Step 4. Configure product stock export
An employee must be assigned to the shop with a Shop Owner Admin role to perform actions referred to in this article.
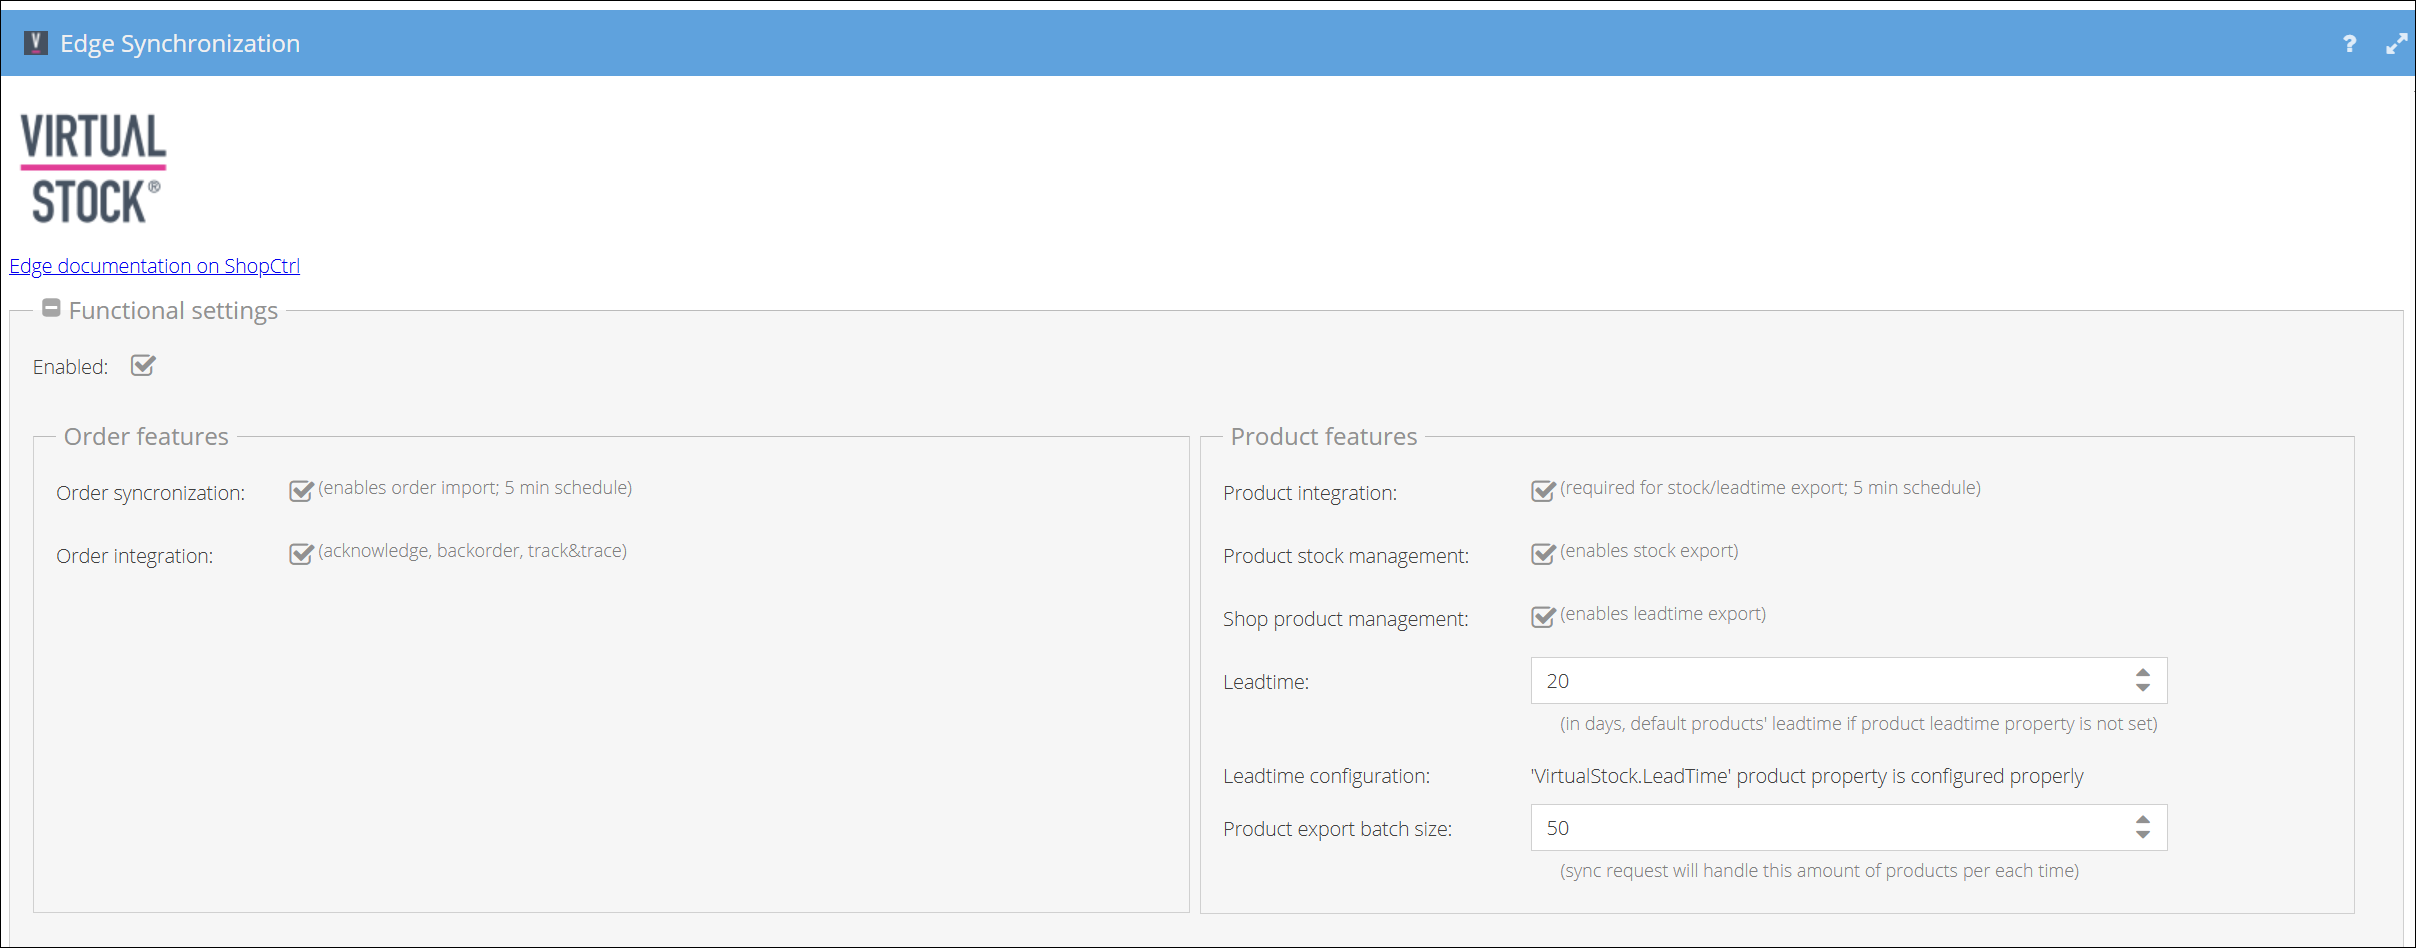
Three checkboxes in Functional Settings > Product features control product export:
- Product integration - the switch for all product export. Nothing below runs without it.
- Product stock management - exports stock levels.
- Shop product management - exports lead times.
Before you start, make sure that:
- The products exist in ShopCtrl, and their offers are published on Virtual Stock.
- Step 2 is complete. The profile sets the supplier SKU field that the mapping is built on - if you change it later, the mapping has to be repeated.
All settings on this page are in Configuration > Shops > your Virtual Stock shop > Edit > Shop Synchronization > Edge Synchronization.
1. Prepare lead times
Virtual Stock needs a lead time for every product.
- Create a product property named
VirtualStock.LeadTime(Number type) and fill in the lead time in days for your products. Learn more about product properties. - In Product features, check that Leadtime configuration confirms the property is found.
- Set Leadtime - the fallback value in days for products without their own lead time.
- Leave Product export batch size at 50 unless you have a reason to change it.
- Click Save or Save and Close.
2. Map products to offers
ShopCtrl links each product to its Virtual Stock offer by matching:
ShopCtrl Product Code → Virtual Stock Supplier Part Number (SKU)
-
In the Products and Offers pane, click Download offers to fetch the current offers from Virtual Stock.

-
Click Preview to download a file showing what the mapping will do:
Sheet Shows Offers All Virtual Stock offers Errors Critical issues that must be fixed Warnings Issues to review, such as products not found in ShopCtrl Remain Existing mappings that stay as they are Update Existing mappings that will change Create New mappings Delete Mappings that will be removed because the product no longer exists 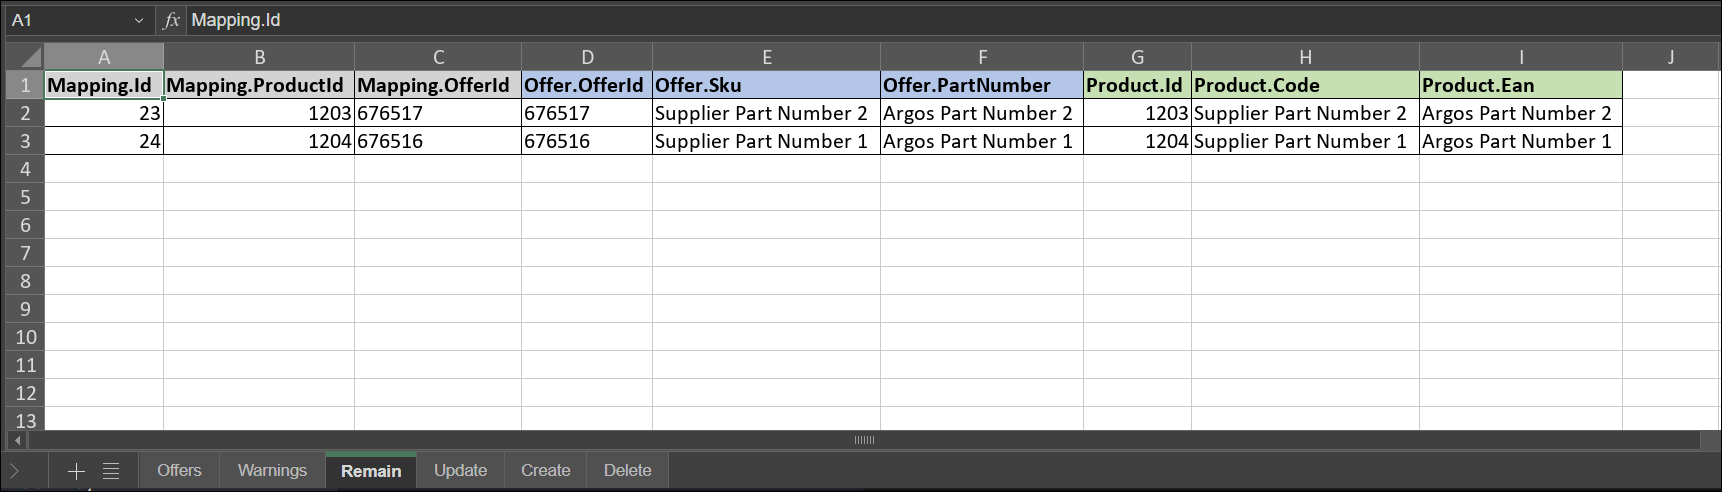
-
Fix any errors, then click Download offers and Preview again until the file is clean.
-
Click Map to create the mappings.
-
Click Save or Save and Close.
3. Turn on product export
Enabled must already be on - it was switched on in Step 3.
- In Product features, tick Product integration, Product stock management and Shop product management.
- Click Save or Save and Close.
From now on, ShopCtrl exports a product's stock whenever it changes.
4. Send the initial stock
Stock is exported when it changes, but right after setup most products have not changed yet. Send the starting stock levels once by hand:
- In the Products and Offers pane, click Mark products for export.
All mapped products are exported. The export can take up to 20 minutes, because products are sent in batches to respect Virtual Stock's rate limits.
Mapped products that are not active are exported with zero stock. If Back-in-stock date on zero stock is on, they also receive a back-in-stock date. Check which mapped products are inactive before you click.
Back-in-stock date for out-of-stock products
Some retailers need a back-in-stock date whenever stock drops to zero, so they can show customers when a product will be available again.
- When it is sent: only when a product's stock is exported as 0, and only if Back-in-stock date on zero stock is on.
- How it is calculated: today plus the product's
VirtualStock.LeadTime. If the product has no lead time, the Leadtime fallback is used instead.
For example, a product with a 10-day lead time that goes out of stock on 1 October gets 11 October. A product with no lead time of its own uses the fallback - by default 5 days, giving 6 October.
The option is in the Retailer product field names section. The Standard profile turns it on and the Special profile leaves it off - see Step 2.
Keep VirtualStock.LeadTime up to date. The back-in-stock date is only as accurate as the lead time behind it.
You've now completed the Virtual Stock (Edge) integration setup. Mapping is not a one-time task - whenever products are added, see Updating product mappings.