eBay
This guide provides step-by-step instructions for integrating your eBay shop with ShopCtrl to enable seamless order synchronization and management.
Configuring eBay Integration with ShopCtrl. Prerequisites.
- Register with eBay: Join the eBay Developers Program. Note: Processing time may vary for eBay registrations.
- Create an eBay Shop in ShopCtrl: Set up your eBay shop before proceeding.
Step 1: Prepare for Integration - Obtain eBay API Keys.
To receive Production API keys, you must complete eBay's account deletion/closure notification process. This ensures GDPR compliance when ShopCtrl processes customer data from eBay.
Please check eBay Policy Notice for more information.
Configure Account Deletion Notifications.
In ShopCtrl:
- Log in to your ShopCtrl account as a user with the Shop Owner Admin role.
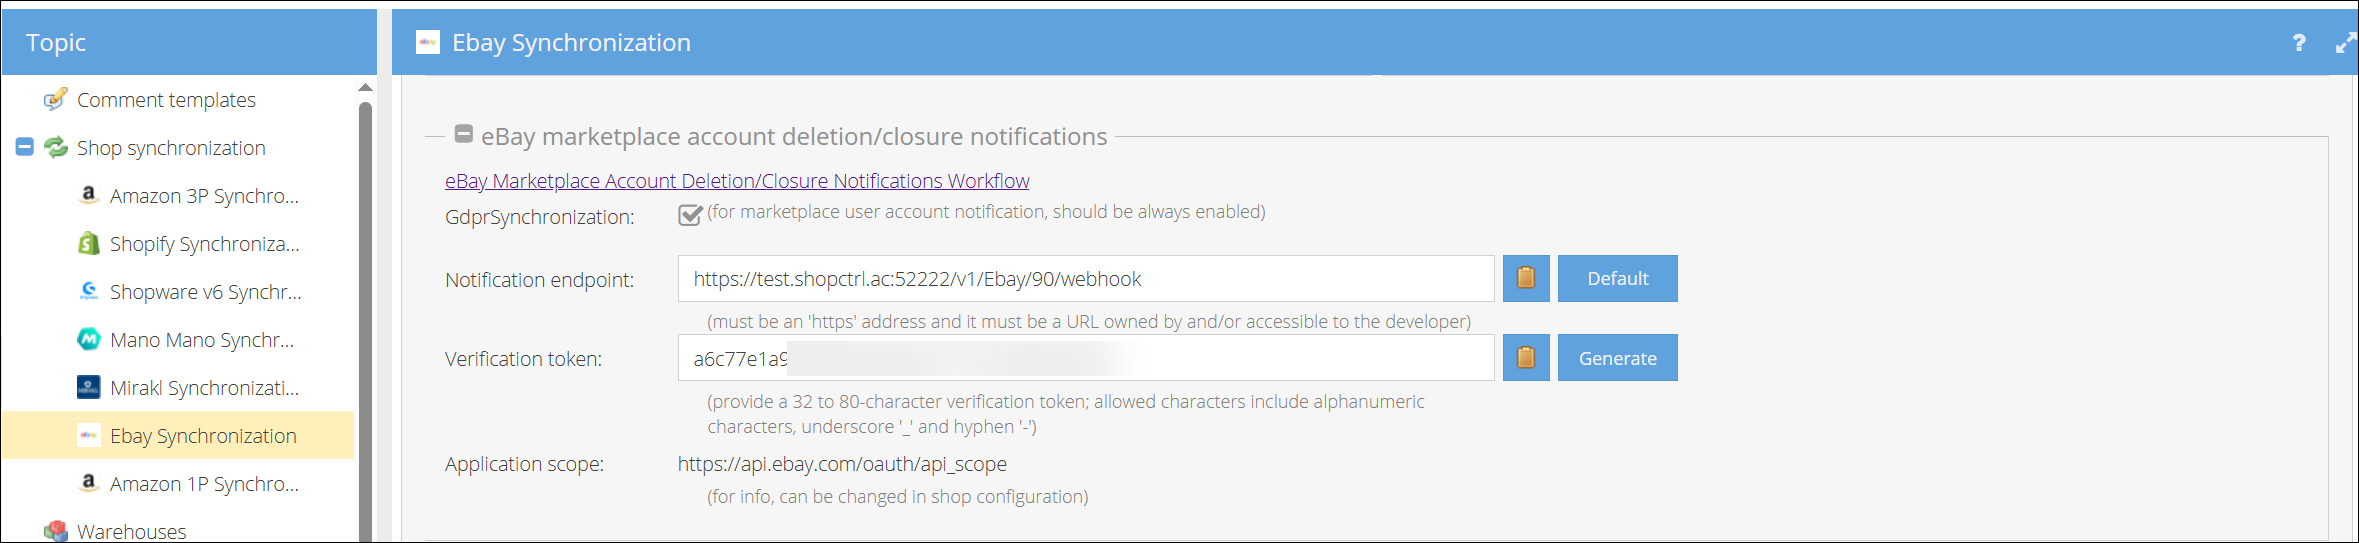
- Go to eBay shop settings > Shop synchronization >eBay Synchronization.
- Navigate to eBay Marketplace Account Deletion/Closure Notifications.
- For Notification Endpoint:
- Click Default to generate your unique URL.
- For Verification Token:
- Click Generate to create your token.
- Click Save.
In eBay Developer Portal:
- Log in to your eBay Developer Account.
- From the top-right menu, select Alerts & Notifications.
- Set environment to Production.
- Go to Alerts & Notifications tab.
- Select Marketplace Account Deletion.
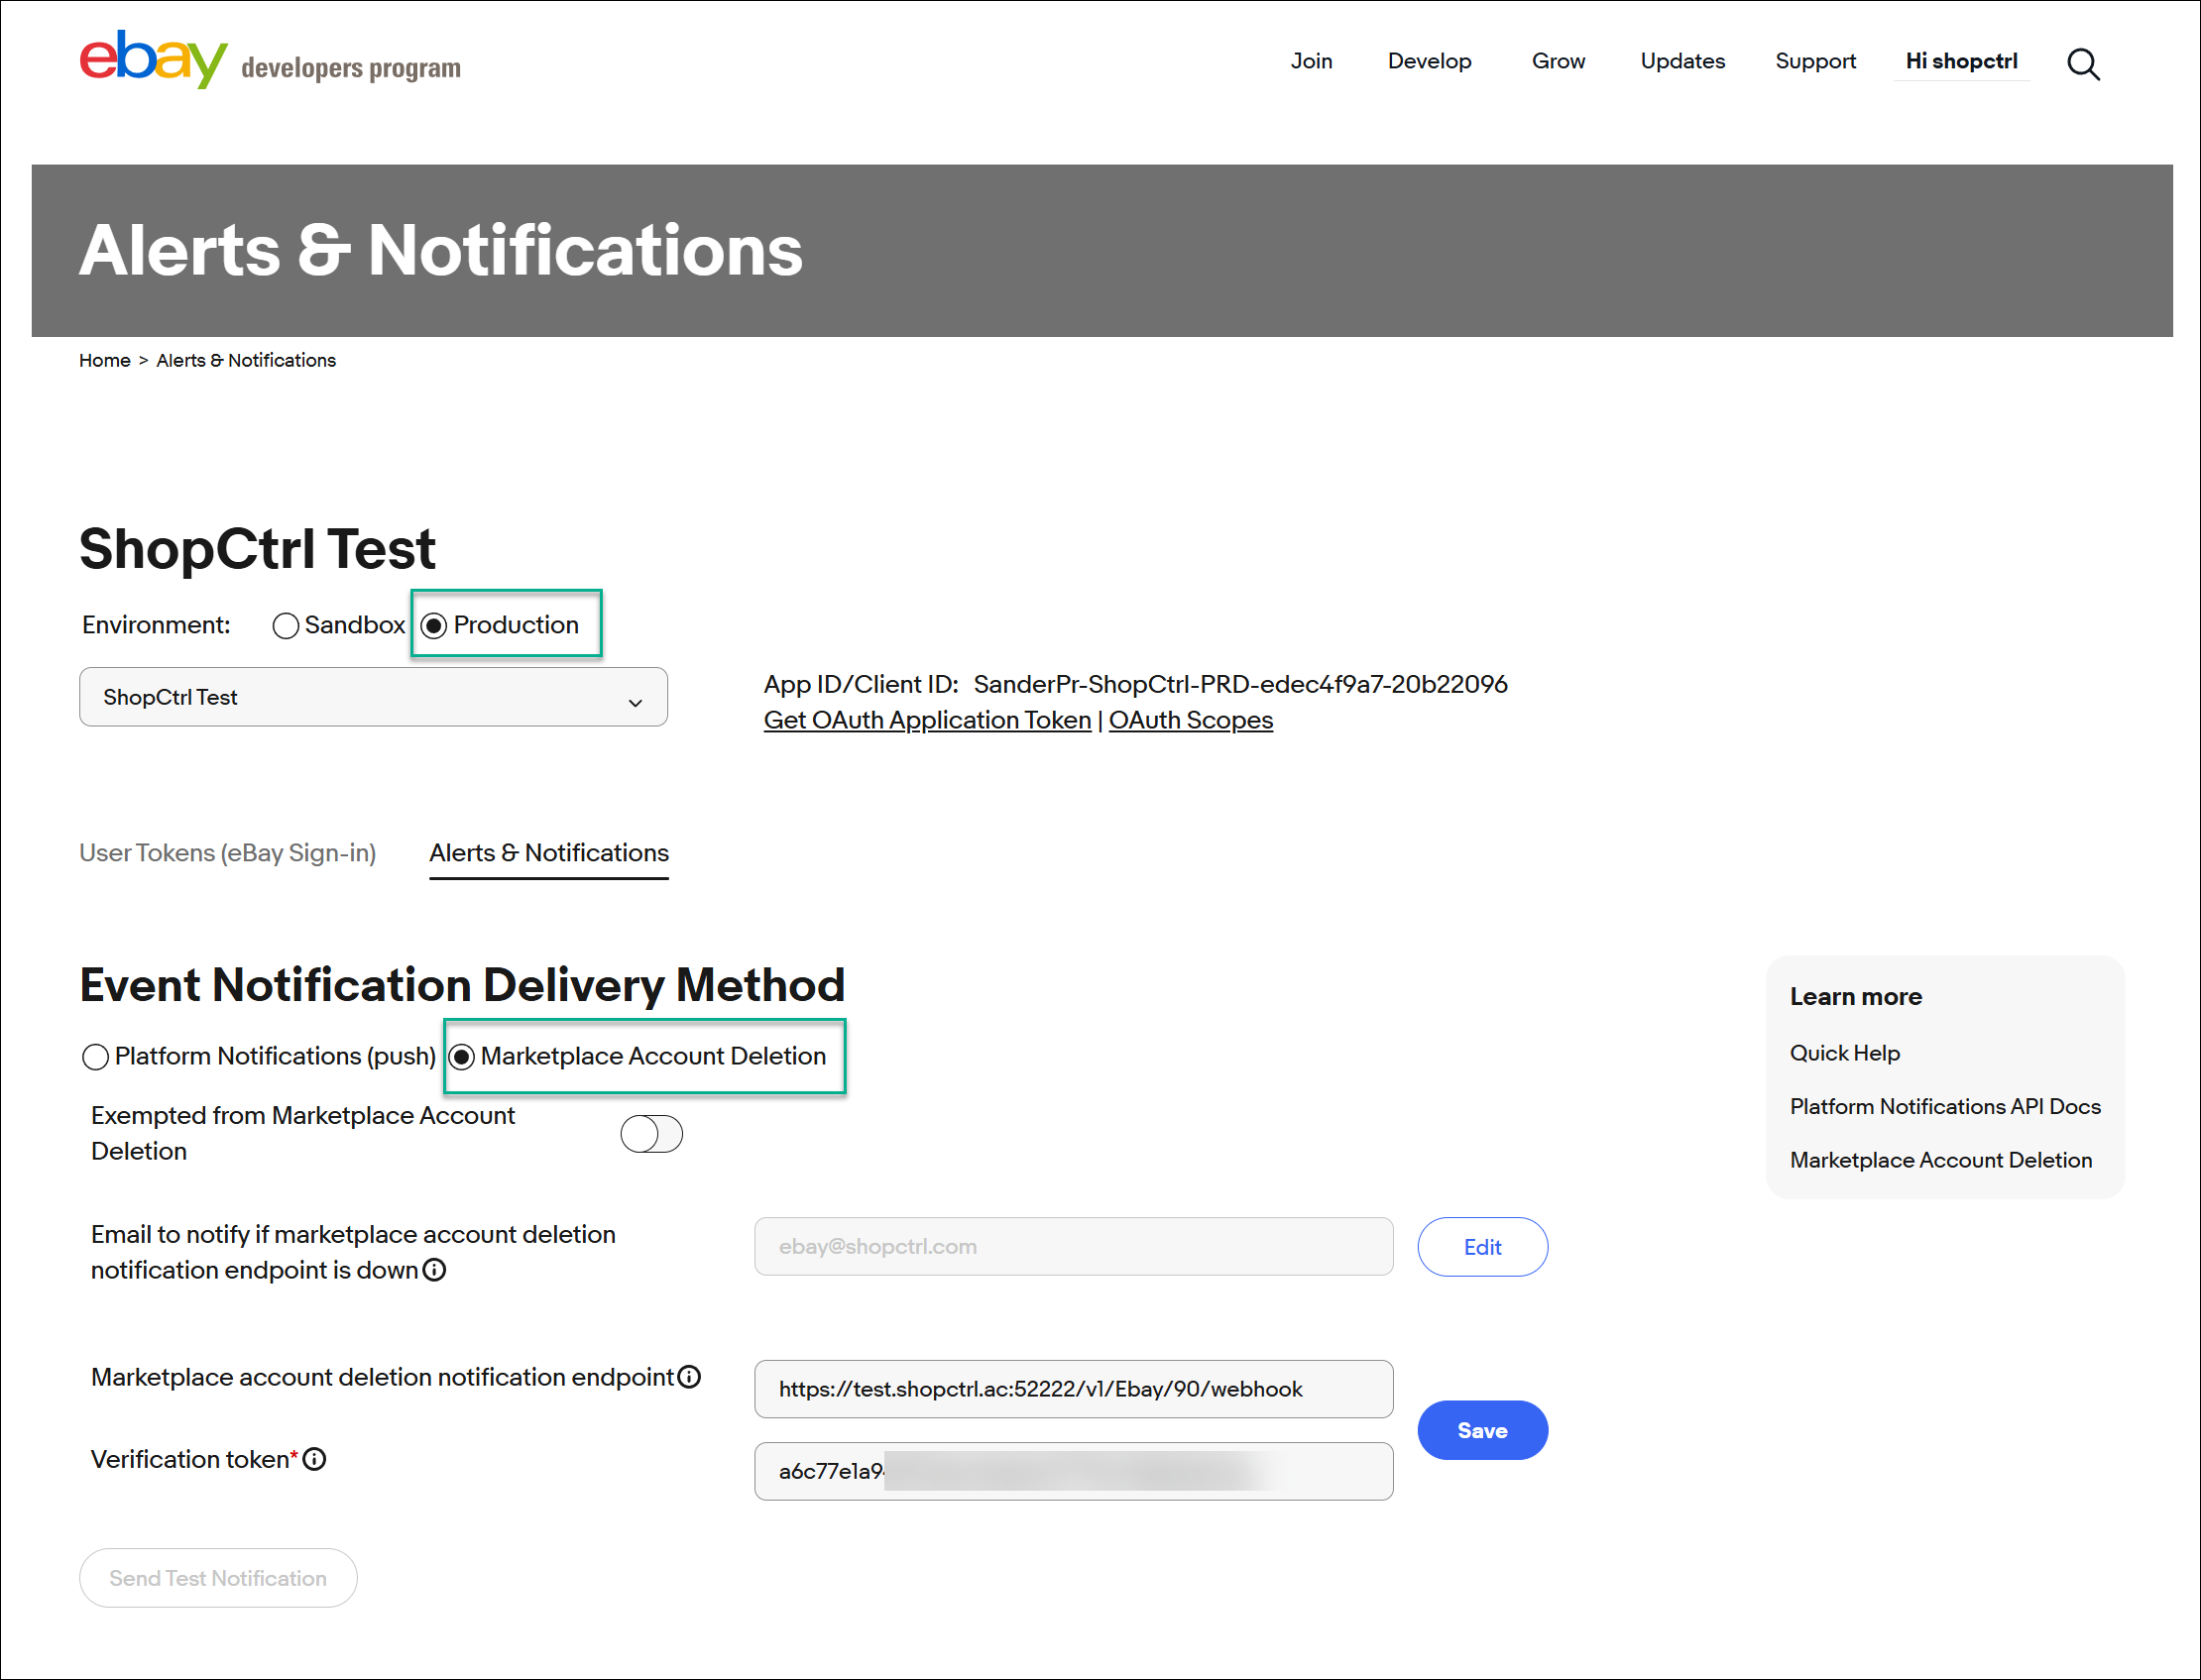
- Configure:
- Notification email (for outage alerts).
- Your ShopCtrl Notification Endpoint URL.
- Your ShopCtrl Verification Token.
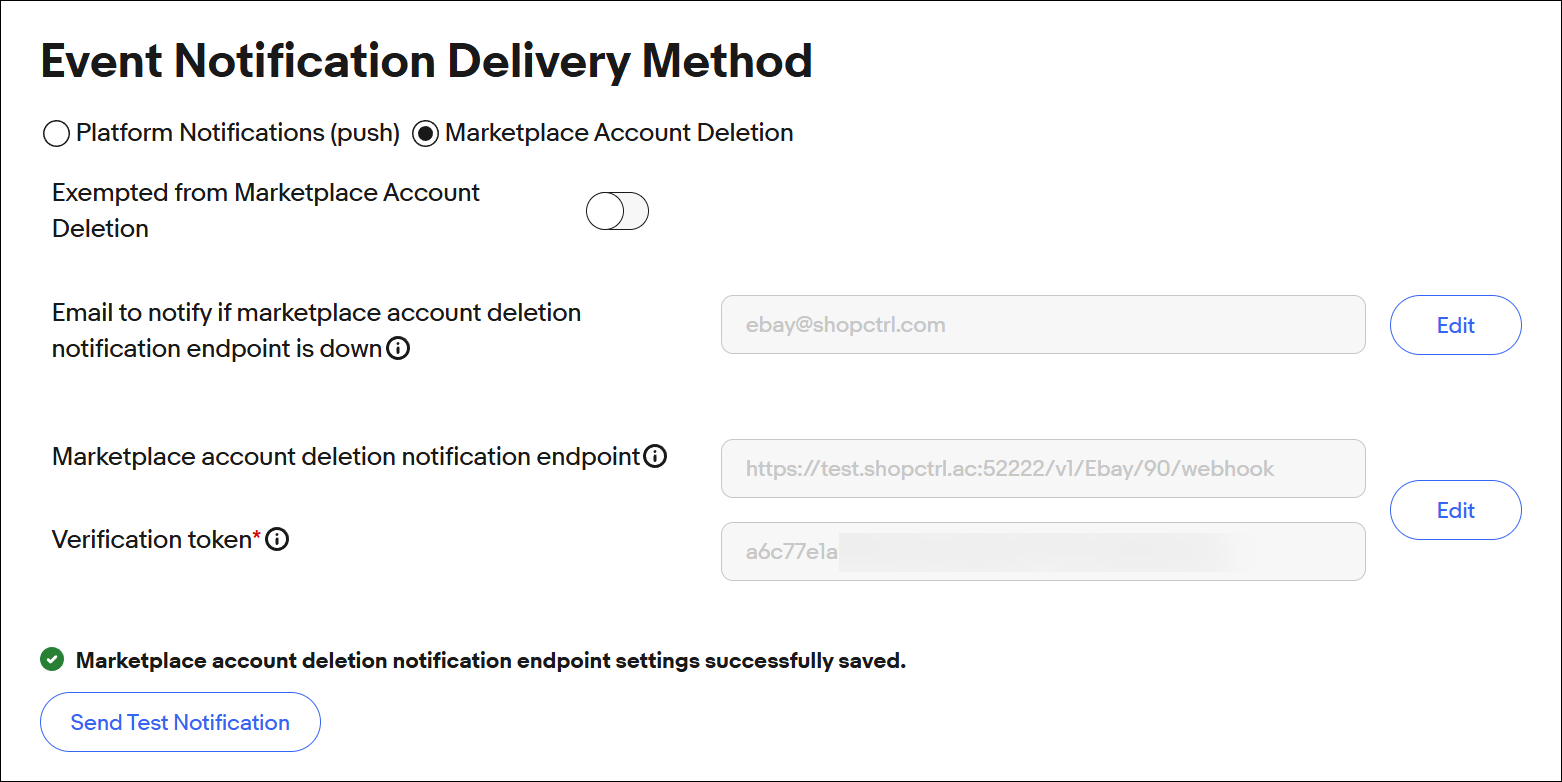
- Click Save. Upon save you will be informed whether the test notification went well.
Request Production API Keys.
After completing the notification setup, request your Production API keys:
- Follow eBay's guide:
Create eBay API Keysets. - Save these keys - you'll need them to connect ShopCtrl to your eBay orders.
Step 2: Configure OAuth Redirect URL on eBay.
The eBay Redirect URL is required for OAuth authentication. Follow these steps to set it up.
In eBay Developer Portal:
- Log in to your eBay Developer Account.
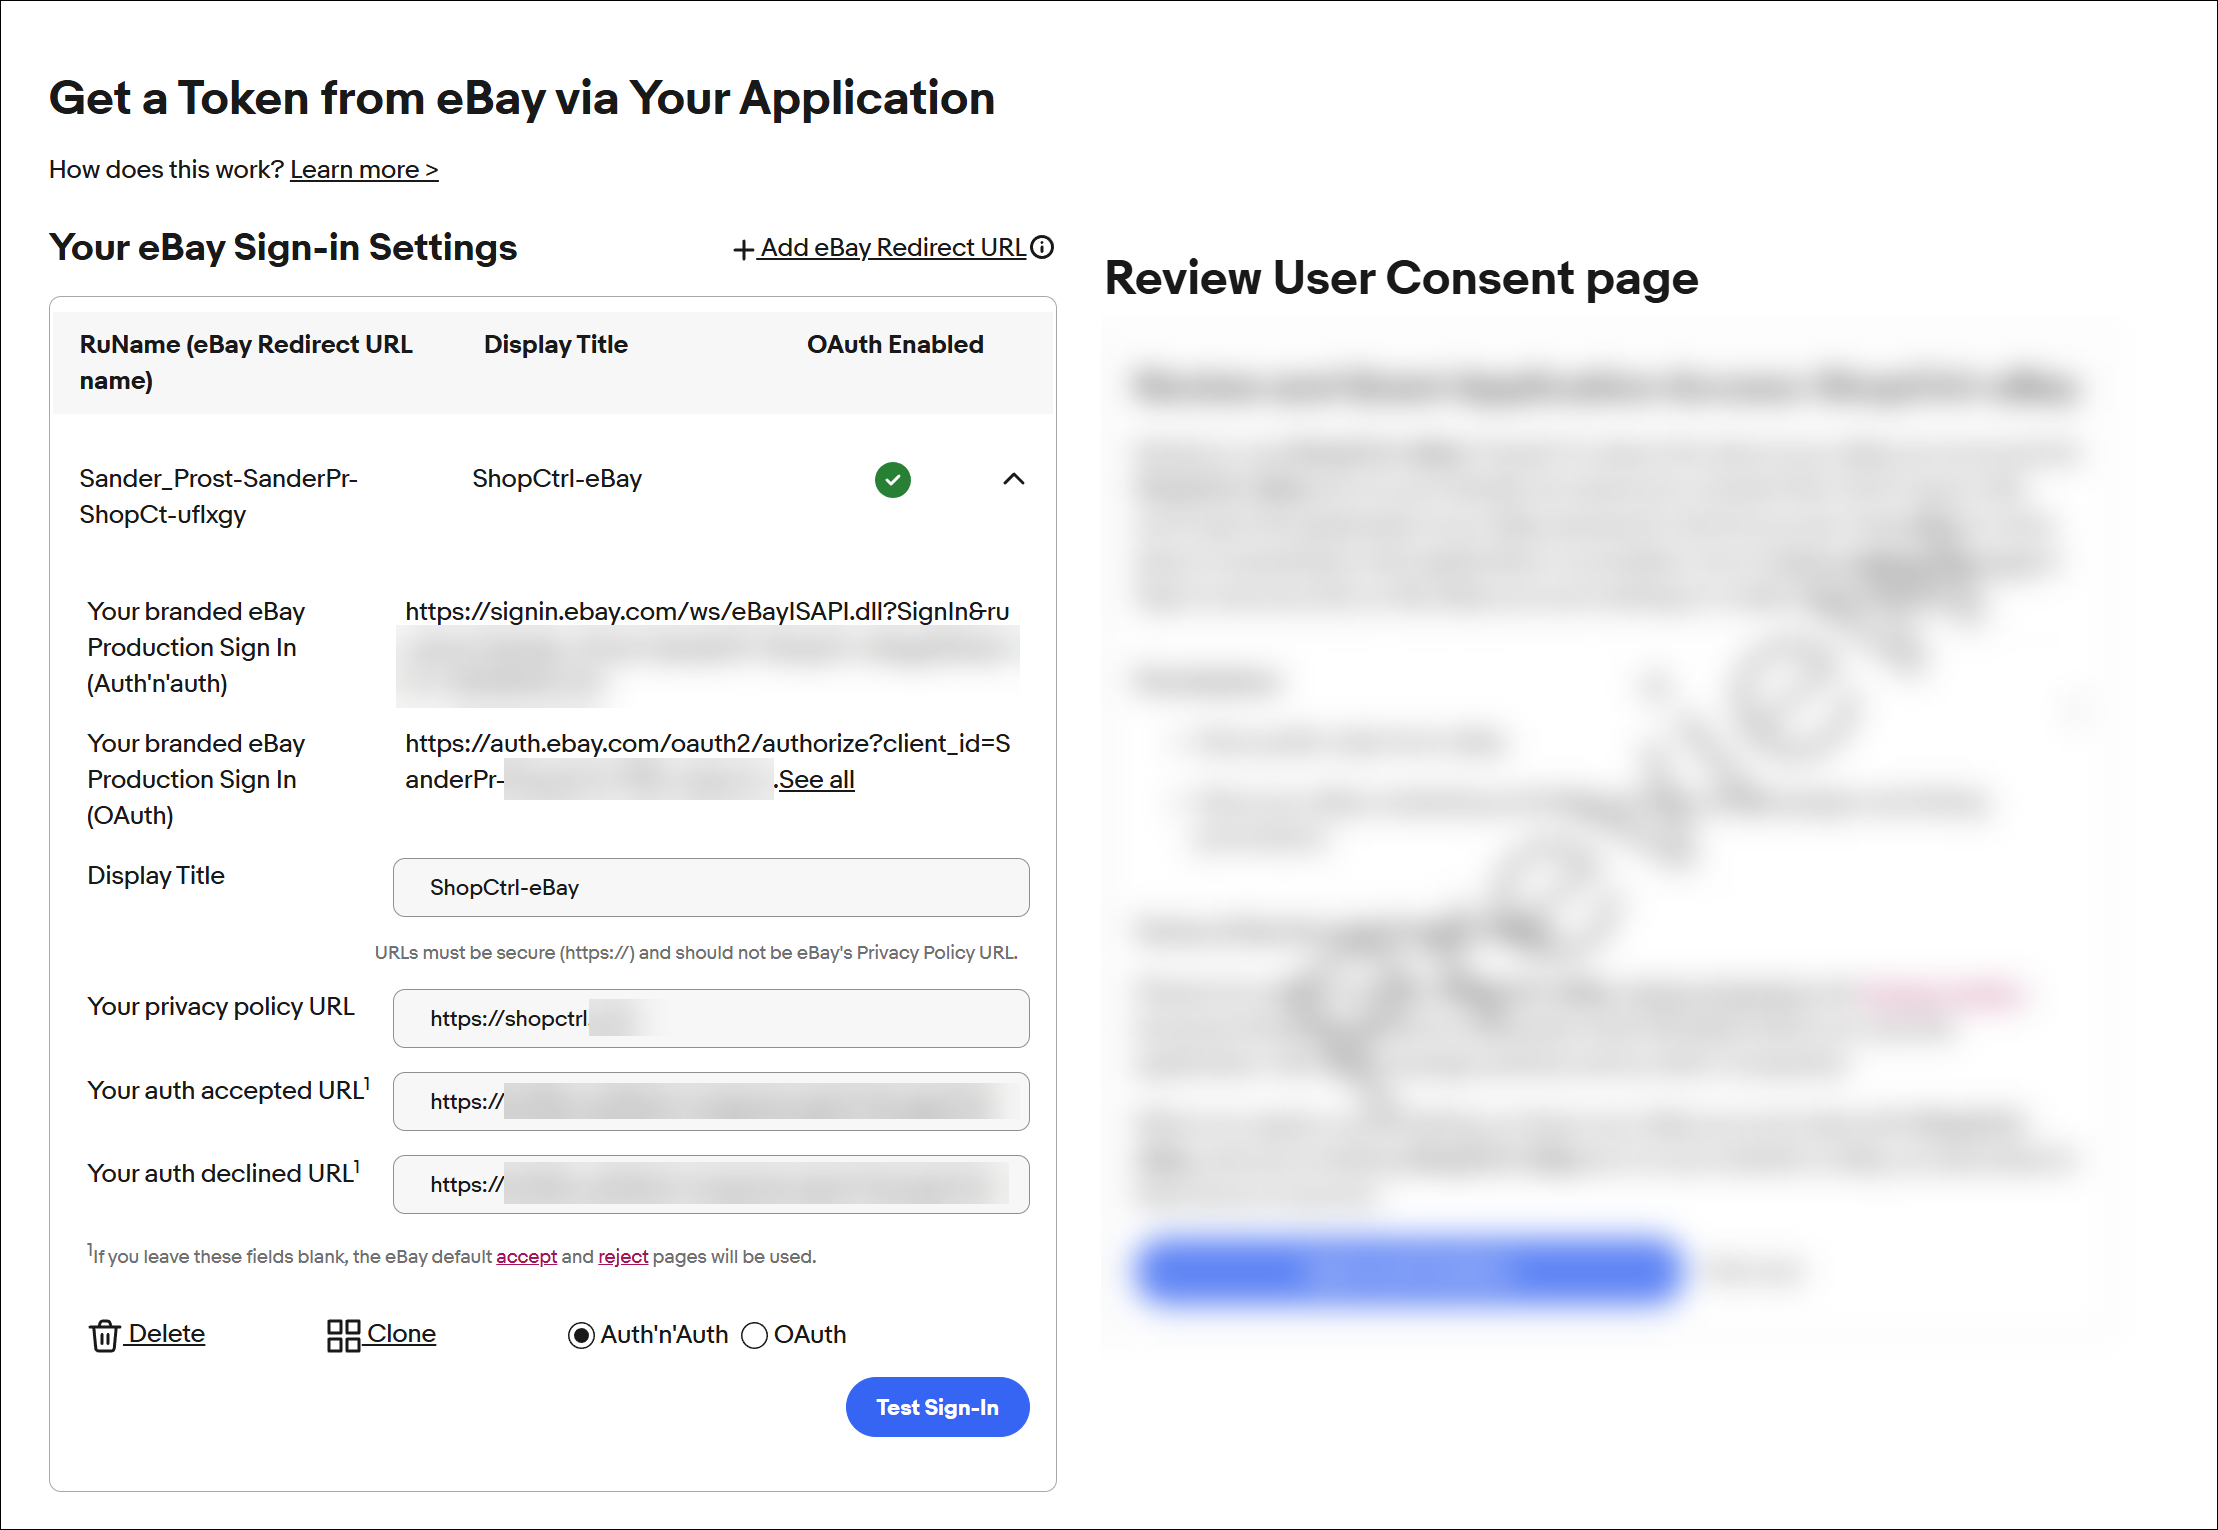
- From the top-right menu, select User Access Tokens.
- Review eBay's Redirect URI documentation.
- Create a new Redirect URL configuration in Production environment.
- Provide your eBay shop's Privacy Policy URL.
In ShopCtrl:
- Log in to your ShopCtrl account.
- Go to eBay shop settings > eBay Synchronization > eBay User Consent OAuth Settings.
- Locate your:
- Auth Accepted URL.
- Auth Declined URL.
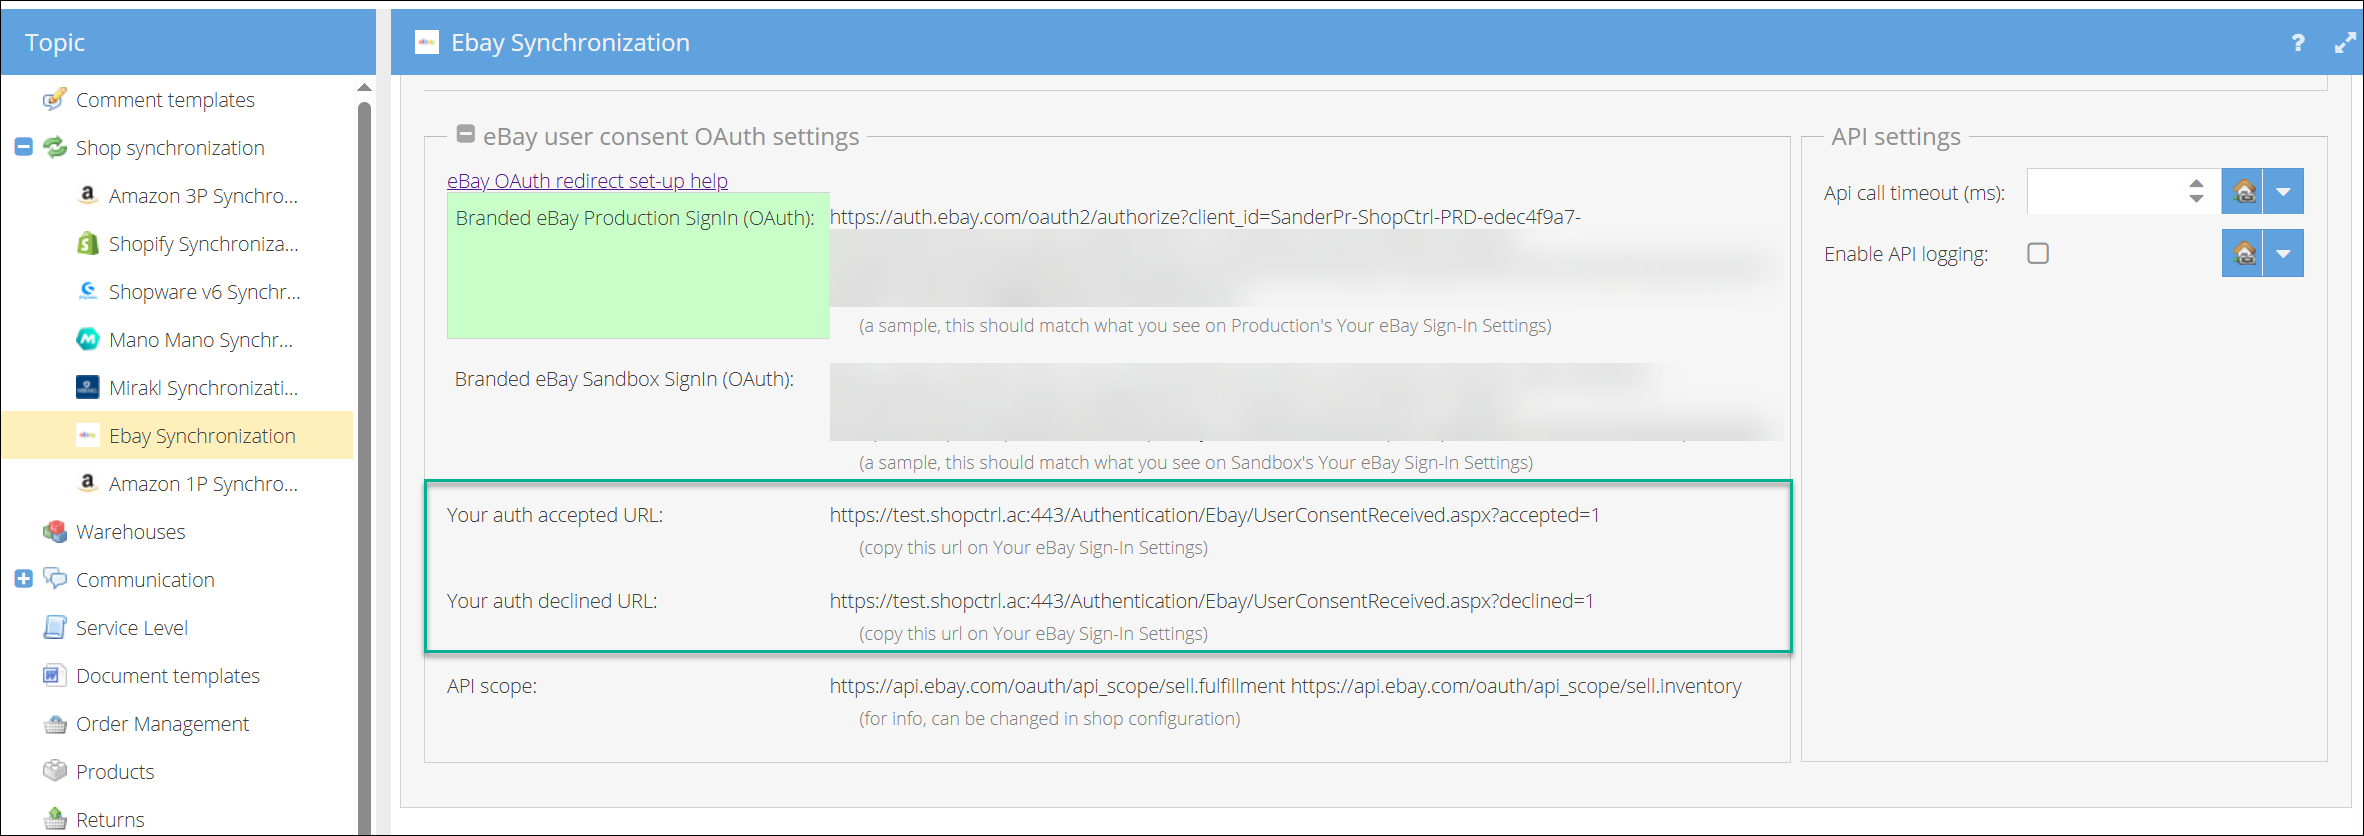
Final Configuration in eBay:
- Return to your eBay Developer Account.
- Enter the Auth Accepted URL from ShopCtrl.
- Enter the Auth Declined URL from ShopCtrl.
- Save your Redirect URL configuration.
Step 3: Complete Authorization Process in ShopCtrl
Follow this sequence to establish the connection between ShopCtrl and your eBay store:
Configuration in ShopCtrl:
- Access Settings:
- Log in to your ShopCtrl account.
- Navigate to eBay Shop Settings → Shop synchronization → eBay Synchronization → Connection Settings.
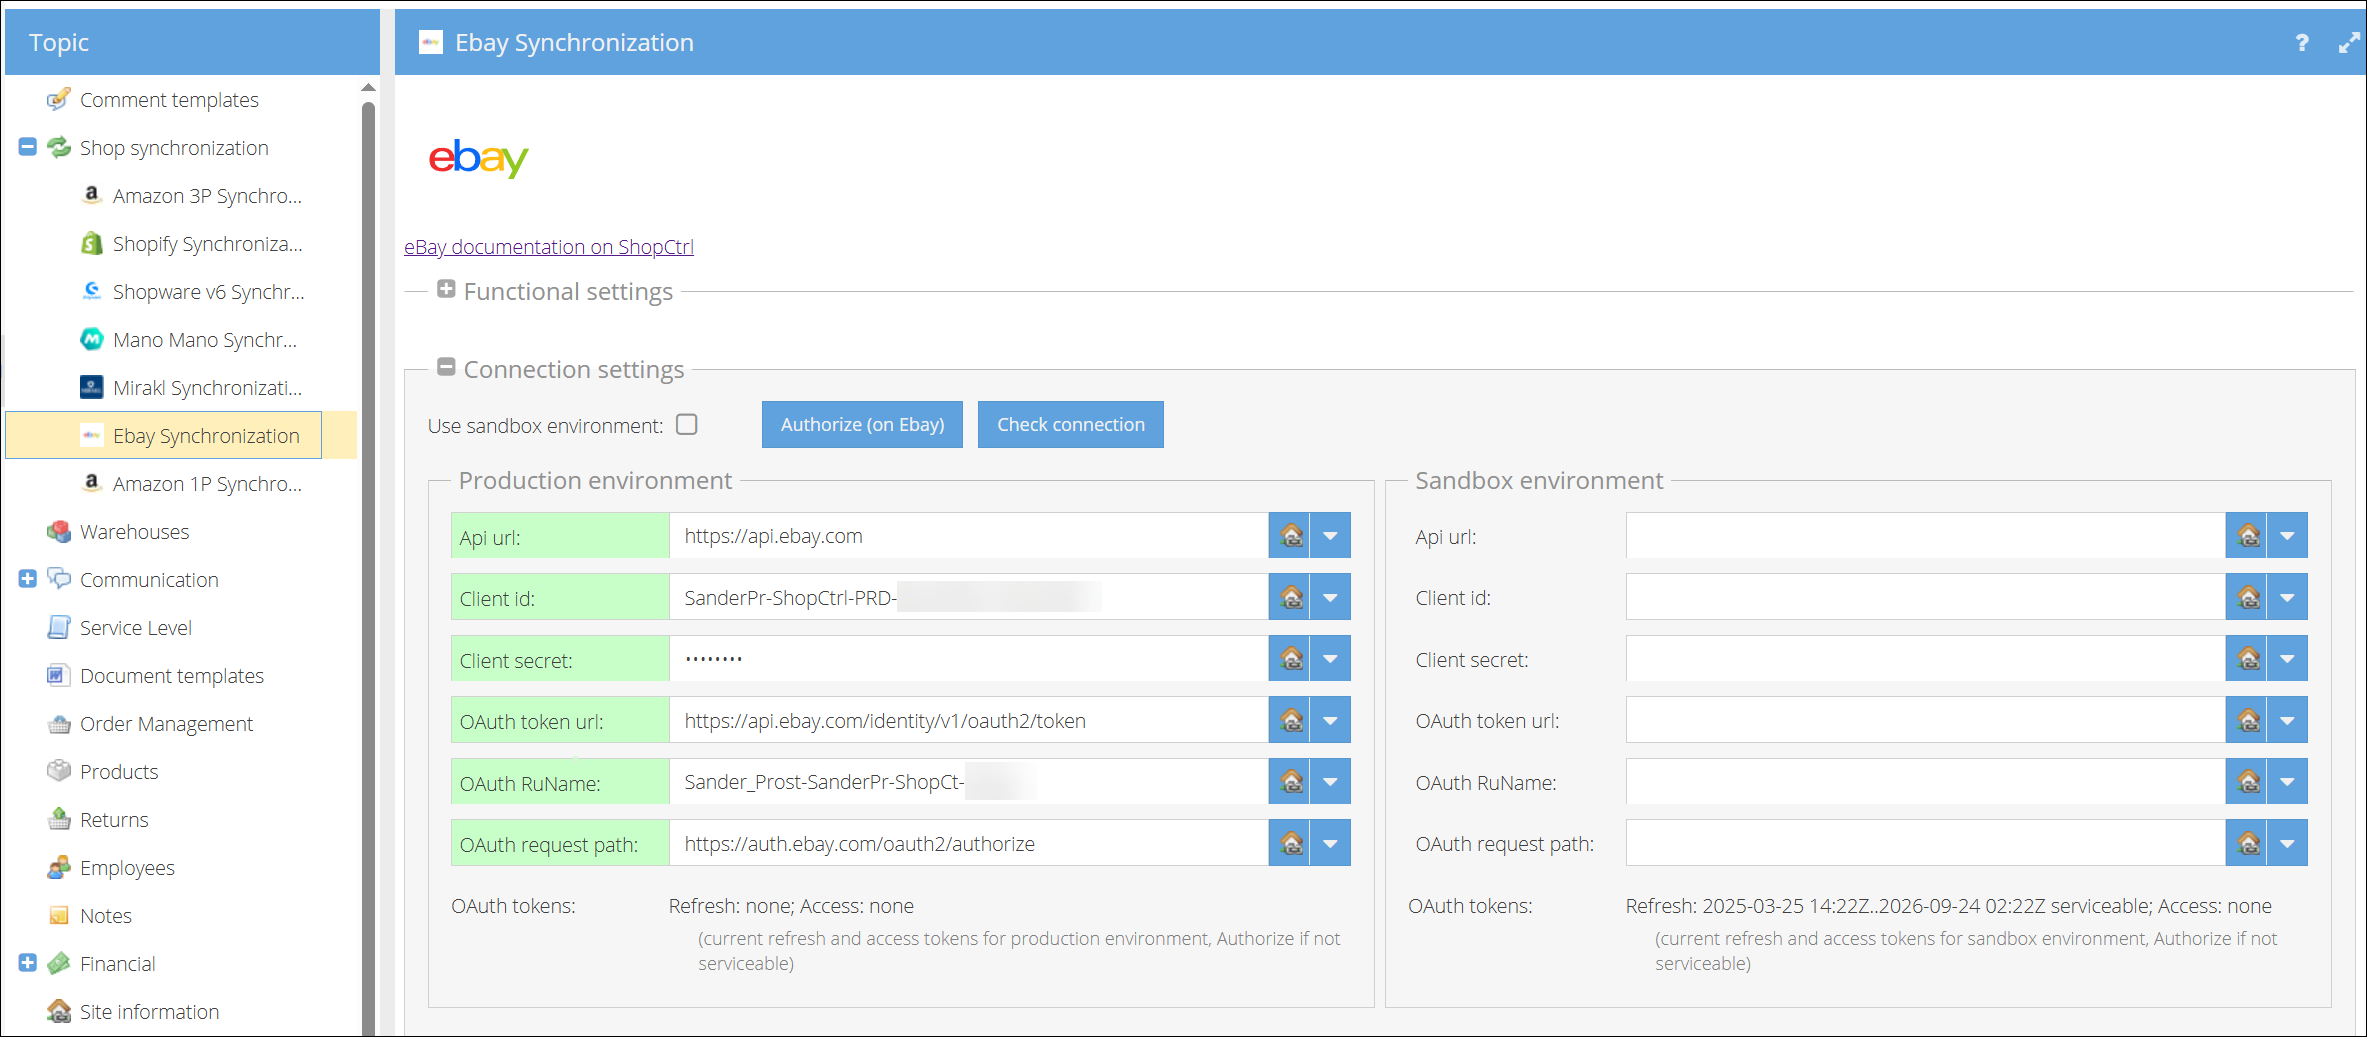
- Environment Settings:
- Ensure Use Sandbox Environment is disabled (unchecked).
- Confirm production fields are active (green).
- Enter API Credentials:
- Input your Client ID from eBay production keys.
- Enter your Client Secret from the same key set.
- Source: eBay API Keys Dashboard.
- Configure OAuth:
- Add your RuName (from eBay Redirect URL setup) in the OAuth RuName field.
- Verify: eBay Redirect URL Settings.
- Click Save to store your credentials
Authorization Workflow:
- Initiate Authorization:
- within ShopCtrl shop Connection settings click Authorize (on eBay) button.
- You'll be redirected to eBay's secure login page.
- eBay Authentication:
- Enter your eBay seller account credentials.
- Carefully review the permission request screen.
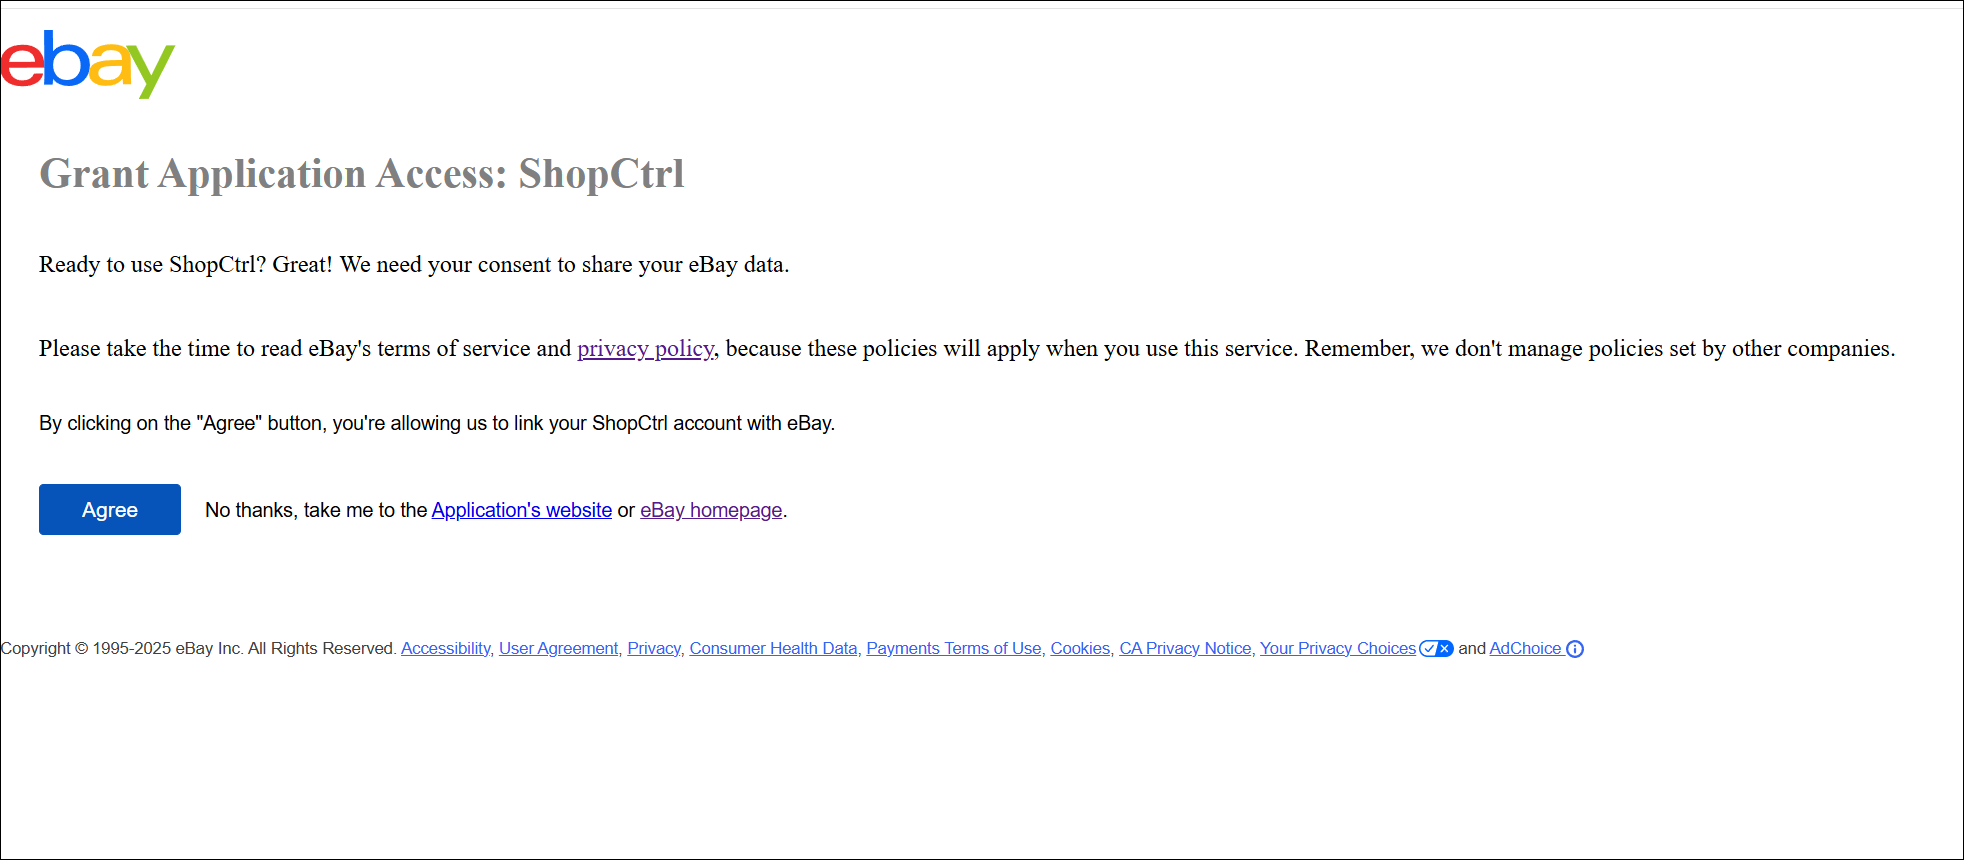
- Grant Permissions by clicking Agree and Continue:
- Click Back to shop settings to go back to ShopCtrl eBay shop settings.
Post-Authorization Steps:
-
Verify Connection:
- Observe the OAuth Tokens section updates:
- Current timestamp
- Status: Serviceable
- Observe the OAuth Tokens section updates:
-
Test Integration:
- Click Check Connection to validate the setup.
- Successful test shows "Connected successfully" message.