Bol.com
An employee must be assigned to the shop with a Shop Owner Admin role to perform actions referred to in this article.
Bol.com integration provides the following functionalities:
- Importing new orders
- Updating tracking numbers for shipped orders
- Updating Bol.com inventory
Setting up integration with Bol.com
To configure the integration, ShopCtrl requires credentials for the Retailer API at Bol.com.
- Obtain the Client ID and Client Secret by following the Step 1: Acquiring API credentials process.
- Refer to Creating API credentials for the Retailer API for detailed instructions.
Setting up shop synchronization in ShopCtrl

Connecting to Bol.com:
- Log in to your ShopCtrl account as a user with the Shop Owner Admin role.
- In the navigation menu, select Configuration > Shops to open the list of shops created.
- Select the desired shop and click Edit to open the shop settings.
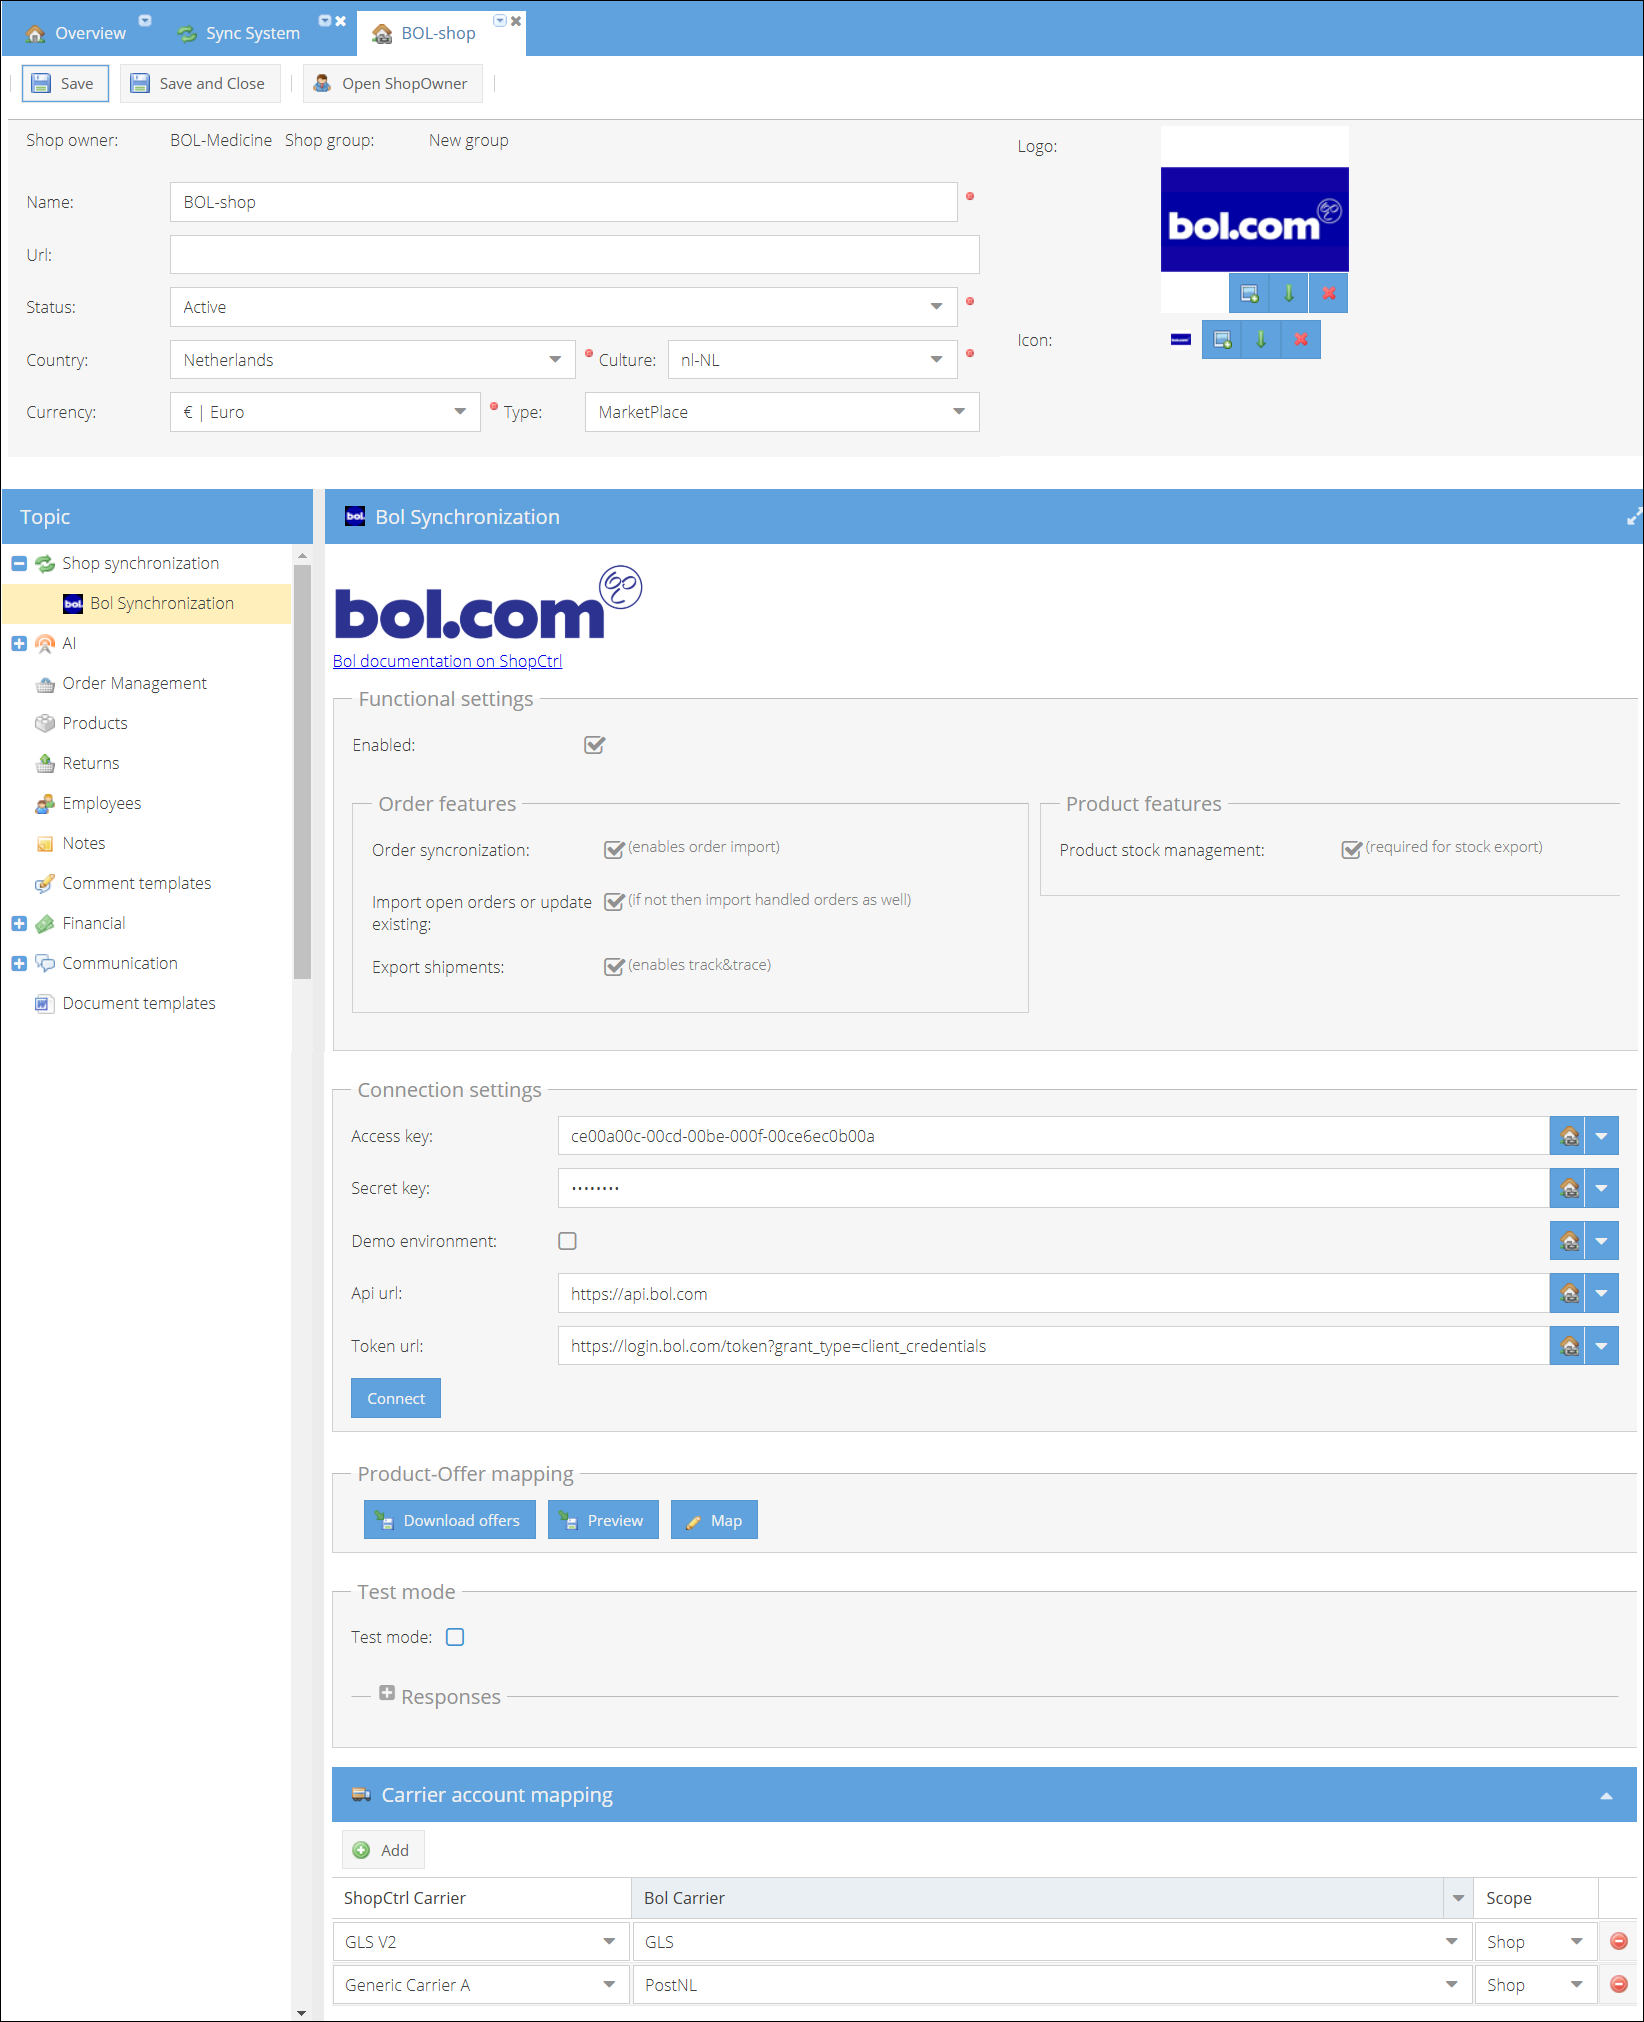
- From the topic menu, go to Shop Synchronization > Bol Synchronization.
- In the Connection Settings pane:

- Enter your Bol.com Client ID in the Access Key field.
- Enter your Bol.com Client Secret in the Secret Key field.
- Verify the default values in the API URL (
https://api.bol.com) and Token URL (https://login.bol.com/token?grant_type=client_credentials) fields. - Click the Connect button to verify the credentials and establish a connection with Bol.com.
- Click Save or Save and Close to apply changes to the shop.
Configuring order import:
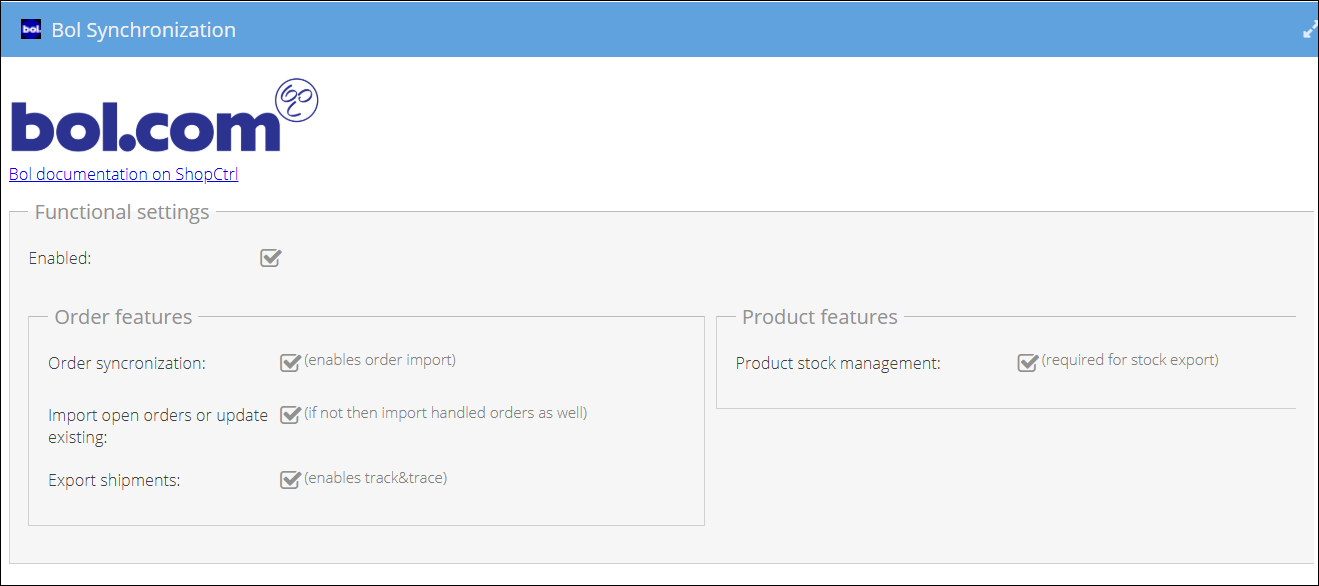
- In the Functional settings pane, enable the desired features:
- Orders synchronization: Enables order import.
- Import open orders or update existing: Excludes handled orders from the import (enabled by default). Only new orders and cancellation requests to the existing orders will be imported.
- Export shipments: Exports tracking codes and carrier info to Bol.com.

- To export order shipping information to Bol.com, configure carrier account mapping in the relevant pane at the bottom of the Bol.com configuration page:
- Click Add and select carrier account available for this shop.
- From the dropdown list select corresponding Bol.com Carrier code.

- Enable the Bol.com integration at the top of the Functional settings pane
- Click Save or Save and Close to apply changes to the shop.
Configuring product stock export
Before starting synchronization, ensure the following:
- Products exist in ShopCtrl.
- Corresponding offers are published on Bol.com.
Linking Products and Offers
ShopCtrl requires a link between ShopCtrl products and Bol.com offers by matching the ShopCtrl Product Code with the Bol.com Offer Reference Code.
Follow these steps for product mapping:
- Log in to your ShopCtrl account as a user with the Shop Owner Admin role.
- In the sales channels pane on the right, select the shop for which the Bol.com synchronization has been configured and click Settings.
- Within the topic menu, select Shop synchronization > Bol Synchronization.

- Preview Possible Mapping:
- In the Product-Offer Mapping pane, click Preview to download an Excel file containing details of the mapping process.
- Review and Correct Errors:
- Open the downloaded file and address any discrepancies. The file includes the following sheets:
- Offers: Lists all Bol.com offers.
- Errors (if any): Identifies critical issues, such as missing reference codes in Bol.com offers that prevent mapping.
- Warnings (if any): Highlights issues, such as products not found in ShopCtrl, which may require attention.
- Remain: Displays existing product-offer mappings.
- Update: Shows updates to be applied to current mappings.
- Create: Lists new mappings to be created.
- Delete: Indicates mappings to be removed because the corresponding product no longer exists.
- Open the downloaded file and address any discrepancies. The file includes the following sheets:

- Create Mappings:
- Once errors are resolved, click the Map button to confirm the matches and generate the mappings.
Enabling Product Stock Export
After completing the mapping process, enable product stock export from ShopCtrl: On the Bol Synchronization tab > Functional settings > Product features pane enable Product stock management feature.

Note:
- ShopCtrl only sends stock updates to Bol.com when product stock changes occur in the ShopCtrl warehouse linked to the Bol.com shop.
- If stock levels differ between ShopCtrl and Bol.com, the discrepancy will be resolved only after the stock is updated in ShopCtrl.
- Use the files downloaded on previous steps to ensure ShopCtrl product stock aligns with the Bol.com stock levels.
Integrating your ShopCtrl account with Bol.com streamlines the management of orders, inventory, and product synchronization, allowing you to maintain accurate stock levels and efficient order processing.