Shopware v6
An employee must be assigned to the shop with a Shop Owner Admin role to perform actions referred to in this article.
Shopware integration connector allows you to import orders and products from your Shopware sales channels using API integration directly to ShopCtrl.
Setting up Shopware 6 Integration
To set up an integration with Shopware, you first need to create a user role and then configure the integration.
Create role
To create an API User Role in Shopware 6
- Login your Shopware account as user with admin rights.
- Open Settings > System > Users & permissions.
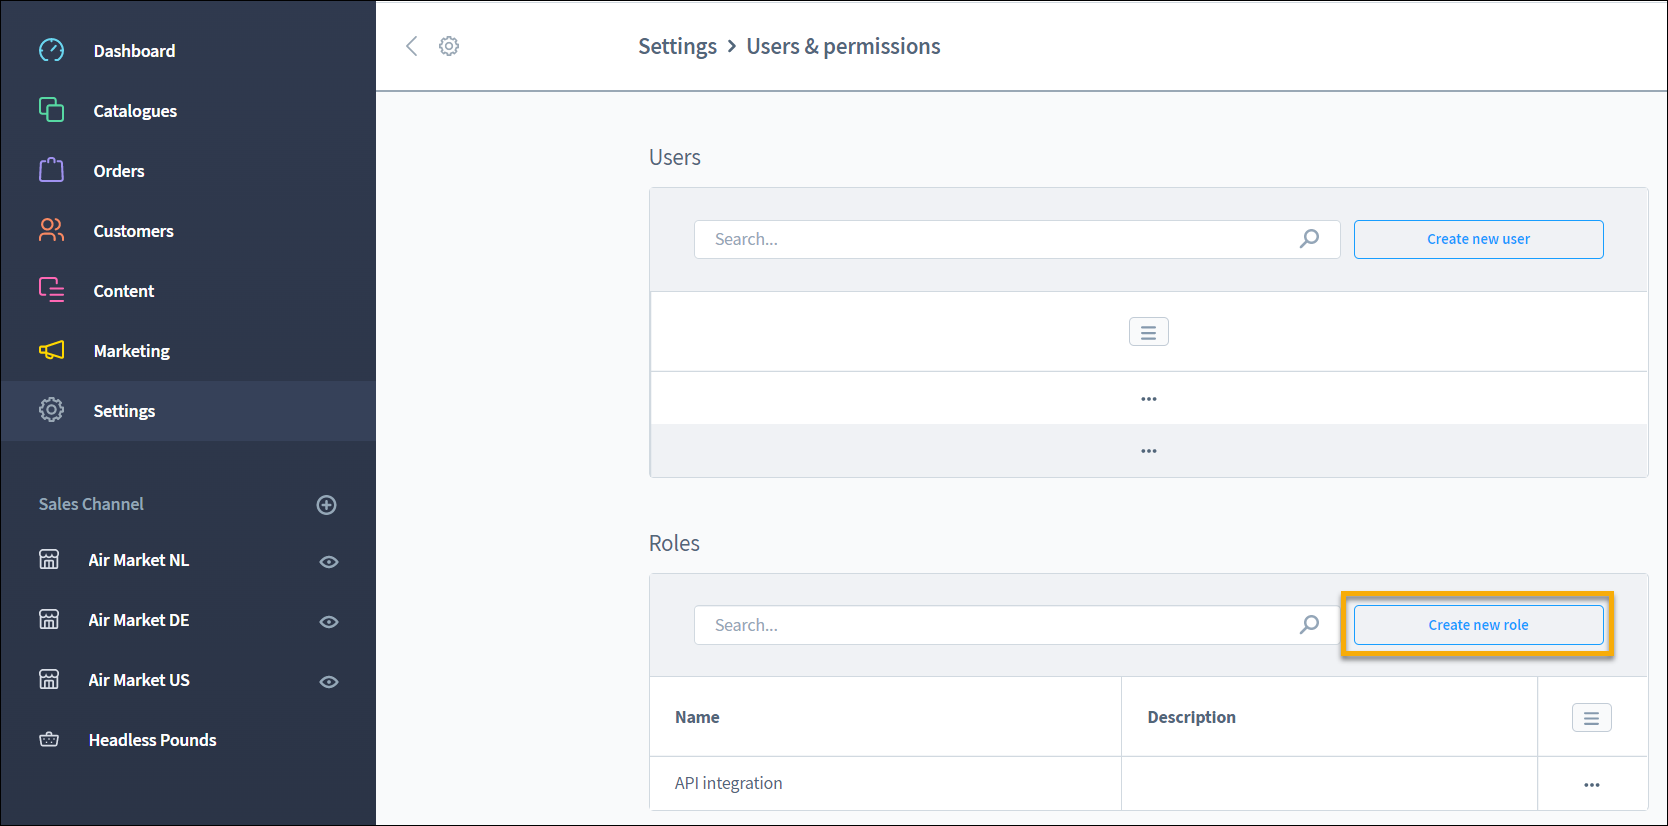
- Enter a Name.
- Select the permissions required for ShopCtrl integration:
| Area of Shopware (including the sub-areas) | View | Edit | Create | Delete | All |
|---|---|---|---|---|---|
| Catalogues | ☑ | ☑ | ☑ | ☑ | ☑ |
| Orders | ☑ | ☑ | ☑ | ☑ | ☑ |
| Other - Sales Channels | ☑ | ||||
| Settings | ☑ | ☑ | ☑ | ☑ | ☑ |
- Click Save to create new role.
For more information visit Shopware 6 Users & Permissions documentation.
Create integration
To create a new integration in Shopware 6:
- Log in to your Shopware account as a user with admin rights.
- Open Settings > System > Integrations.
- Click Add integration.
- Enter the Name.
- Select the Role created for ShopCtrl API integration at previous steps.
- Copy and note down the Access key ID and Secret access key. These keys will be used later for the ShopCtrl synchronization module.

- Click Save Integration.
Please write down the Secret access key and keep it in a secure place. The secret access key will no longer be visible after saving integration.
For more information visit Shopware 6 Integrations documentation.
Setting up Shopware v6 synchronization in ShopCtrl
Before enabling synchronization with Shopware, please set up the corresponding shop currency, VAT tariffs, and payment types for your ShopCtrl shop.
Once you have enabled integration in your Shopware account, you can set up synchronization in ShopCtrl.
- Log in to your ShopCtrl account as a user with the Shop Owner Admin role.
- In the navigation menu, select Configuration > Shops to open the list of shops created.
- Select a shop for which you would like to set up Shopware synchronization and click Edit to open shop settings.
- Within topic menu select Shop synchronization > Shopware v6 Synchronization
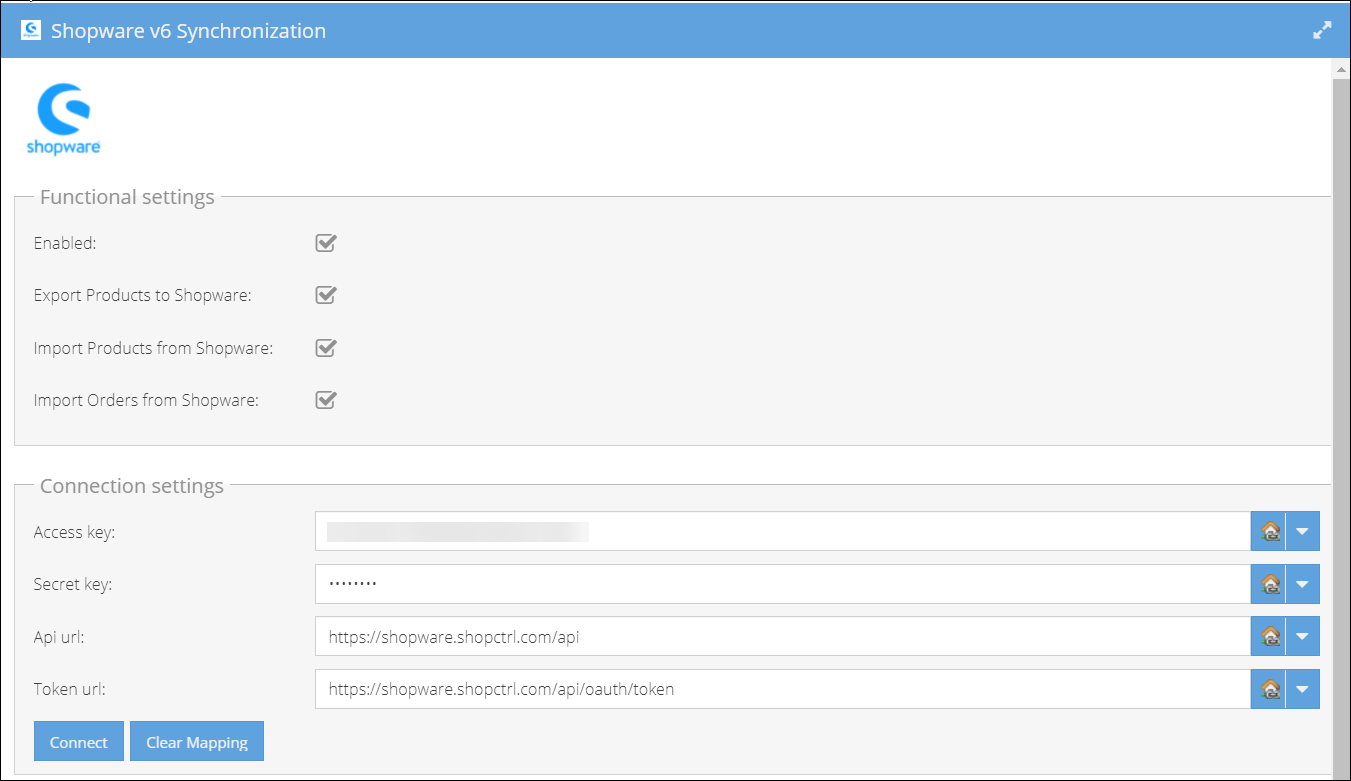
- Provide the Access key and Secret key generated for the ShopCtrl integration in Shopware.
- Provide an Api url, which is
https://{hostname}/api. - Specify the Token url
https://{hostname}/api/oauth/token. - In the Functional settings pane, check the features you would like to use:
- Export Products to Shopware
- Import Products from Shopware
- Import Orders from Shopware
- Enable the synchronization.
- Click Connect to establish the connection. If connection was successful, the Sales Channels and mapping panes will be enabled.
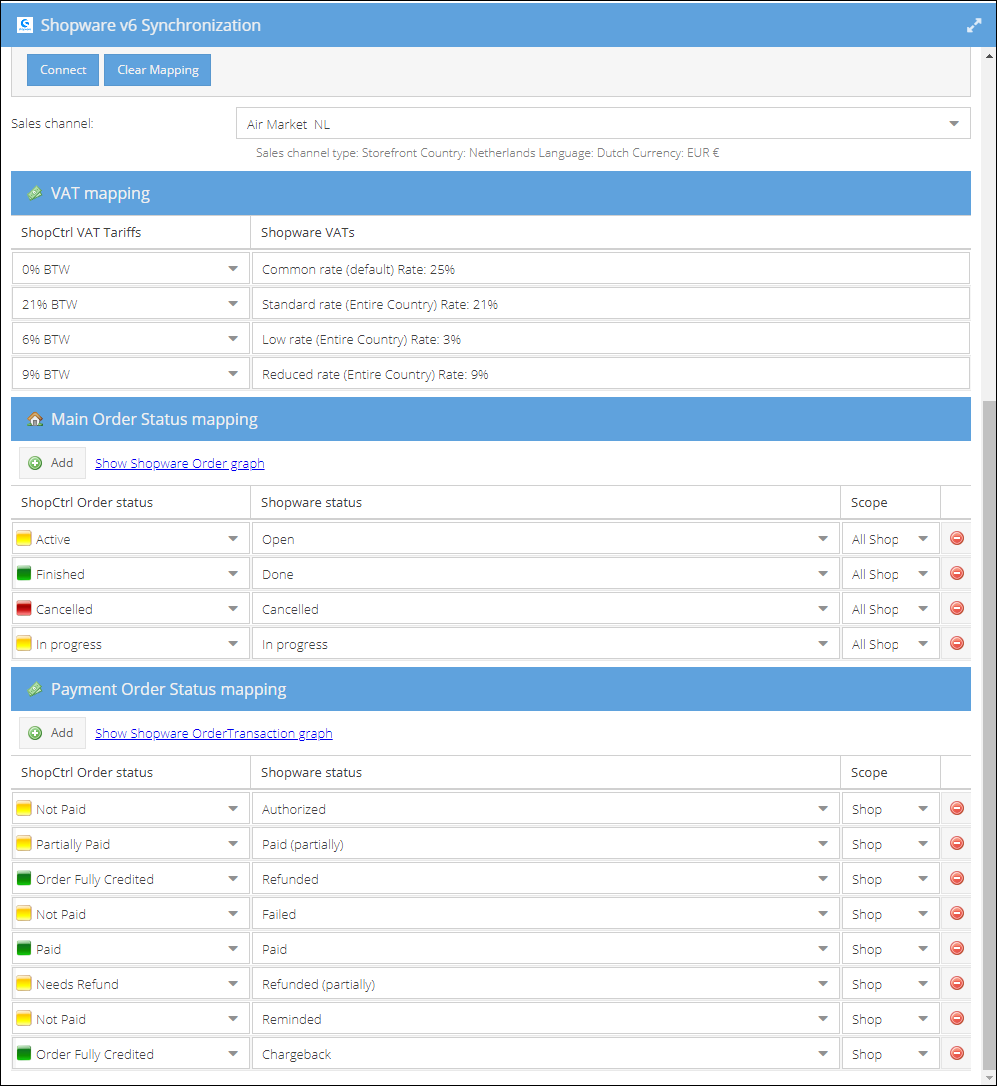
- From the drop-down, select the Sales channel that you would like to synchronize your shop with.
- Map the Shopware taxes to the VATs set at your ShopCtrl shop. Shopware VAT displayed is the one chosen according to the Shopware tax rules for the sales channel country. If no tax rule for the sales channel country is defined, the default one is displayed. Please see more on Shopware taxes.
- Add and map the Main Order Statuses.
- Add and map the Payment Order Statuses.
- Click Save or Save and Close to apply changes to the shop.