Step 3. Configure synchronization settings
An employee must be assigned to the shop with a Shop Owner Admin role to perform actions referred to in this article.
In this step you choose what ShopCtrl synchronizes with Shopify and enable the synchronization. Connect ShopCtrl to Shopify first.
All settings are in the shop settings under Shop synchronization > Shopify Synchronization, in the Functional settings pane. Configure only the features you need:
- Configure order import
- Configure track and trace export
- Configure product stock export
- Enable the synchronization
Configure order import
One Shopify store, several ShopCtrl shops
In Shopify, one store can sell to many countries, each with its own VAT tariffs and currency. In ShopCtrl, VAT tariffs and currency are set per shop, so you usually create a separate shop per country, for example a BE shop and an NL shop.
To support this, every ShopCtrl shop can import only the orders of selected Shopify markets:
- Same connection - connect each shop to the same Shopify store with the same app credentials.
- Different markets - in each shop, enter the countries in Markets. For example, NL in the NL shop and BE, LU in the BE shop.
- Order country - ShopCtrl takes the country of the billing address of the order, or of the shipping address if the order has no billing address.
- Currency - orders are imported in the currency the customer paid in. Set the shop currency to the currency of its markets.
- If a country is entered in two shops, its orders are imported into both shops.
- If Markets is empty, the shop imports orders of all countries. Leave it empty only when you connect a single ShopCtrl shop.
- Orders from a country that is not entered in any shop are not imported.
To select orders by the country of the shipping address instead of the billing address, contact ShopCtrl support. This is a system-wide setting.
Set whether prices include taxes
Set this before you turn on order import. ShopCtrl already uses it when it imports orders.
-
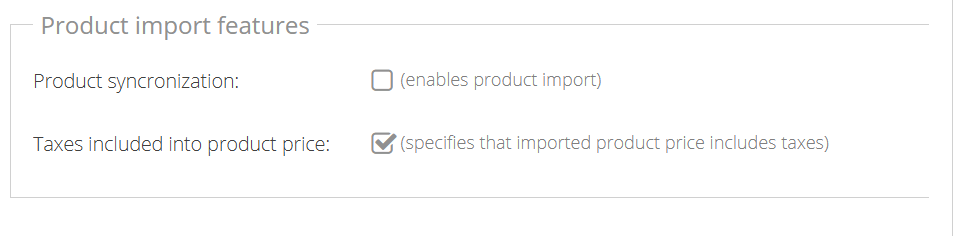
In the Product import features section, check Taxes included into product price if the prices in your Shopify store include taxes. Leave it cleared if they exclude taxes. Learn more on Shopify Taxes.
-
Click Save and Close.
Set up order import
In the Order import features section:
-
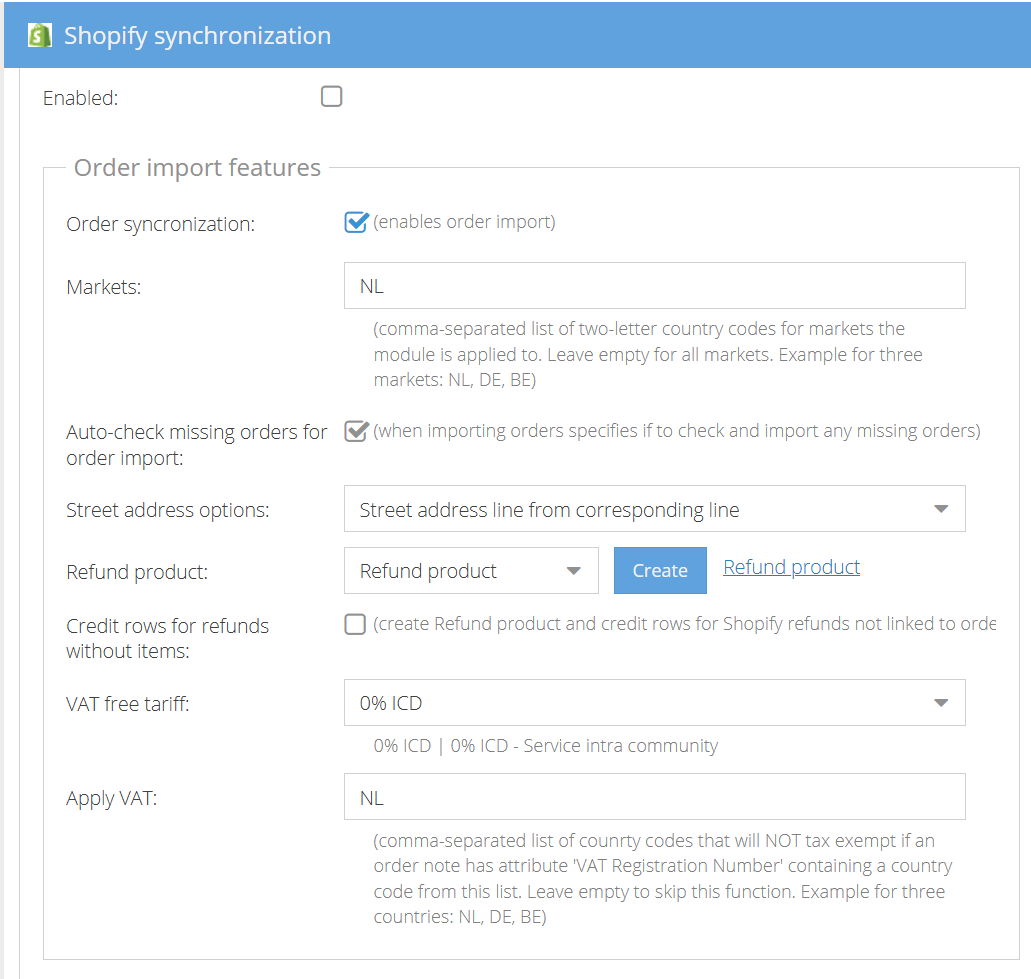
Check Order syncronization to import new orders from Shopify.
-
In Markets, enter the two-letter country codes of the orders this shop imports, separated by commas, for example
BE, LU. Leave it empty to import orders of all countries. -
Check Auto-check missing orders for order import to check for orders that went missing for any reason and import them.
-
In Street address options, select how the street name and house number are split over address lines 1 and 2 in Shopify.
-
Select a Refund product. Shopify may refund an amount without a link to an order row. ShopCtrl then adds an order row with this product and a credit row with the refunded amount.
-
Check Credit rows for refunds without items to create these rows automatically. Clear it if you credit such refunds manually in ShopCtrl. Then only the refund payment is imported.
-
Select a VAT free tariff. It is used for products that are not taxable in Shopify.
-
Optionally, in Apply VAT, enter the country codes that are not exempt from VAT, even when the order has a VAT Registration Number attribute with that country code. Leave it empty to skip this check.
-
Click Save and Close.
Order syncronization alone doesn't start the import. ShopCtrl imports the first orders only after you check the main Enabled flag at the top of the settings. See Enable the synchronization.
Configure track and trace export
ShopCtrl sends the tracking code, carrier and tracking URL to Shopify and marks the order as fulfilled. See Fulfilling orders and exporting tracking info to Shopify.
Map carriers and warehouses first, and turn on track and trace only after that.
Map carriers
The carrier names in ShopCtrl and Shopify must match. The Shopify carrier is sent with the tracking code.
-
In Carrier account mapping, click Add.
-
Select the ShopCtrl carrier used for this shop.
-
In Shopify carrier, enter the carrier name exactly as Shopify writes it, for example
PostNL,DHL Parcel,DPD,GLS,UPSorBPost. Shopify then builds the tracking link for the customer. See the list of carriers supported by Shopify. -
In Scope, select whether the mapping applies to this Shop or to All shops.

Map warehouses to Shopify locations
Each fulfillment in Shopify belongs to a location. Map every warehouse enabled for the shop to the corresponding Shopify location in Warehouse to location mapping.
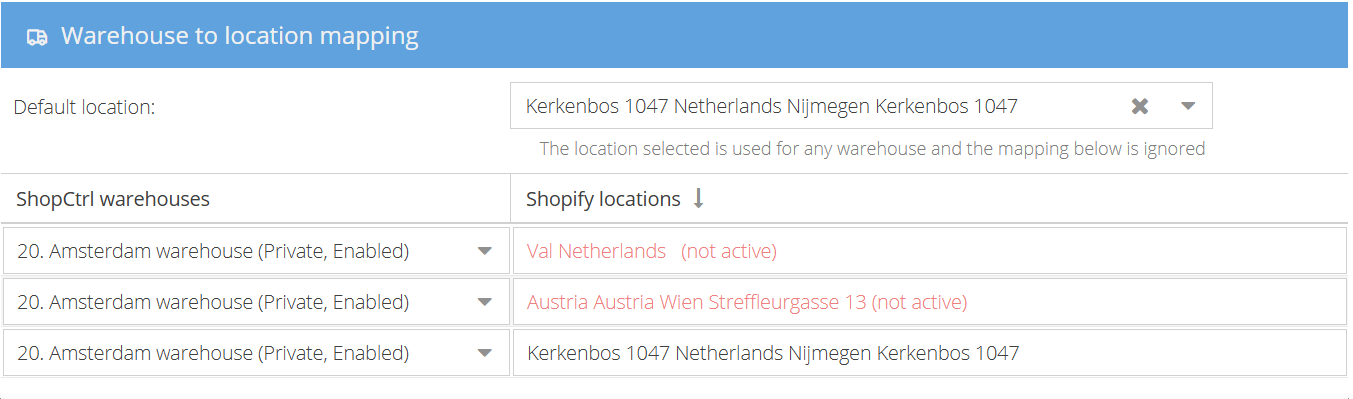
The list of locations is loaded from Shopify, so the connection must be set up first.
If you ship all orders from one Shopify location, select it in Default location instead. The default location is used for every warehouse, and the mapping is ignored.
Turn on track and trace
In the Track&Trace features section:
-
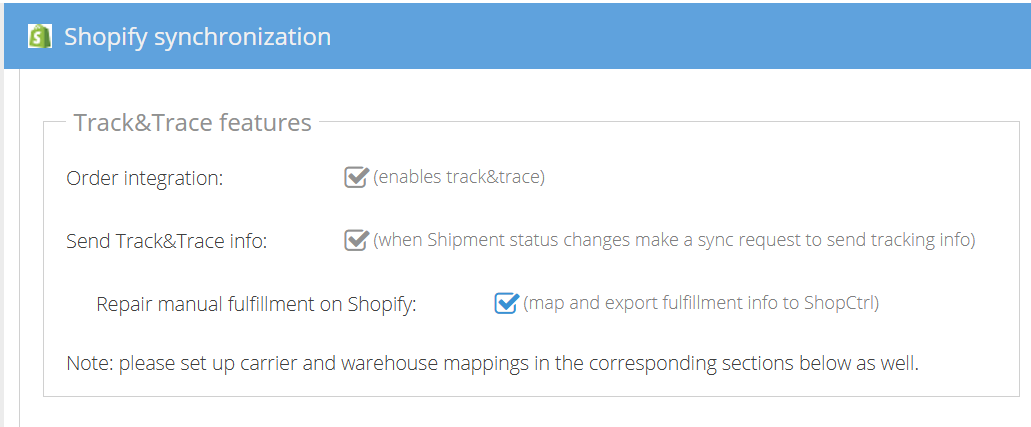
Check Order integration to enable track and trace.
-
Check Send Track&Trace info to send the tracking info to Shopify. ShopCtrl sends it at the moment the shipment is marked as Shipped.
-
Optionally, check Repair manual fulfillment on Shopify. If an order was accidentally fulfilled in the Shopify admin, ShopCtrl maps this fulfillment to the shipment and adds the missing tracking info in Shopify.
-
Click Save and Close.
Configure product stock export
ShopCtrl sends the available stock of products to Shopify. See Updating Shopify inventory.
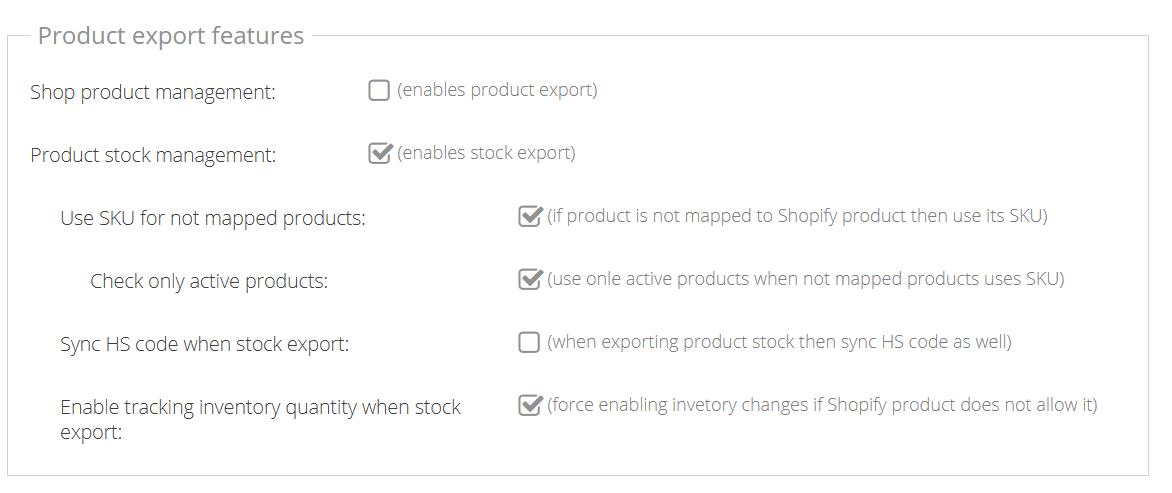
In the Product export features section:
-
Check Product stock management to export the available product stock.
-
Check Use SKU for not mapped products if the products were not imported from Shopify. ShopCtrl then finds the Shopify product by its SKU.
-
Check Check only active products to search only active Shopify products by SKU. This prevents the stock from going to an inactive product with the same SKU.
-
Optionally, check Sync HS code when stock export to send the HS code of the product together with the stock.
-
Check Enable tracking inventory quantity when stock export to turn on inventory tracking for a Shopify product that doesn't allow stock updates.
-
Click Save and Close.
The stock is exported per Shopify location, so map warehouses to Shopify locations as well.
ShopCtrl sends the stock of a product to Shopify only when it changes. Products whose stock doesn't change after you turn on the export keep their current stock in Shopify. To send the stock of all products once:
- Contact ShopCtrl support to start a full initial stock synchronization.
- Or import the product stock via Excel. The import updates the stock, and ShopCtrl then sends it to Shopify.
Enable the synchronization
- At the top of the Functional settings pane, check Enabled.
- Click Save and Close.
ShopCtrl starts the features you turned on, for example the import of the first orders.