Step 2. Connect ShopCtrl to Shopify
An employee must be assigned to the shop with a Shop Owner Admin role to perform actions referred to in this article.
In this step you enter the credentials of your Shopify app in ShopCtrl and check that the connection works.
Set up the shop currency, VAT tariffs and payment types of your ShopCtrl shop before you enable the synchronization with Shopify.
Open the Shopify synchronization settings
- Log in to your ShopCtrl account as a user with the Shop Owner Admin role.
- In the navigation menu, select Configuration > Shops to open the list of shops.
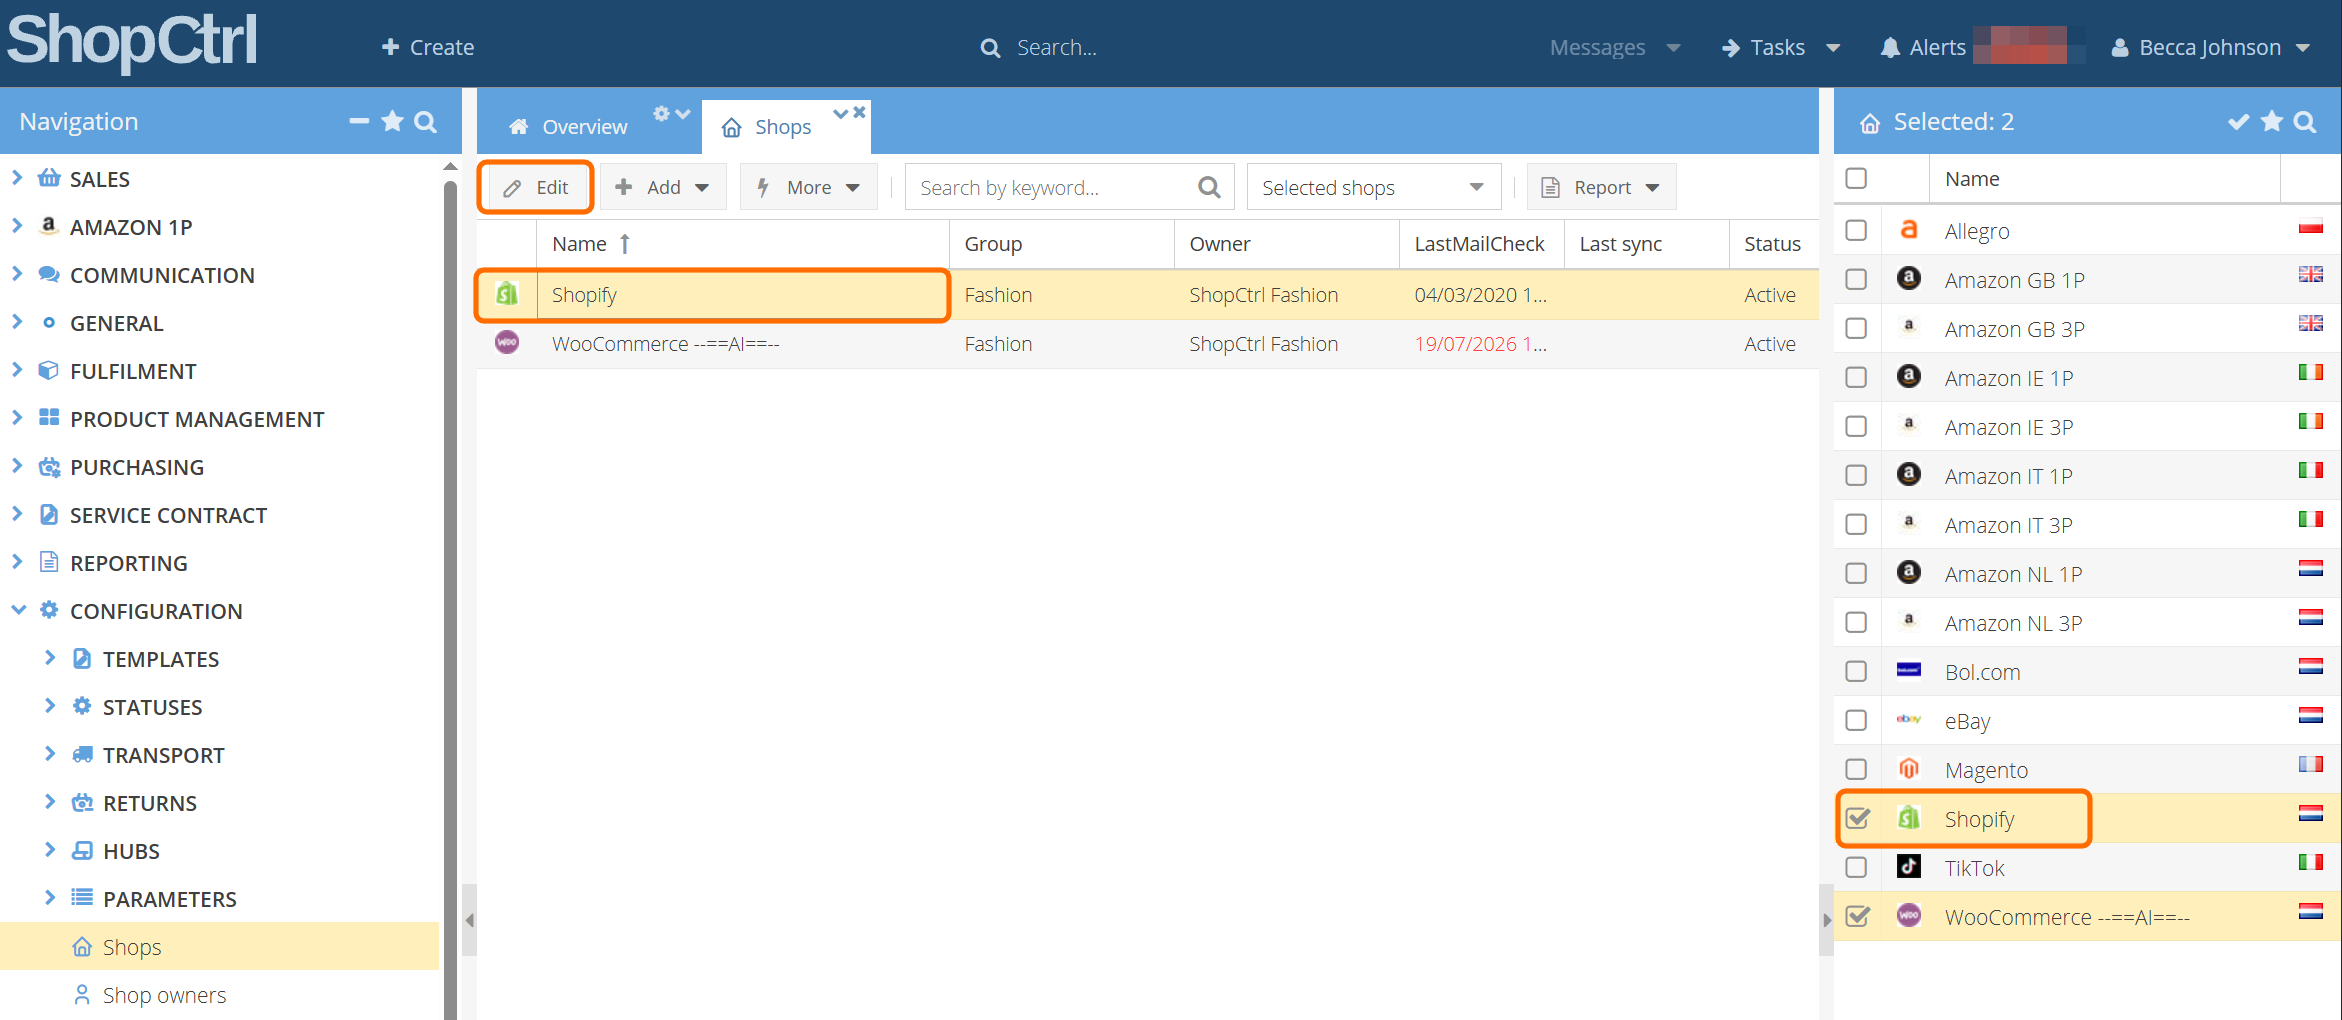
- Select the shop you want to set up the Shopify synchronization for and click Edit to open the shop settings.
- In the menu, select Shop synchronization > Shopify Synchronization.
Connect with a Dev Dashboard app
Use this for an app created in the Shopify Dev Dashboard. All fields are in the Connection settings pane.
-
In Authentication, select Client ID and secret (Dev Dashboard app).
-
In Client ID and Client secret, paste the values you copied from the app in the Dev Dashboard.
-
In Api url, enter
https://{shop}.myshopify.com/admin/api/{version}/, where{shop}is the name of your store. Use a current API version, for examplehttps://yourstore.myshopify.com/admin/api/2026-10/.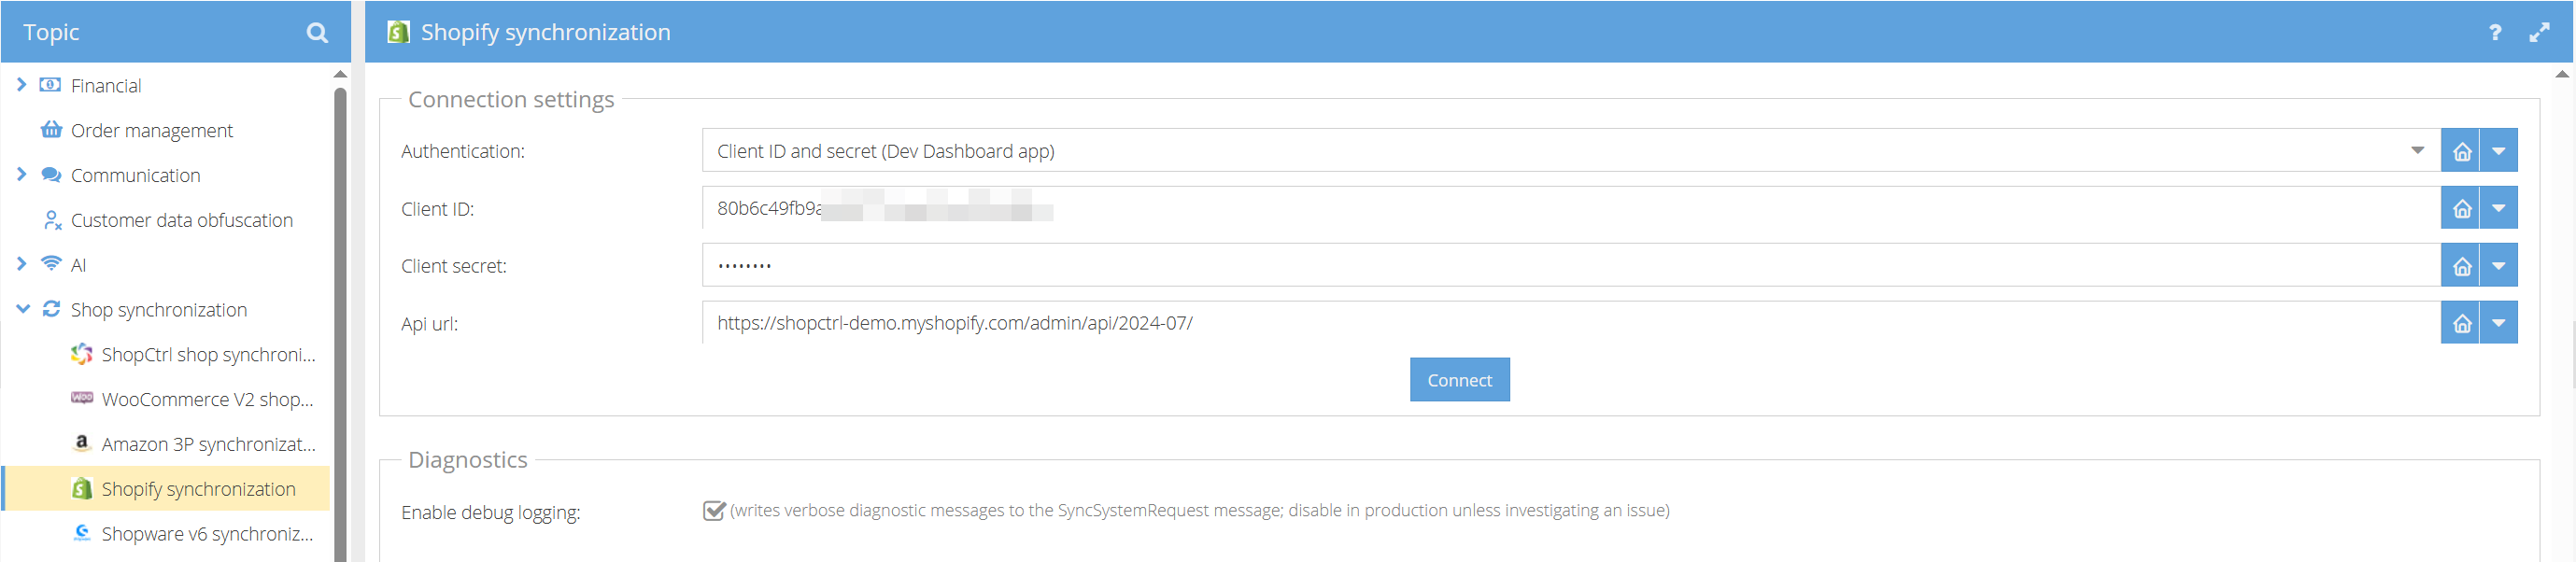
-
Click Connect. A popup window shows whether the connection was established successfully or what is wrong with the credentials.
-
Click Save to apply changes to the shop.
ShopCtrl uses the Client ID and Client secret to request an access token from Shopify. The token is valid for 24 hours and ShopCtrl renews it automatically, so you don't need to update anything when it expires.
Connect with a legacy custom app
Use this for an app created in the Shopify admin before 2026. Shops connected this way keep working, so you only need these steps to change the credentials. All fields are in the Connection settings pane.
-
In Authentication, select Admin API access token (legacy custom app). This method is selected by default.
-
In Api key, enter the API key of the app.
-
In Api password, enter the Admin API access token of the app.
-
In Api url, enter
https://{shop}.myshopify.com/admin/api/{version}/, where{shop}is the name of your store. Use a current API version, for examplehttps://yourstore.myshopify.com/admin/api/2026-10/.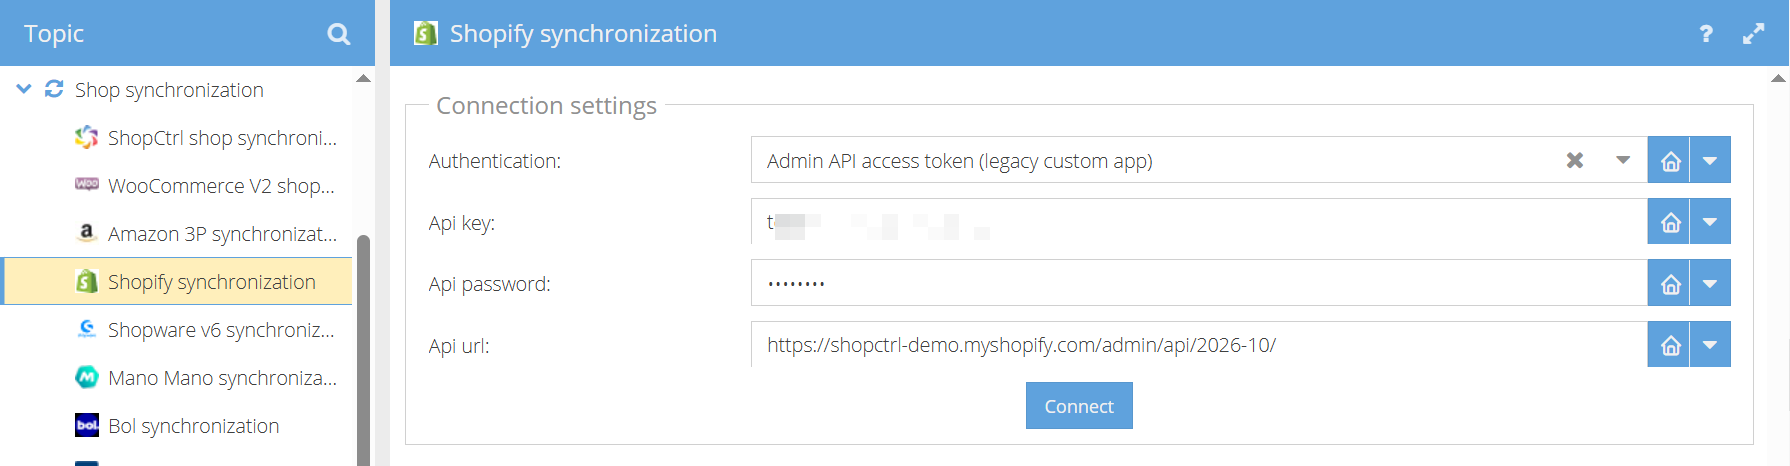
-
Click Connect. A popup window shows whether the connection was established successfully or what is wrong with the credentials.
-
Click Save to apply changes to the shop.
Troubleshooting
shop_not_permitted
- The app and the store are not in the same Shopify organization.
- Create the app in the Dev Dashboard of the organization that owns the store.
app_not_installed
The full message is Shopify rejected the access token request (400 Bad Request). app_not_installed: The application is not installed on this shop.
- The app is not installed on the store in Api url. Install the app on your store and click Connect again.
- Check that the Client ID and Client secret belong to the app installed on this store.
Shopify rejected the access token request
- Check that the Client ID and Client secret are copied completely and belong to the same app.
- Check that the app is installed on the store. See Install the app on your store.
- Check that Api url contains the
myshopify.comaddress of the right store.
Invalid API key or access token
- With a legacy custom app, check the Api key and Api password.
- Check that Authentication matches the type of your app.
The connection works, but a feature fails with an access error
- A scope is missing. Compare the scopes of the app with the Required API scopes.
- To add a missing scope, see Change the API scopes.