Step 1. Create a Shopify app
ShopCtrl connects to your store through a custom app that you create in Shopify. The app defines which parts of your store ShopCtrl can access and gives you the credentials for the connection.
If your shop was connected before 2026, it uses a legacy custom app and keeps working without any changes. You can skip this step. See Legacy custom apps.
Create an app in the Shopify Dev Dashboard
-
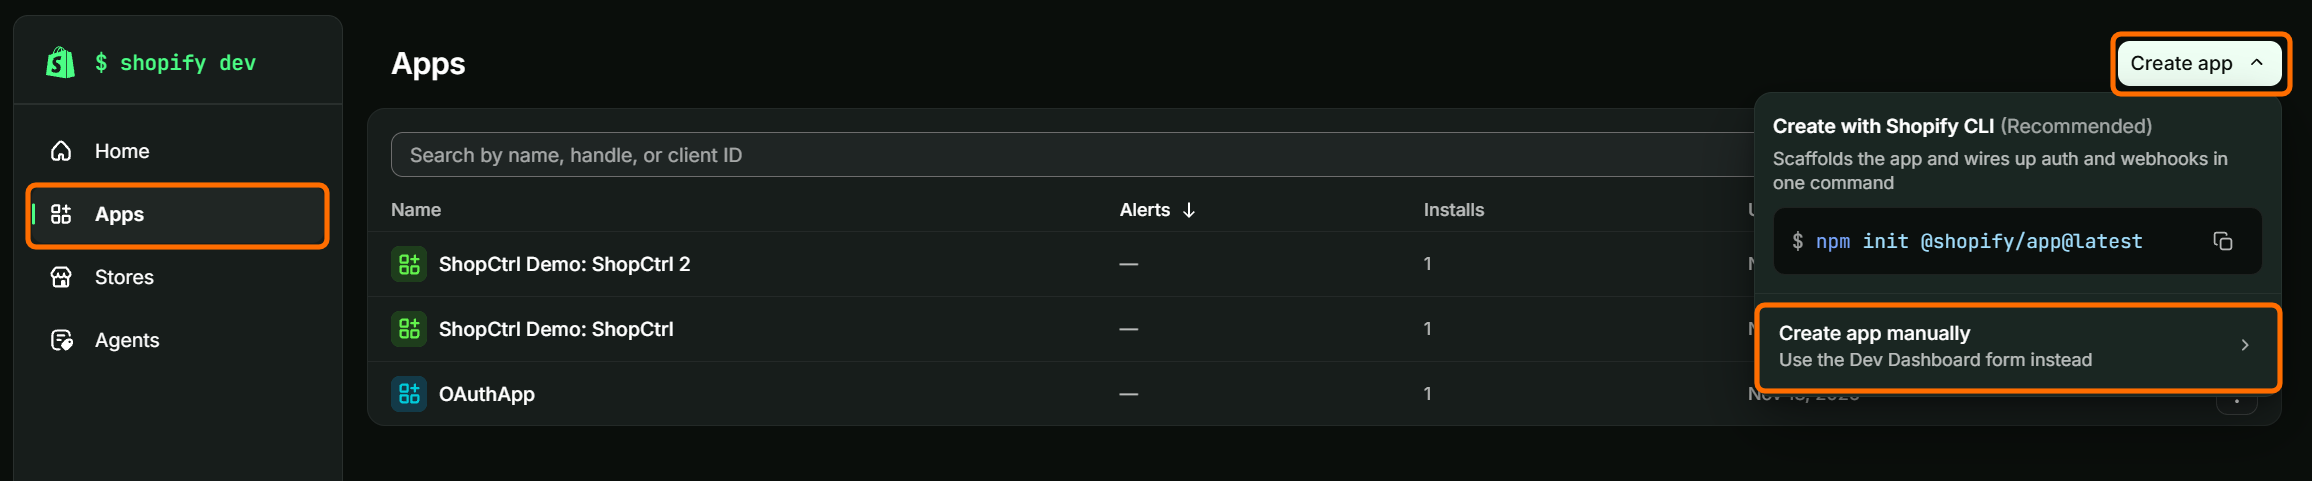
Open the Shopify Dev Dashboard and make sure Apps is selected in the navigation menu.
-
Click Create app.
-
In the dropdown, select Create app manually (Use the Dev Dashboard form instead). You don't need the Shopify CLI option.
-
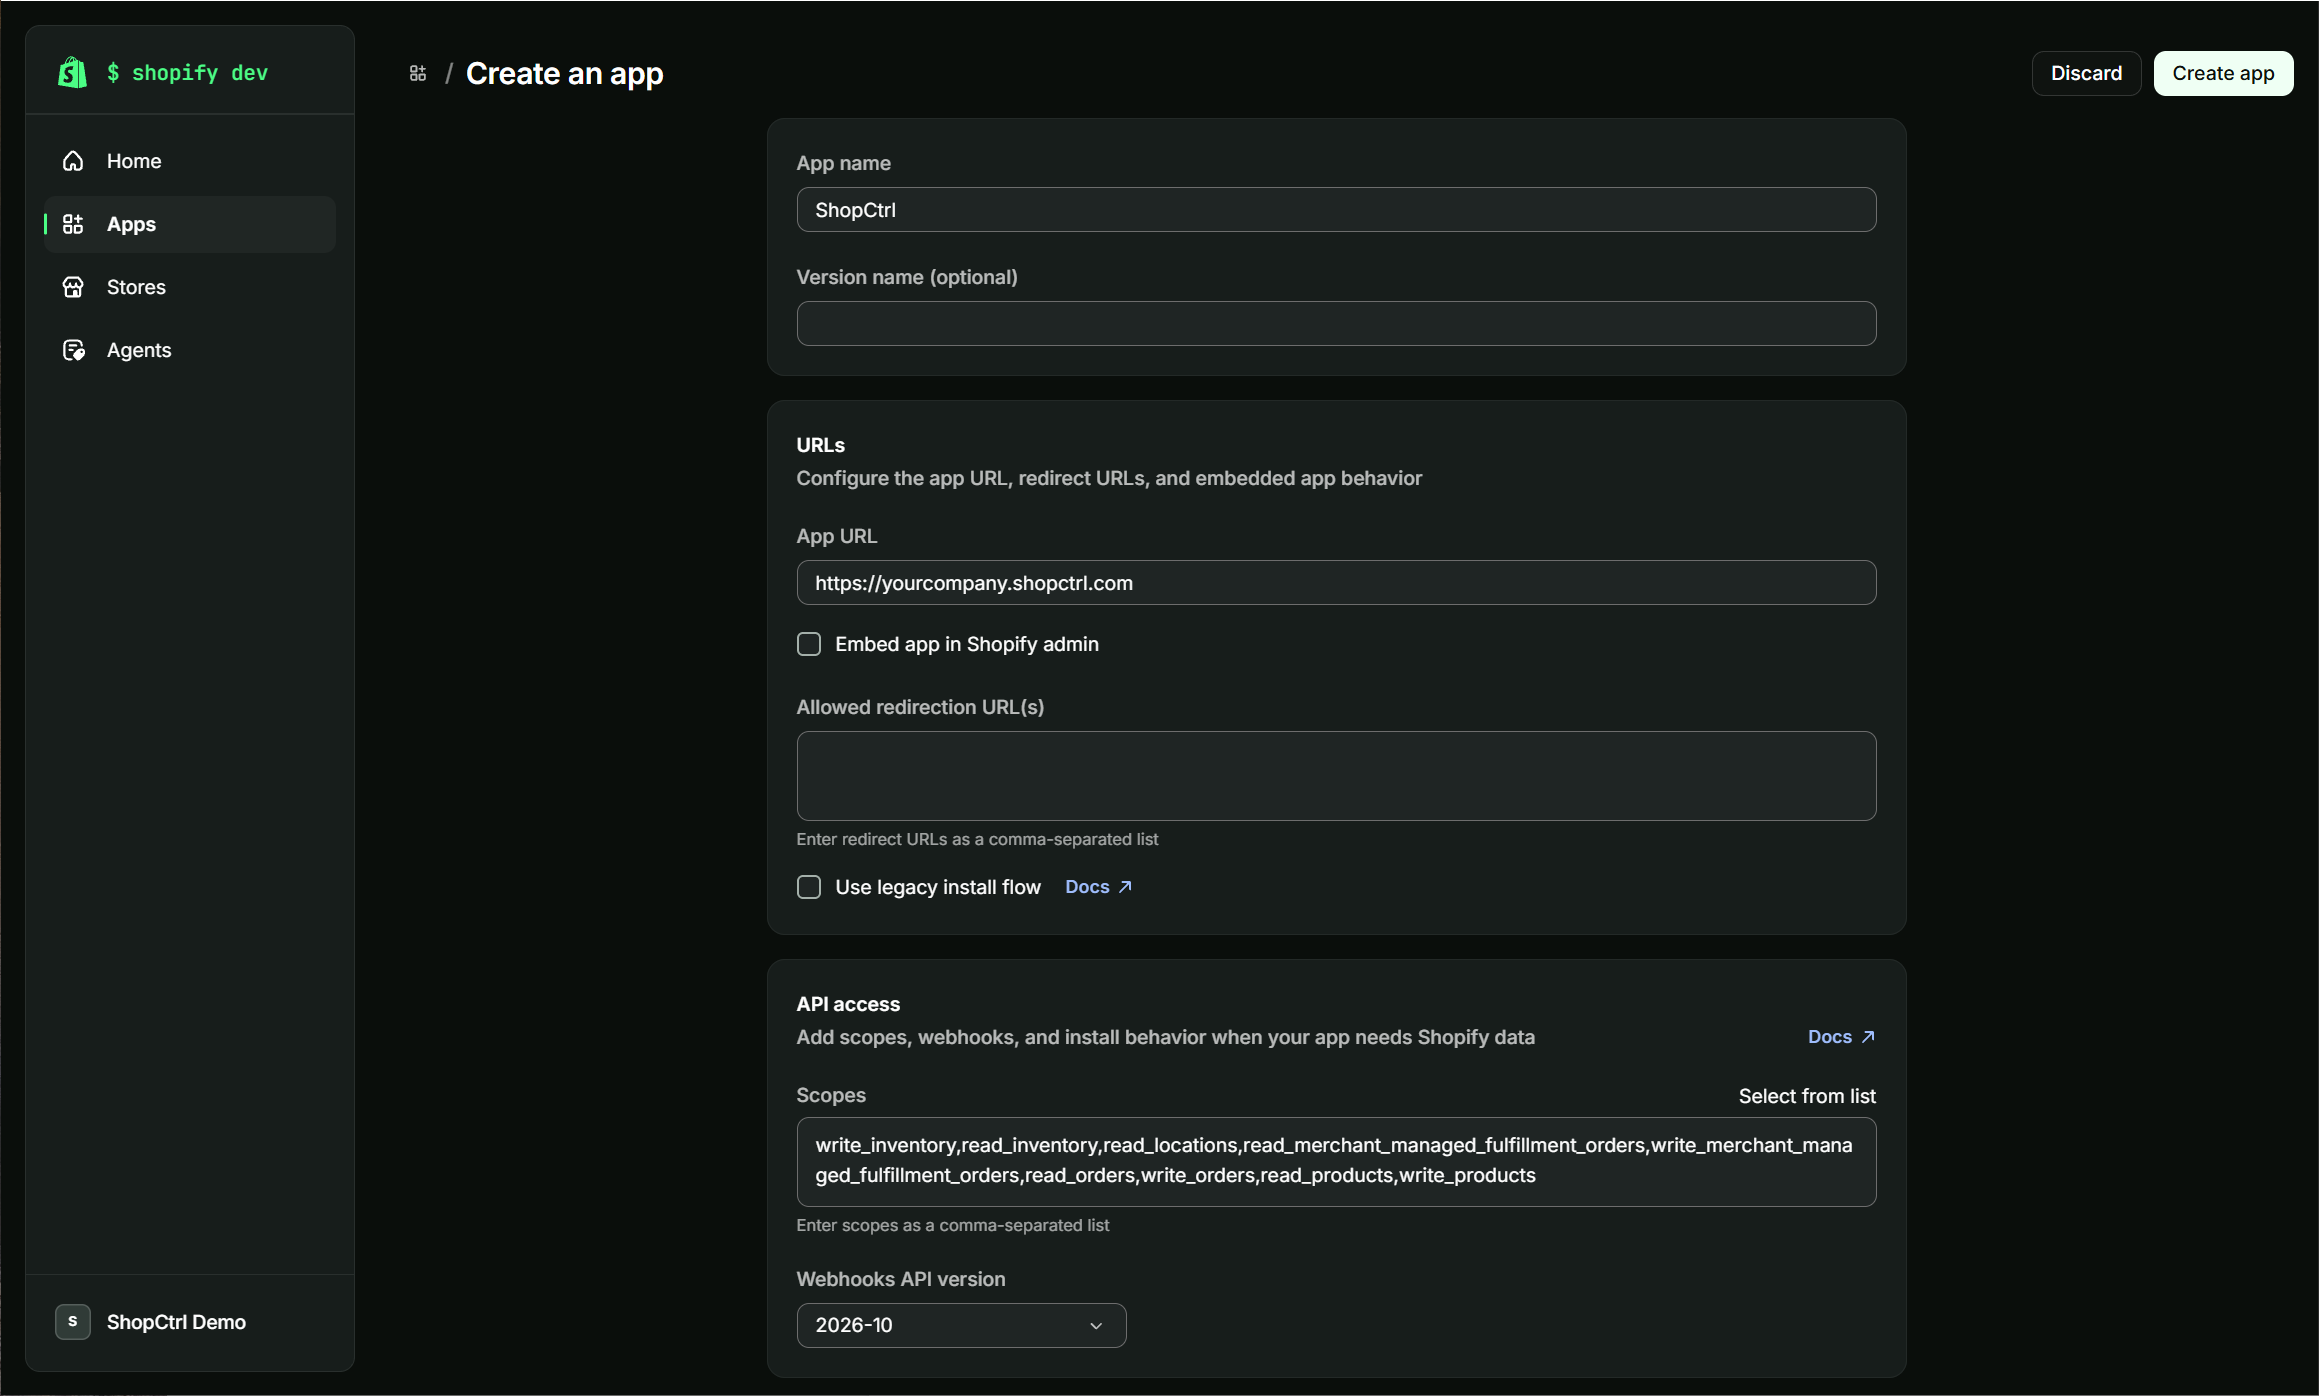
Fill in the Create an app form:
-
App name - for example ShopCtrl.
-
App URL - enter the address of your ShopCtrl, the one you open in the browser to log in, for example
https://yourcompany.shopctrl.com. Shopify opens this page after the app is installed and when you open the app from the Shopify admin. -
Embed app in Shopify admin - leave it cleared.
-
Scopes - copy the list below with the copy button in its top-right corner, and paste it into the field. See Required API scopes for what each scope is used for.
write_inventory,read_inventory,read_locations,read_merchant_managed_fulfillment_orders,write_merchant_managed_fulfillment_orders,read_orders,write_orders,read_products,write_products -
Webhooks API version - keep the newest version.
-
-
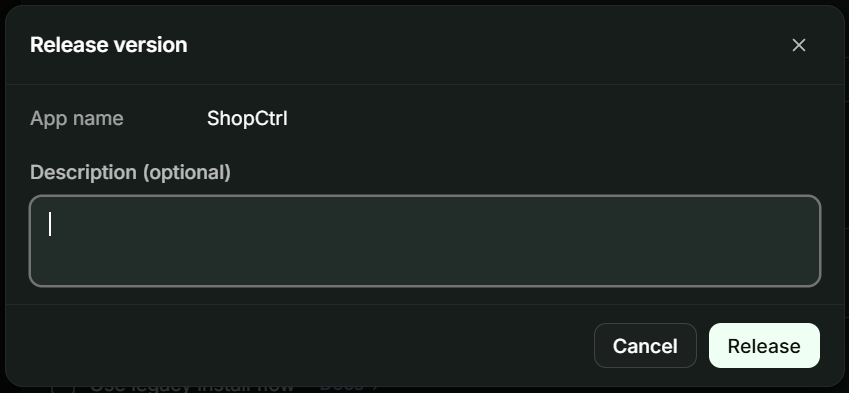
Click Create app. The Release version window opens.
-
Optionally, enter a Description for the version, then click Release. The app needs a released version before it can be installed.
The app is created and the Versions page of the app opens.
Install the app on your store
For more information, see Install a custom app in the Dev Dashboard in the Shopify Help Center.
-
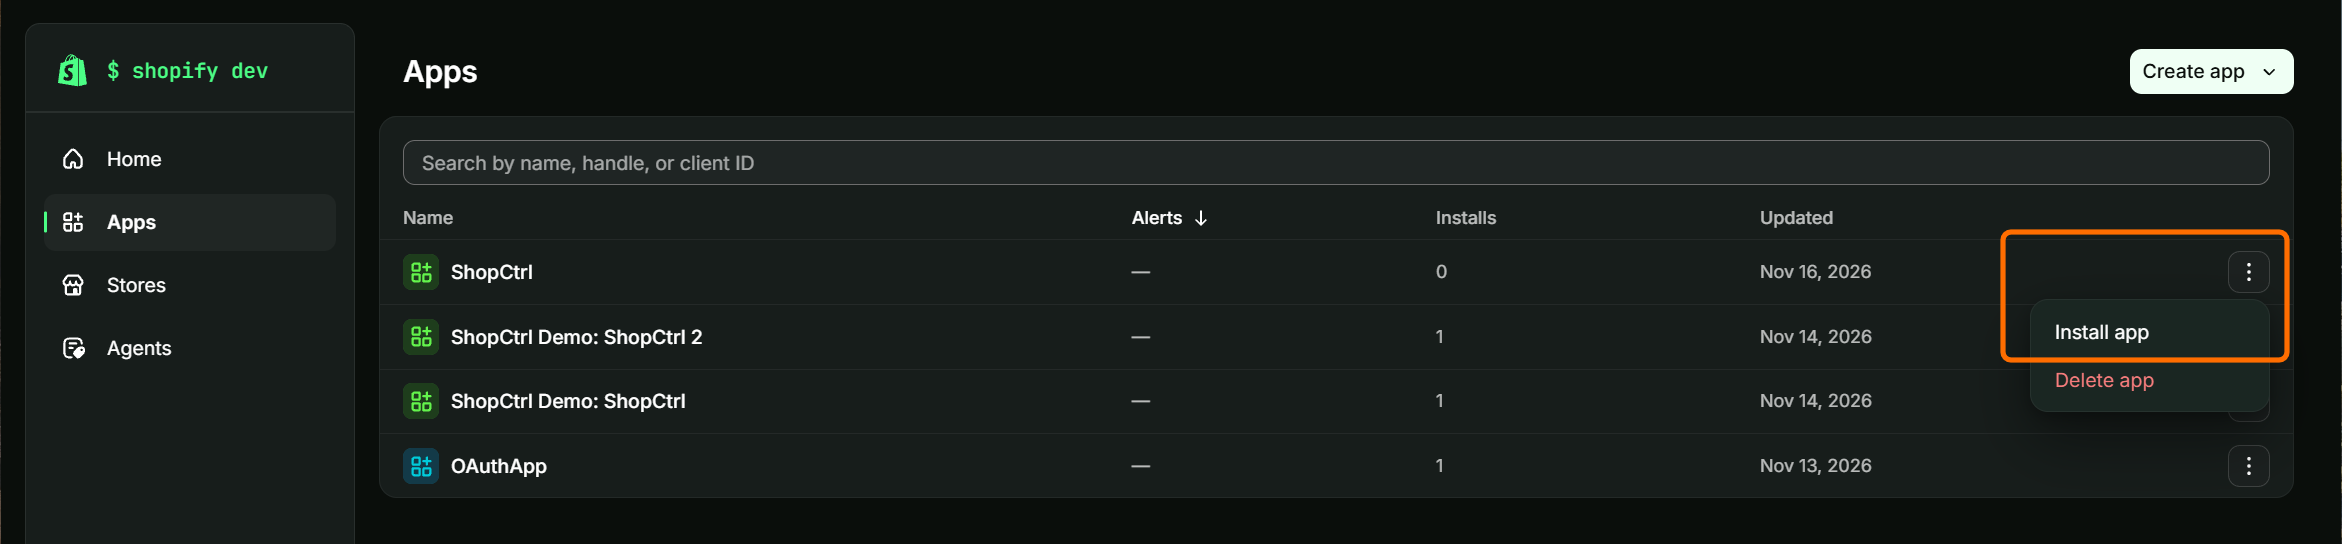
In the Dev Dashboard, click Apps in the navigation menu.
-
In the row of the new app, click the three dots (⋮) and select Install app.
-
You are redirected to your Shopify store. The Install app page shows the data the app needs access to. Click Install.
The warning This app hasn't been reviewed is expected: Shopify reviews only public apps, not custom apps.
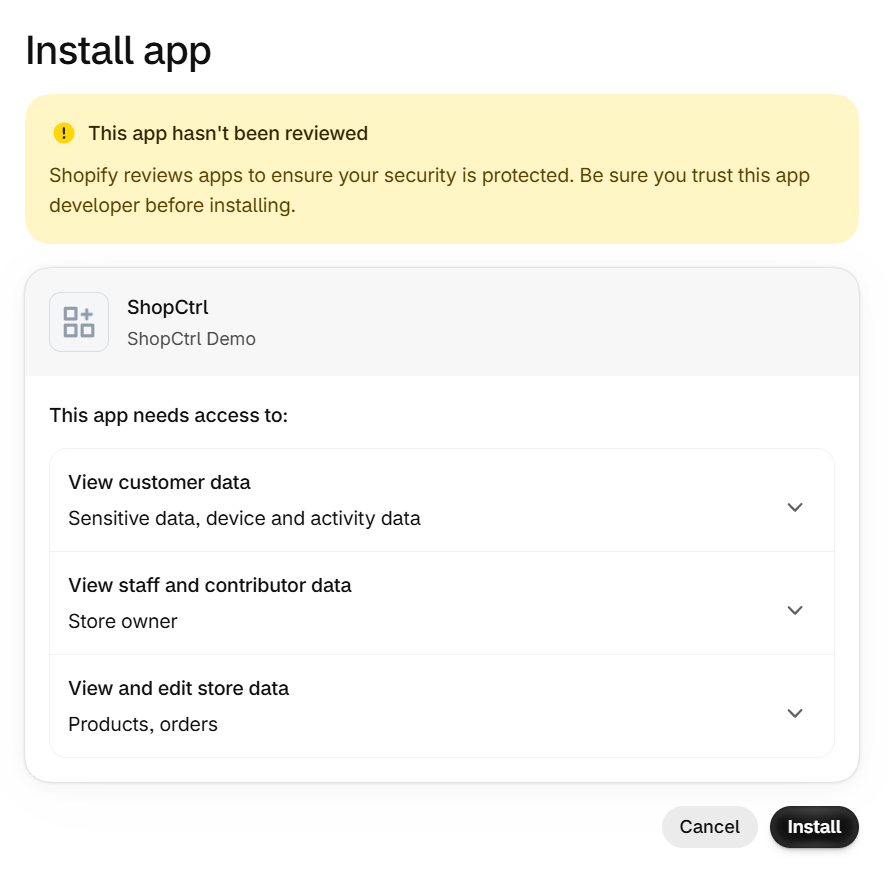
The app is installed and Shopify opens your ShopCtrl, the App URL entered when creating the app. In the Apps list of the Dev Dashboard, the Installs column of the app shows 1.
Copy the Client ID and Client secret
-
In the Shopify Dev Dashboard, click the name of the app. The Overview page of the app opens.
-
In the Credentials card, copy the Client ID and Client secret with the copy buttons next to them. Save them in a secure place like you would normally do with passwords.
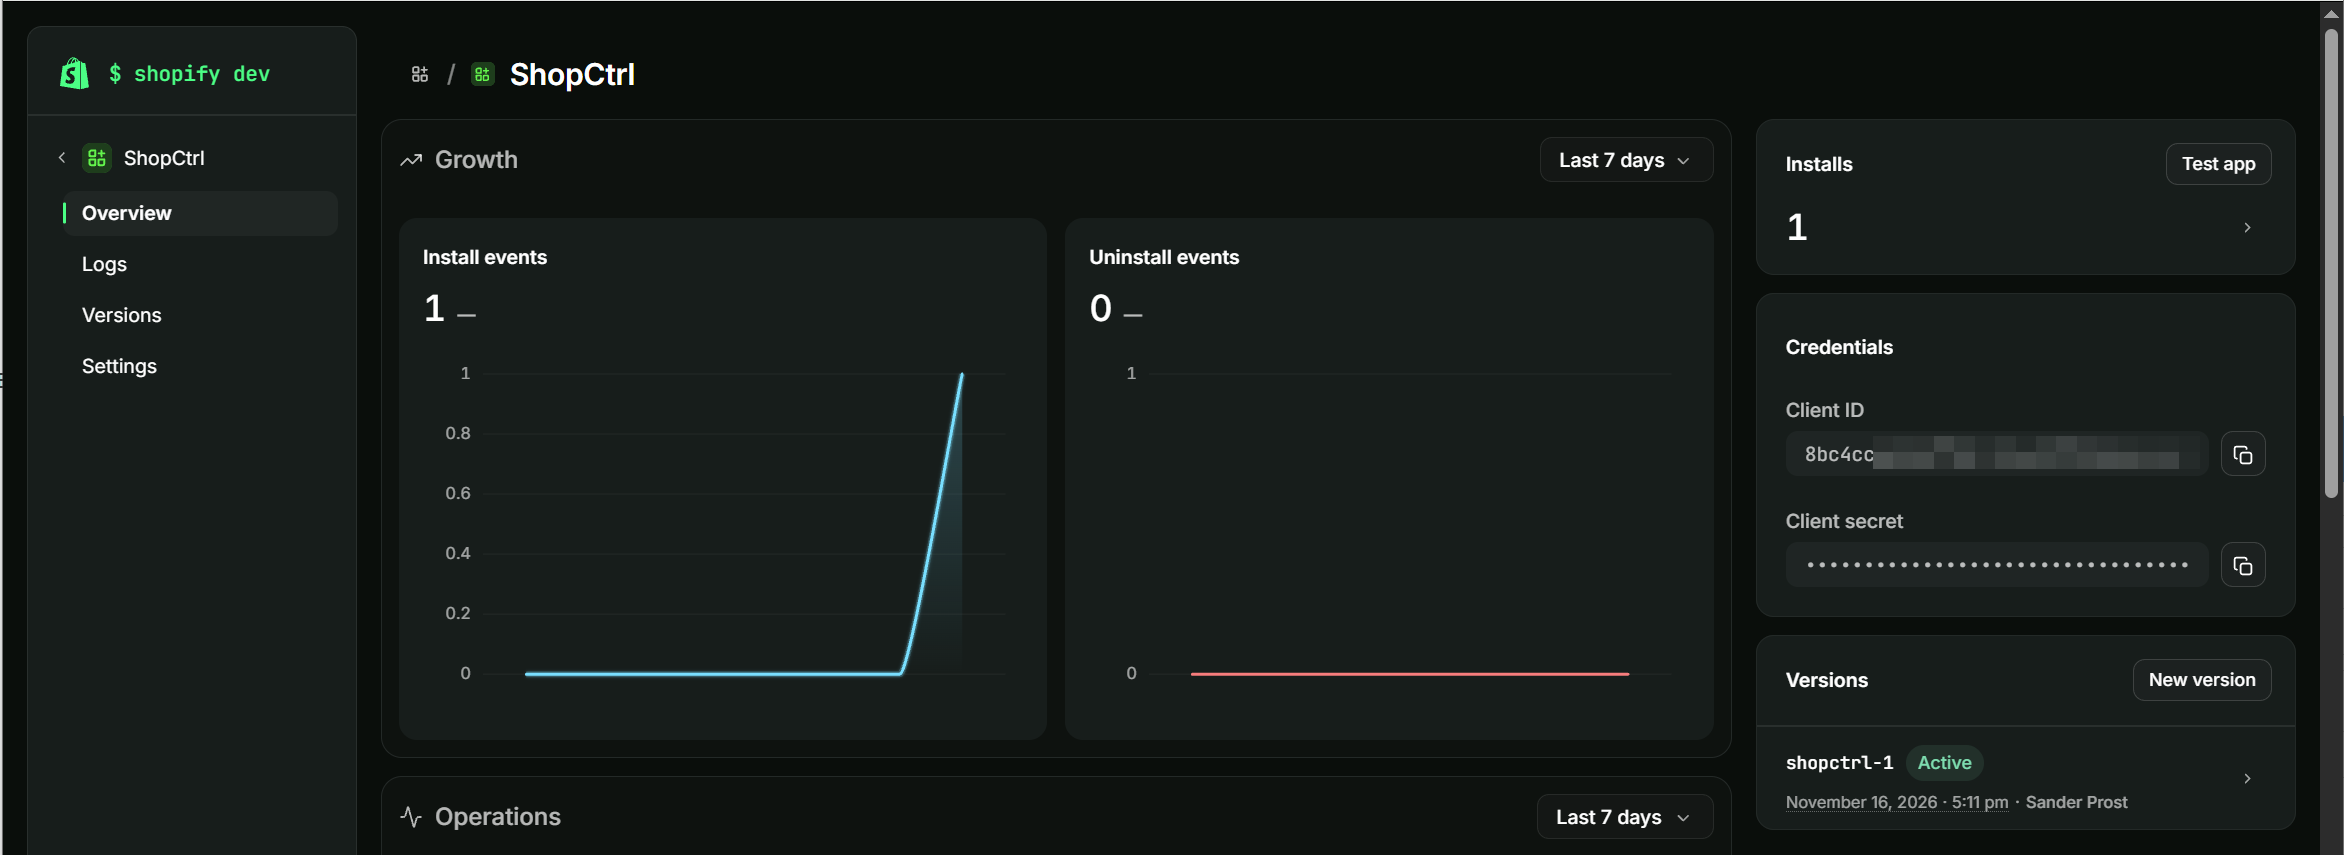
You now have the Client ID and Client secret that ShopCtrl needs.
For more information, see these Shopify guides:
Required API scopes
Scopes determine which parts of your store the ShopCtrl app can access. Copy the list and paste it into the Scopes field:
write_inventory,read_inventory,read_locations,read_merchant_managed_fulfillment_orders,write_merchant_managed_fulfillment_orders,read_orders,write_orders,read_products,write_products
Orders and fulfillment
- read_orders, write_orders - import orders and their payments.
- read_merchant_managed_fulfillment_orders, write_merchant_managed_fulfillment_orders - fulfill orders and send tracking info.
Products and stock
- read_products, write_products - find products by SKU and enable track quantity for them.
- read_inventory, write_inventory - update stock in Shopify.
- read_locations - map warehouses to Shopify locations.
Change the API scopes
Change the scopes of an installed app, for example when ShopCtrl needs a new scope after an update. Scope changes are not applied automatically to a store where the app is already installed: you release a new version of the app, and then install the app again to approve the new scopes in your store.
For more information, see Manage access scopes in the Shopify documentation.
- In the Shopify Dev Dashboard, click the name of the app. The Overview page of the app opens.
- On the Versions card, click New version.
- In Scopes, add or remove scopes. Compare the list with Required API scopes.
- Release the new version: click Release, optionally enter a Description, and click Release again.
- Install the app again to approve the new scopes: in the Dev Dashboard, click Apps, then in the row of the app click the three dots (⋮) and select Install app. See Install the app on your store.
- You are redirected to your Shopify store. The Install app page shows the new scopes. Click Install to approve them.
Legacy custom apps
Legacy custom apps were created in the Shopify admin before January 1, 2026. Shopify no longer allows creating them, but existing ones keep working. ShopCtrl connects to them with an API key and an Admin API access token.
Find the credentials of a legacy custom app
-
Log in to your Shopify admin.
-
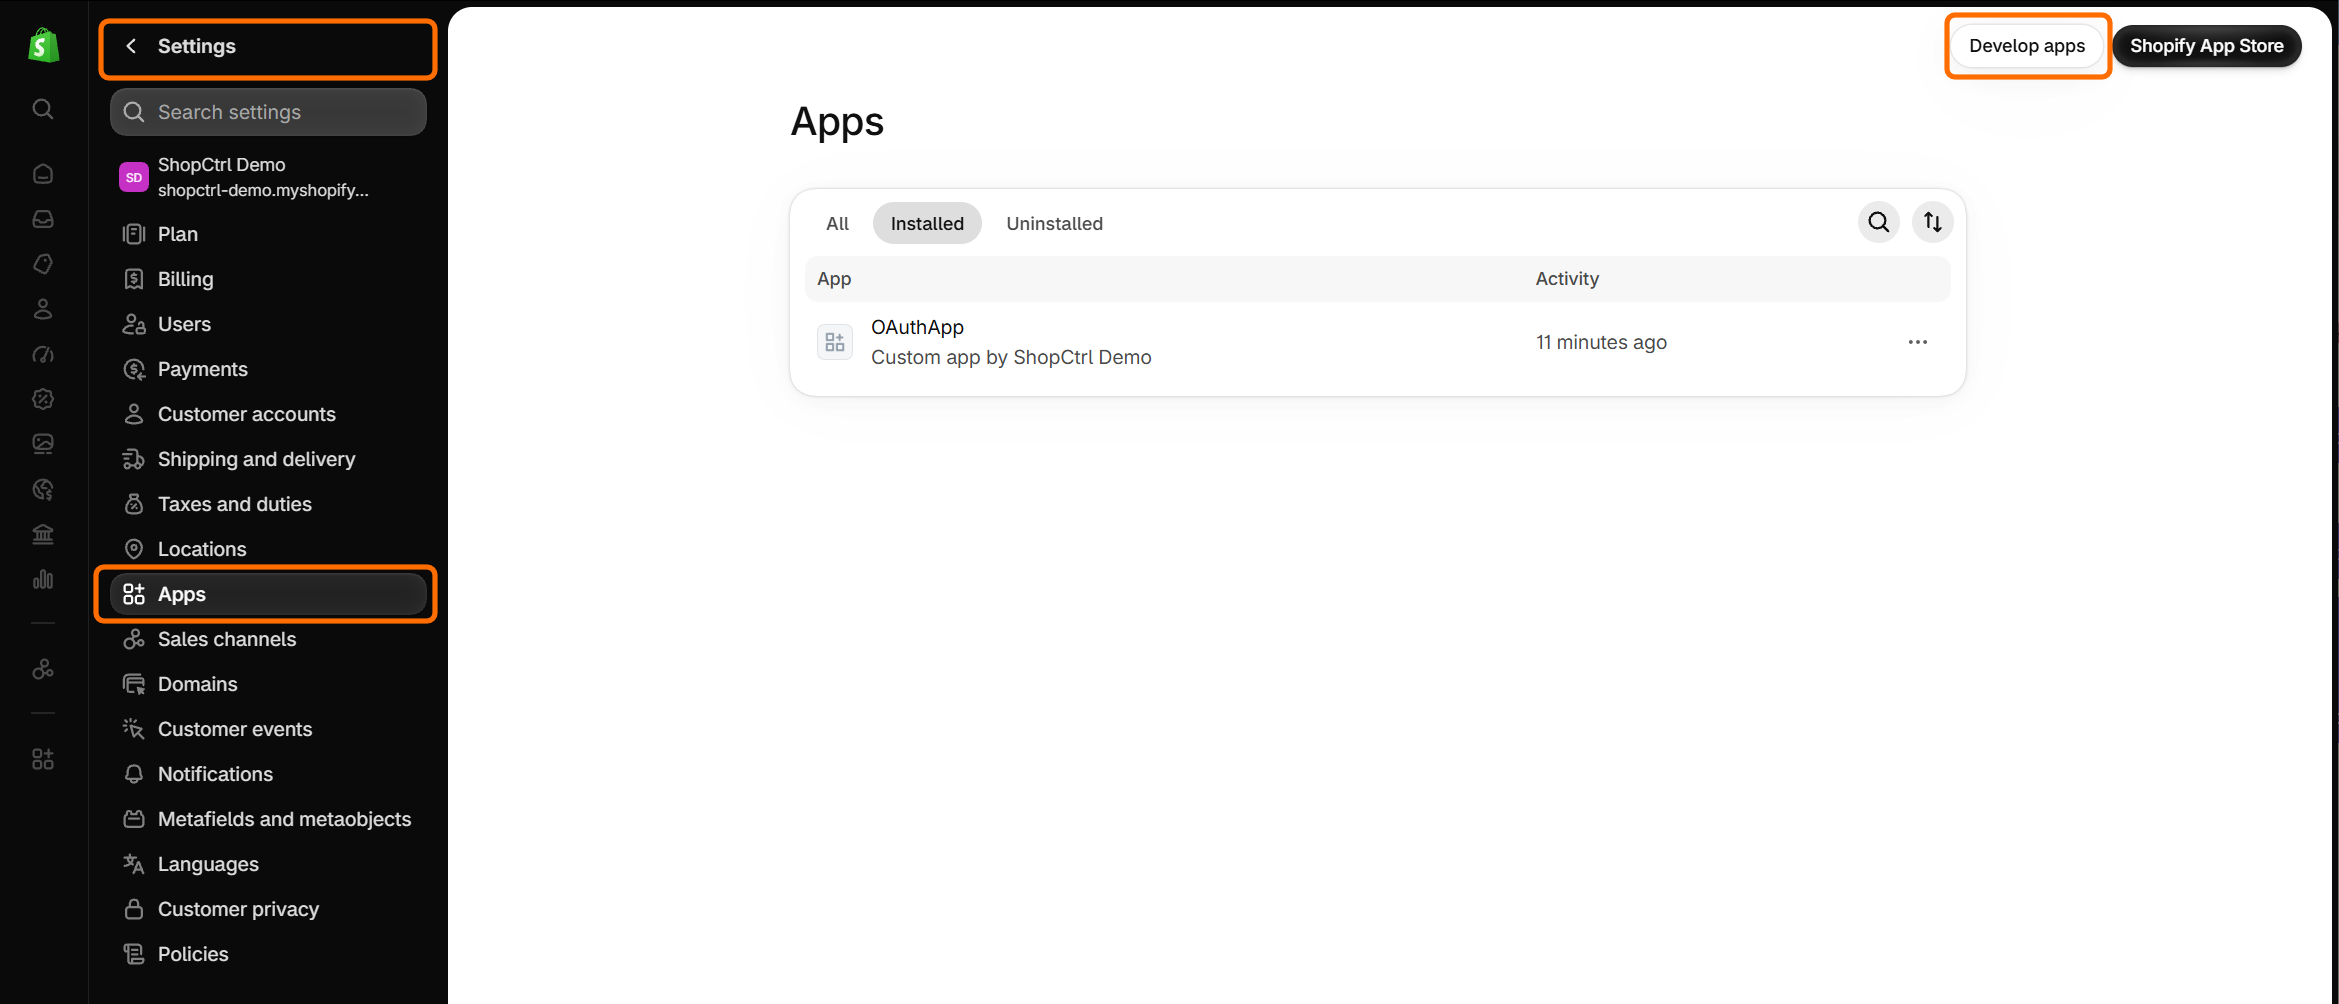
On the navigation menu click Settings ⚙ > Apps.
-
Click Develop apps. The list of your existing custom apps opens.
-
Open the app created for ShopCtrl.
-
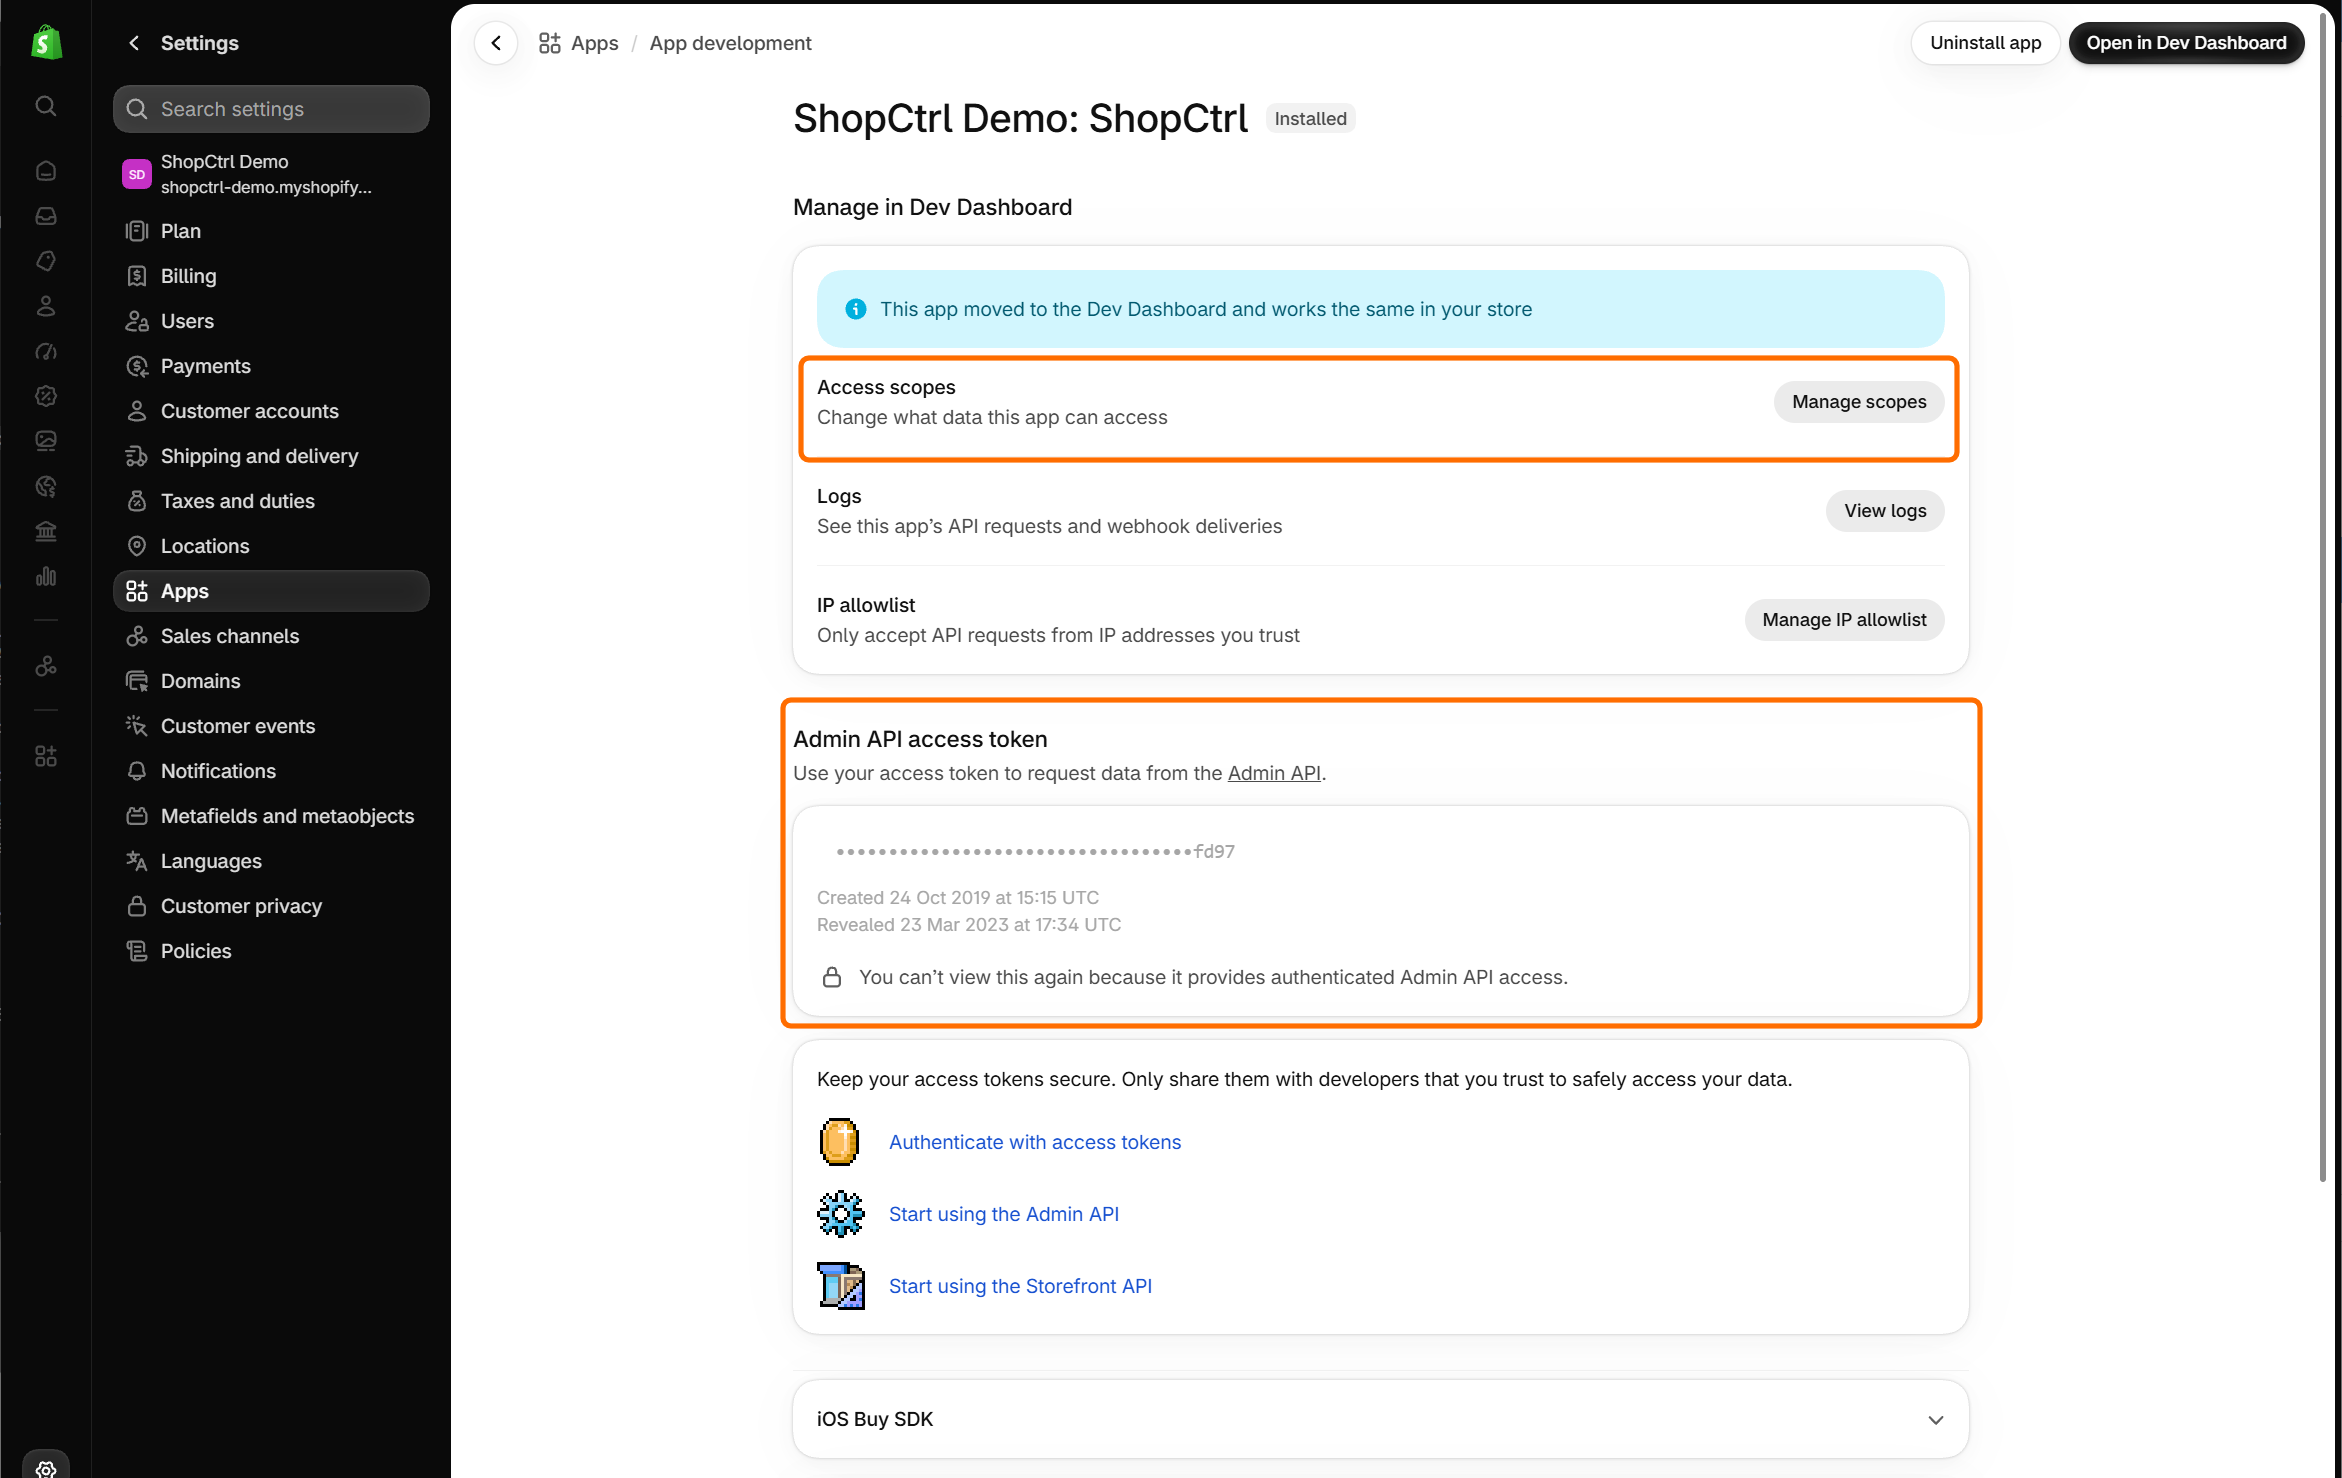
To check or change the scopes, find the Access scopes section and click Manage scopes. The app needs the same Required API scopes.
-
To find the API key, click Open in Dev Dashboard and open Settings. The API key is shown there as the Client ID.
The Admin API access token section shows the token masked. Shopify reveals it only once, so you can't view it again. If you no longer have the token, create a new app in the Dev Dashboard instead.
For more information, see Manage legacy custom apps in the Shopify Help Center.