UPS
An employee must be assigned to the shop with a Shop Owner Admin role to perform actions referred to in this article.

Setting up UPS integration
To start using UPS integration in ShopCtrl we need to get the following data about your UPS account:
- User name
- Password
- Access license number
- Shipper account number
User name and Password are the credentials you use for UPS.com and the shipper account number is your UPS account number. The access license number is provided by UPS when you request an access key.
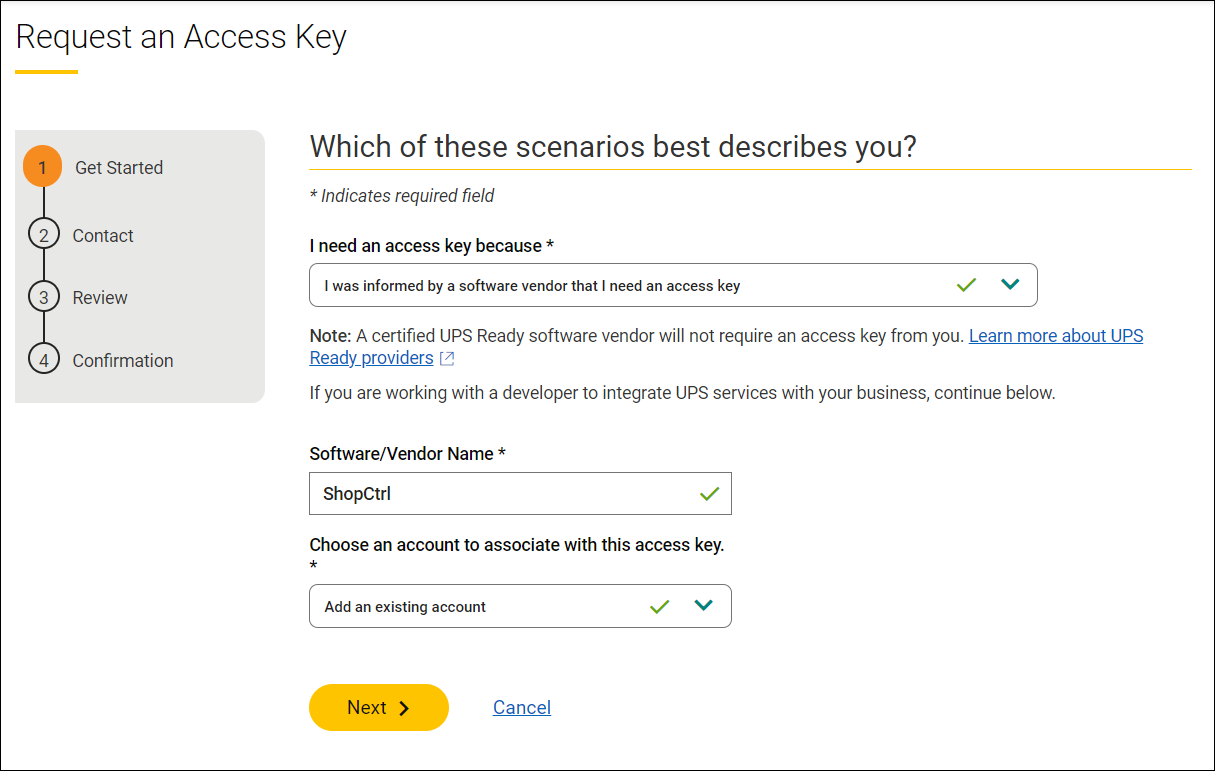
To request Access Key, go to UPS Developer Kit page, login under your UPS account and click Request an access key. You wil be asked to fill in several questions and choose an account number that will be connected to this access key.
- I need an access key because: "I was informed by a software vendor that I need an access key"
- Software/Vendor name: "ShopCtrl"
- Choose an account to associate with this access key: account you would like to connect to this integration

After going through the steps and submitting a request, UPS will issue an Access key. Please keep this key to enter it later on the carrier configuration page.
Setting up UPS integration on ShopCtrl
Carrier synchronization for UPS is configured per shipping service you are planning to use.

How to configure UPS carrier account:
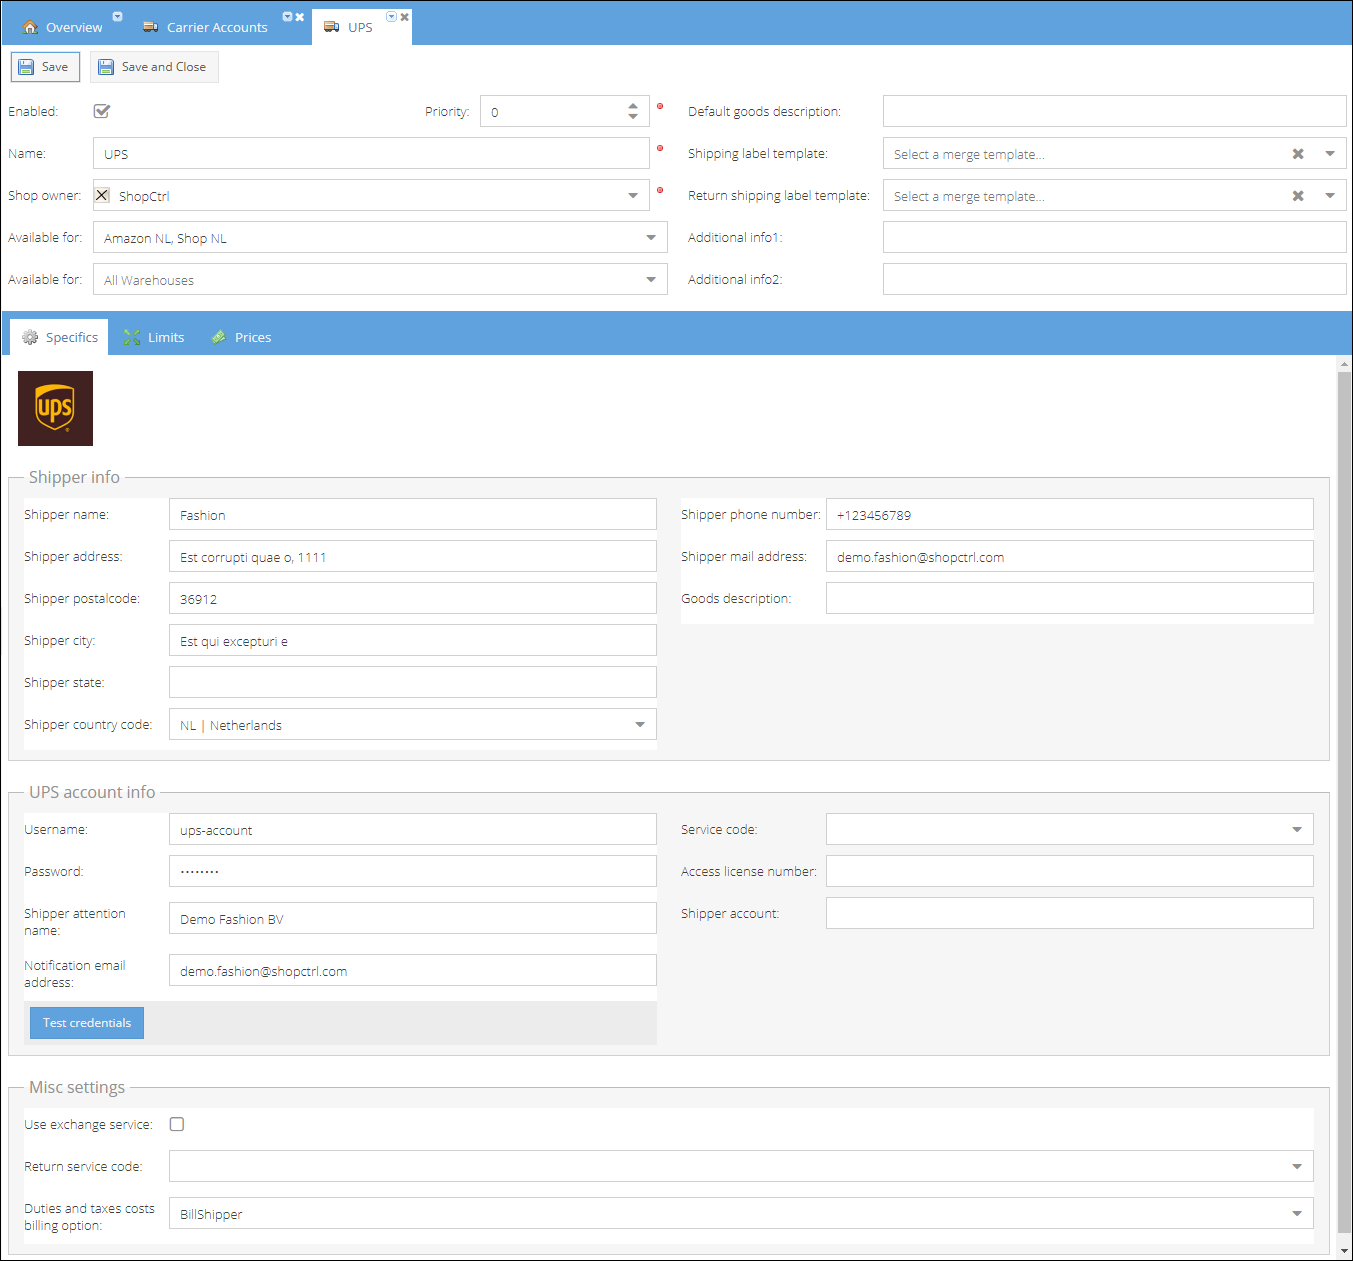
- Go to Configuration > Transport > Carrier Accounts.
- Click Add and select UPS from the dropdown list. The new carrier details page will be opened on a new tab.
- Enter the meaningful carrier Name preferrable mentioning the service used.
- (Optional) Select Shops for which the carrier will be used.
- (Optional) Select Warehouses for which the carrier will be available.
- Proceed to providing Shipper info which are your company contact details and will be used for generating labels:
- Shipper name
- Shipper address
- Shipper postal code
- (Optional) Shipper state
- Shipper country code
- Shipper phone number
- Shipper mail address
- Goods description
- Enter the User name of your UPS account.
- Provide Password for this UPS account.
- Enter the Shipper attention name that will be printed on shipping label.
- Fill in the Notification email address.
- Fill in the Access license number which is the access key obtained from UPS.
- Enter your Shipper account number connected to the access key.
- Click Test credentials to verify that the authentication was successful.
- You can now choose the Service code to be used on this account.
- Save or Save and Close carrier to apply changes.
Once ready, Enable the carrier to immediately include it to the carrier distribution.