Bowker
About Bowker
Bowker Transport, a family-owned logistics operator established in 1919, offers a comprehensive range of transport and warehousing services in the UK. As a member of Palletline, the only UK pallet network selected for Amazon's Inbound Preferred Carrier Program (IPCP), Bowker Transport ensures reliable and cost-effective delivery to Amazon Fulfillment Centers with fixed time slots. Their extensive network of strategically located distribution centers across the UK and a dedicated support team simplifies and speeds up the inbound freight process, providing customers with seamless transportation solutions.
ShopCtrl integration with Bowker API allows to send shipments directly to Bowker, specify the delivery time limitations, receive and print PDF shipping labels per pallet, tracking codes and tracking URLs.
The Bowker carrier integration is compatible with half-pallet and pallet-sized packages, and supports 2 delivery types:
- Economy
- Next day
How to start using Bowker carrier integration
An employee must be assigned to the shop with a Shop Owner Admin role to perform actions referred to in this article.
To start using Bowker carrier integration, you need to obtain credentials for API integration (user name and password) from Bowker support.
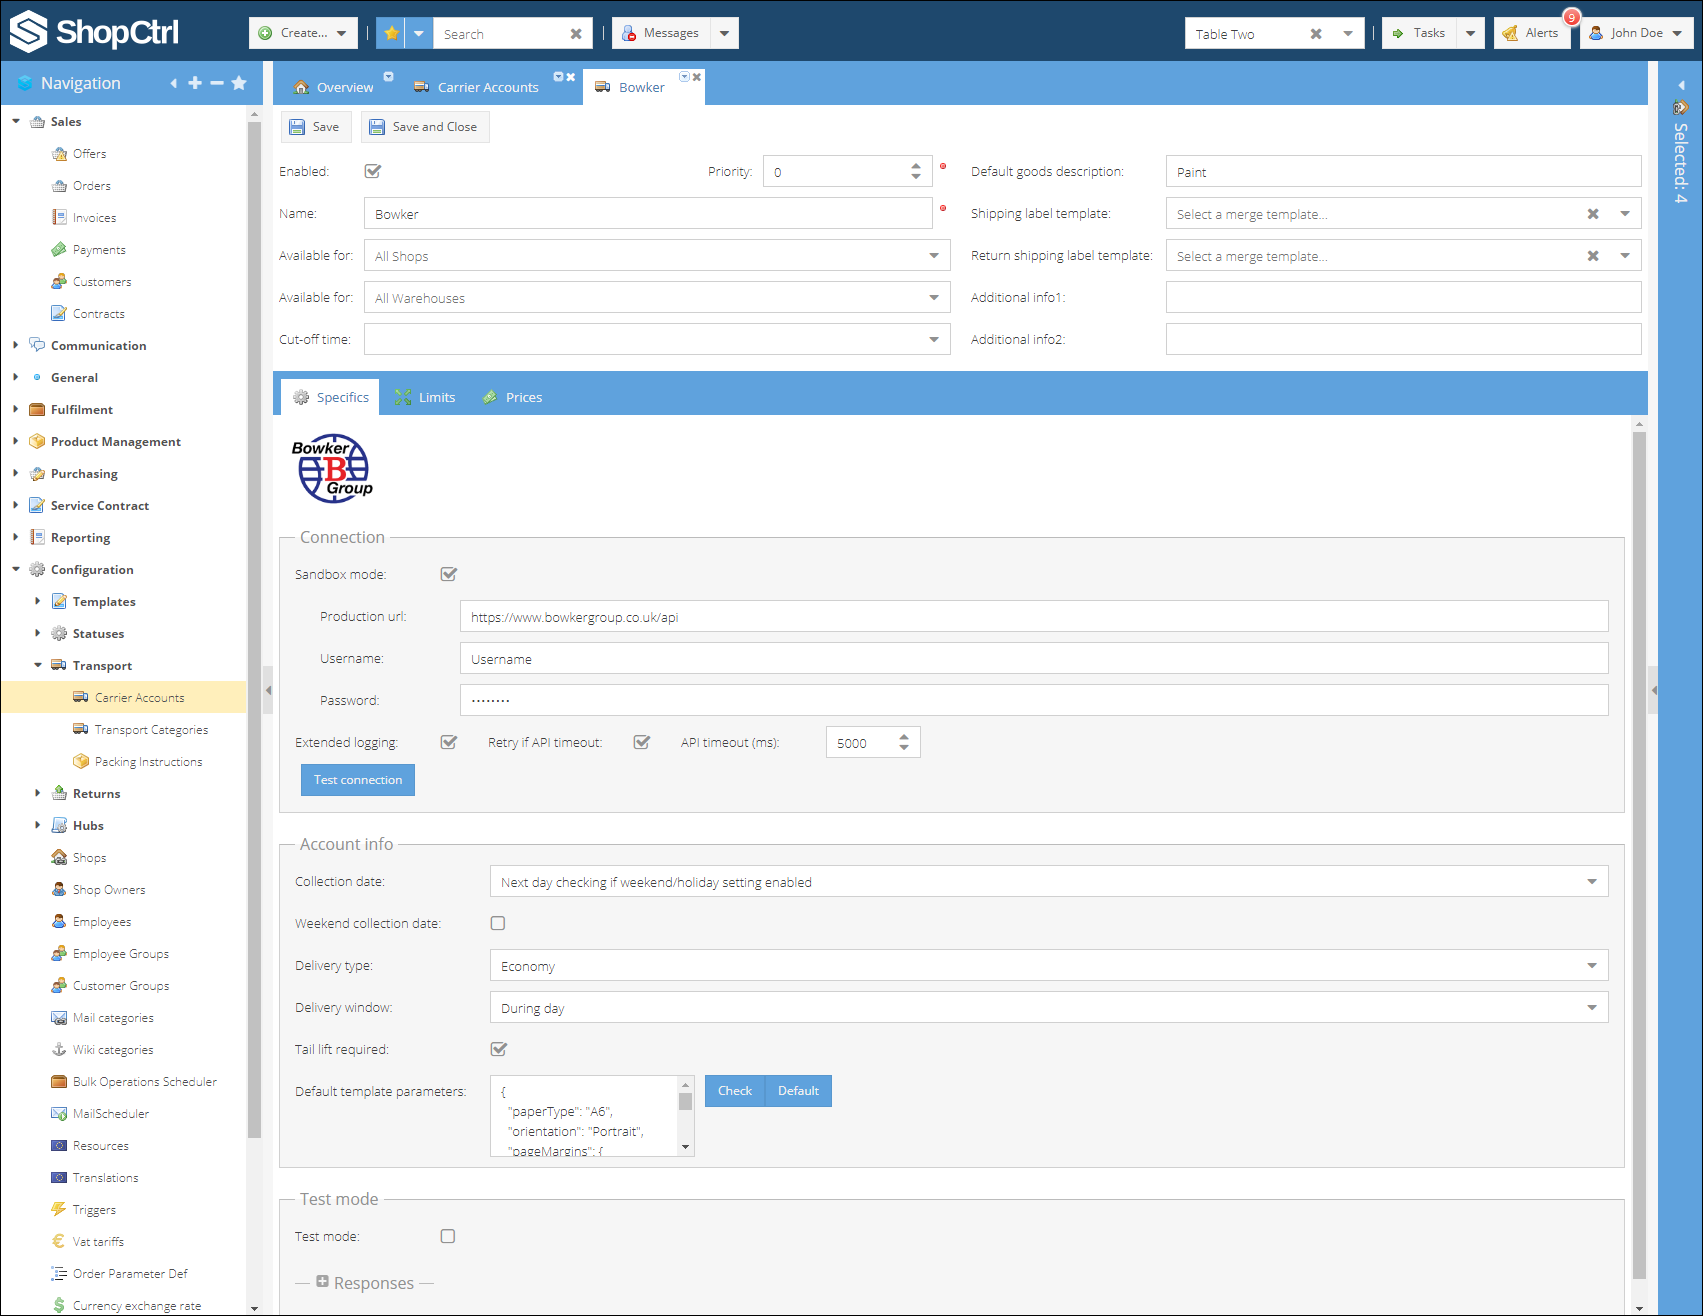
How to create and configure a Bowker carrier account at ShopCtrl:
- Log in as a user with shop owner permissions.
- Go to Configuration > Transport > Carrier Accounts.
- Click Add and select Bowker carrier from the list.
- Type in preferred Name for the integration.
- Set carrier Priority.
- Choose Shops and/or Warehouses for which the carrier will be available.
- On the right provide the Default goods description for your shipments. You can override it later for particular shipments.
- (Optional) On the Specifics pane check the Sandmox mode, if you would like to create a label with
TESTorder prefix in the production environment.
Bowker doesn't provide a dedicated sandbox environment. To test the label creation you can use this checkbox to create a label in the production enviroment with the TEST number prefix. This will identify that the label was created for testing purposes and should not be routed.
- Verify the pre-filled Production url with the data provided by Bowker.
- Enter Username and Password provided to you by Bowker support team.
- (Optional) Enable the Extended logging for the starting period.
- You can now Test connection to verify if authorization at Bowker is successful.
In case of authorization errors, please verify the credentials entered with the data provided by Bowker, or contact Bowker support.
- On the Account info section specify the preferred Collection date:
- Do not specify- could be specified later for a specific shipment in the package parameters.
- Today regardless of weekend/holiday
- Next day checking if weekend/holiday setting enabled
- Enable the Weekend collection date if needed.
- Choose Delivery type:
- Economy
- Next day
- Choose the default Delivery window:
- During day
- AM (incurs extra charges)
- PM (incurs extra charges)
- Book in
- At (delivery time is required for this option for the specific shipment, incurs extra charges)
- Decide whether Tail lift is required for loading.
- Default template parameters are predefined. All of the parameters could be adjusted:
- Paper type
- Orientation
- Page margins
- Label size
- Add or remove page break between labels
- Save the new carrier account.
You can test and print the example Bowker shipping label template by enabling the Test mode. In the test mode ShopCtrl will use the same sample Bowker label each time you create a shipment. You can adjust the label size and margins as many times as you need till it fits your requirements. No real labels will be created while testing. Disable the Test mode and Sandbox mode when the testing phase is over.