Products
This section gives an overview of all the products your company is selling. Both products, product groups, and selections can be managed from the products page. All of the products that exist in your system are created on a shop owner level. So you can move, add and update products within all of your sales channels from one place.

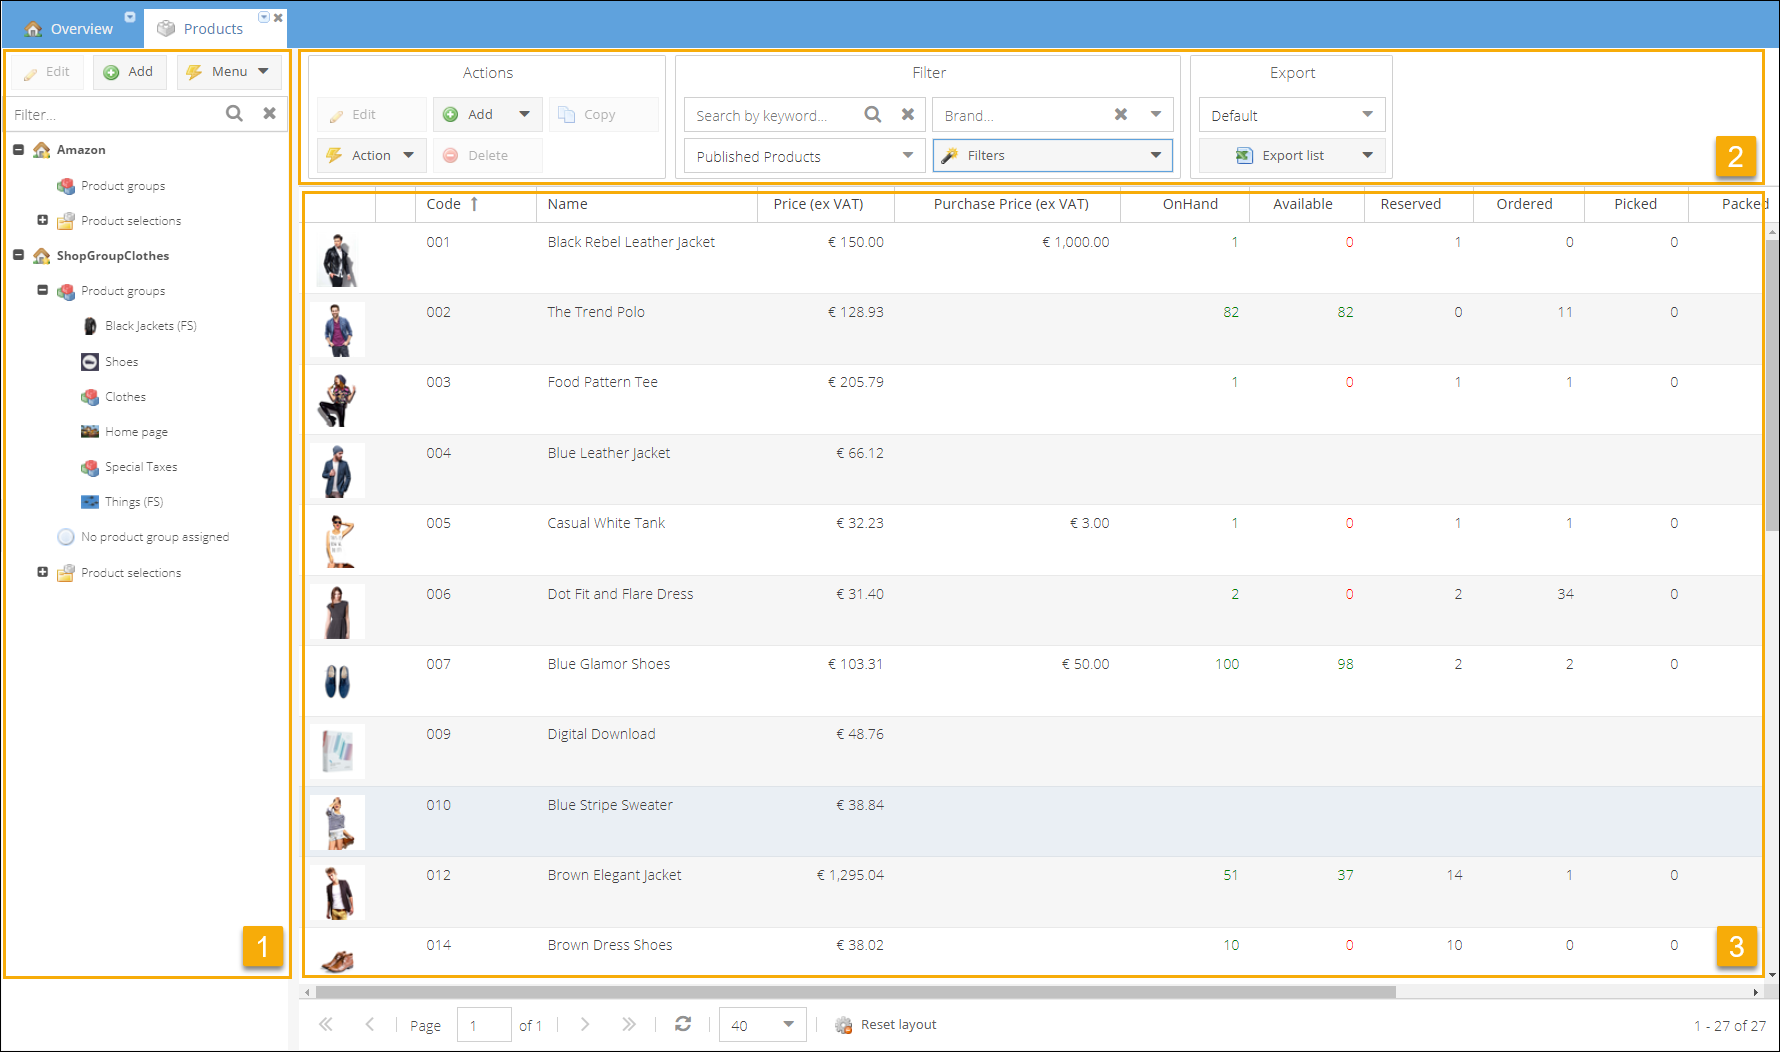
The products page is divided into two parts: groups and selections tree (1) and products pane with a top action menu (2 and 3). The set of actions in the top menu changes depending on whether the selection or group is chosen.
Product groups and selections tree
The first level in a nodes tree is the name of your shop group. It is followed by three nodes: Product groups, No product group assigned, and Product selections.
Product groups tree - repeats the product catalog structure of your sales channels. Click the shop group name or product groups node to display all of the products of this shop group. To filter the products by the group they belong to, click on the particular group name.
For your convenience, all products that are not included in any category can be found in the No product group assigned folder.
Product selections are created automatically per shop and store all products being sold on a particular shop, together with prices and VAT tariffs.
The top action menu in the tree pane provides the possibility to manage both product groups and selections.
Top action menu products pane
Within this panel, you can view, add, edit and manage products. Action buttons in the top menu become active when you select a product row. You can open products for editing by double-clicking the product row or selecting a product row and clicking the Edit button.
To change the product's publication status, you can select one or several product rows and click the Action > Publish/Unpublish selected products button.

By default, the filter is set to published products, but you can also change it to All or Unpublished products. You can filter products by keyword, brand, or price.

To filter by price, click the More filters button, select a price range and click Apply. You can decide whether to include End of Life products or not.
To filter by Properties, click Add Property and select a property caption to filter by. Property will be added to the filter and you can now select an option or fill in the desired value. Click Apply to filter by all parameters selected. Available property types to filter by: dropdown, text, text area (complete match), data, number and yes/no.

Export There is an option to export products grid with detailed information or a short stock state update into an Excel sheet. You can export all products, current page or only selected products. Use dropdown to select an export profile, to export a customized Excel file. An import profile could be an export profile as well; please see Product Import via Excel for more information about how to create a profile.
The top actions menu will change when you select one of your shop's active selections.

Within the selection, you can manage products included in this selection. Open products for editing, copy products and remove from the selection chosen. You can not manage the publication status of the product in the particular selection, but it is possible to filter products by publication status. New products created are automatically included in all of the active shop selections.
Products grid
The product grid displays the content of the node chosen on the left side. You can click the Product Groups node to show all of the products created in the system.
By default, the products grid displays the products prices and stock allocations summary. But there is also a set of other columns available. You can configure the grid overview by adding and deleting columns. Please see Customizing the table layout for more information.