Product Groups
Product groups and selections could be viewed and managed from the tree pane in the products section.
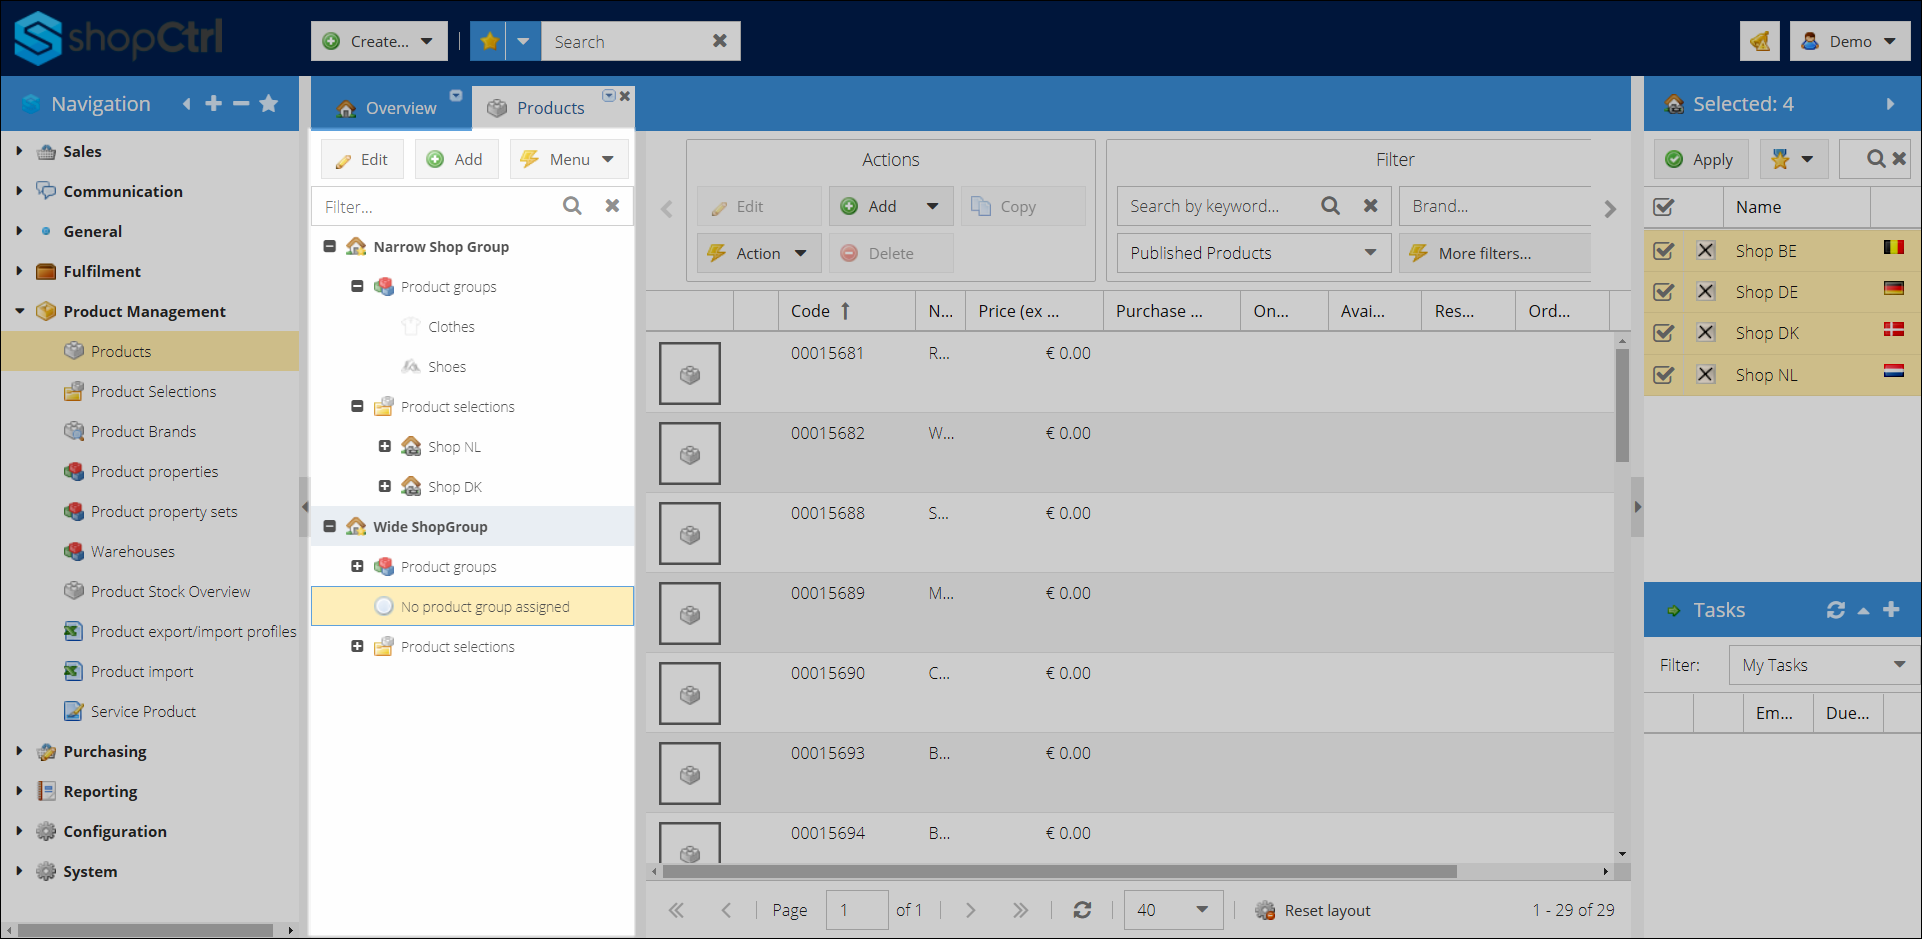
Product groups for each of the shop groups are located under the Product groups node. Click on the group node to open the products list in the product pane on the right.
The tree structure repeats the product catalog structure of your sales channels.
You can add new groups, edit existing ones, and delete groups from the top action menu on the top of the tree pane.
How to create product group
To create a product group:
- Open Product Management > Products tab.
- Inside a shop group, select the main Product group node to create a new group. To create a sub-group, select a group node that will be the parent group.
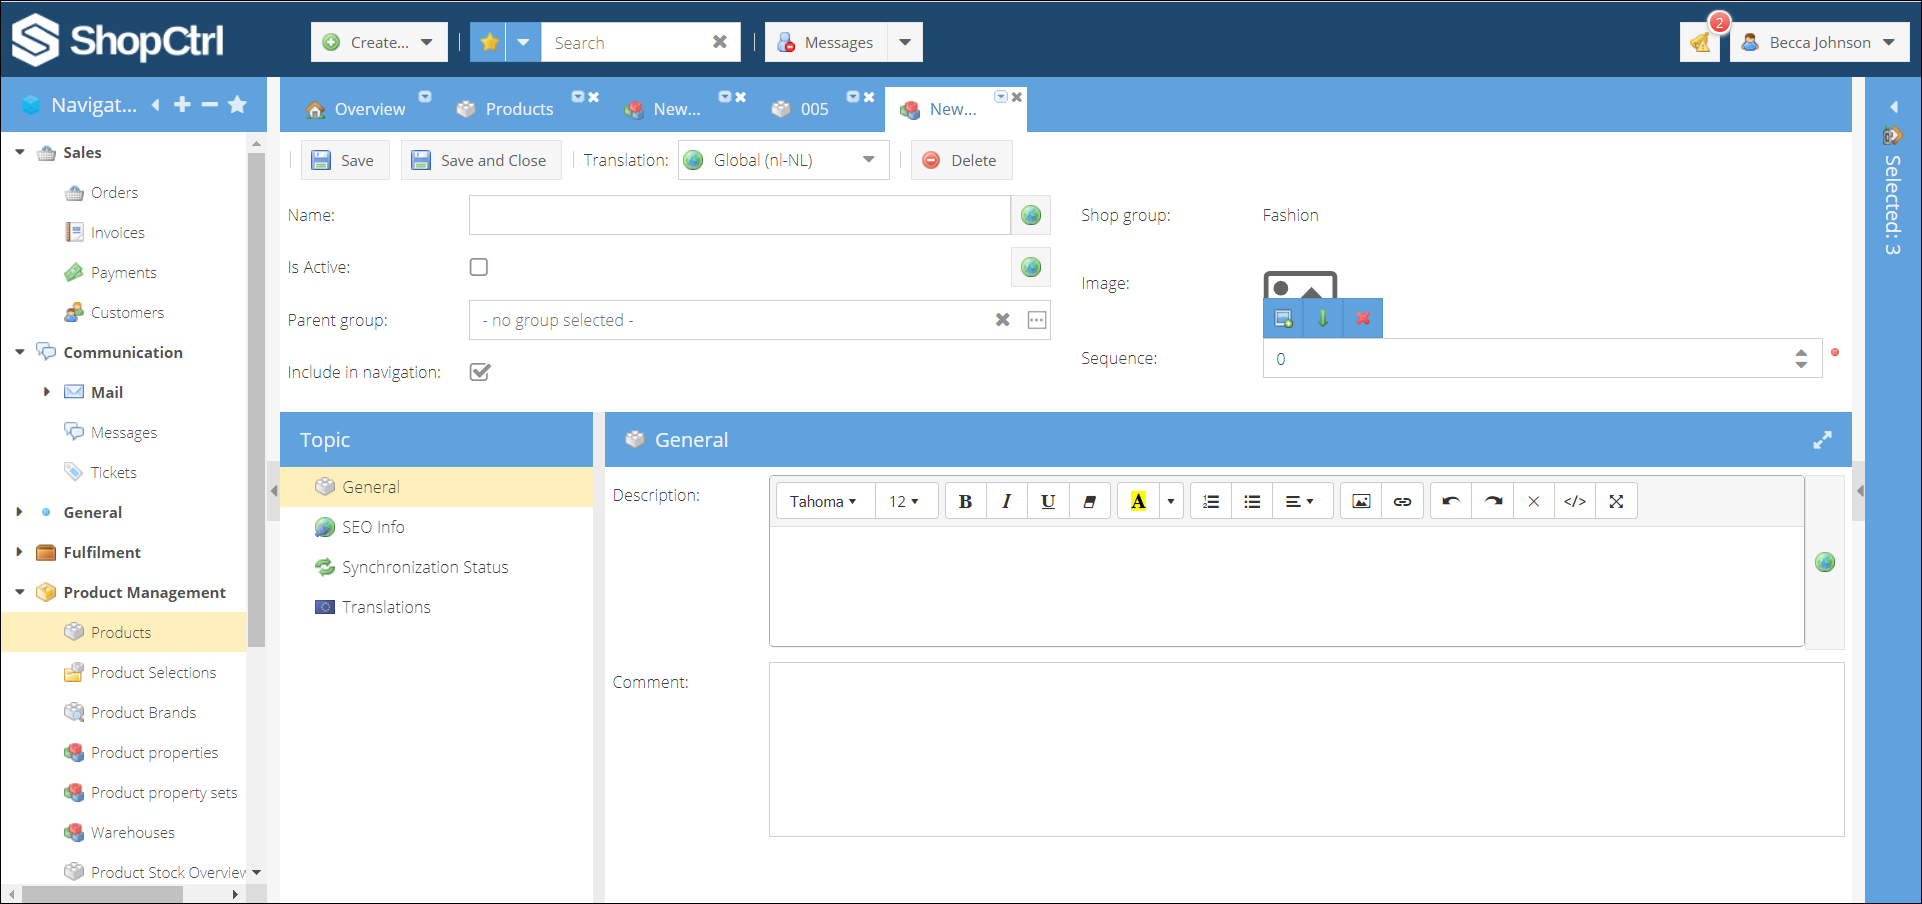
- Click Add in the top menu of the group's tree pane. A new product group details page will be opened in a new tab.
- Fill in the group Name.
- Select whether you want to make the group active by marking the Is Active checkbox.
- Select or change a parent group if you are creating a sub-group by clicking the three dots button. Or leave the "-no group selected-" value if you are creating a parent group.
- Deactivate the checkbox Include in navigation if you want this group to be hidden from your webshop navigation.
- You can select an image that will be shown in the product group tree and also synced to the webshops linked.
- Choose the place of your product group in the group tree by changing the Sequence number. If the same sequence is set for several groups, they will be sorted alphabetically.
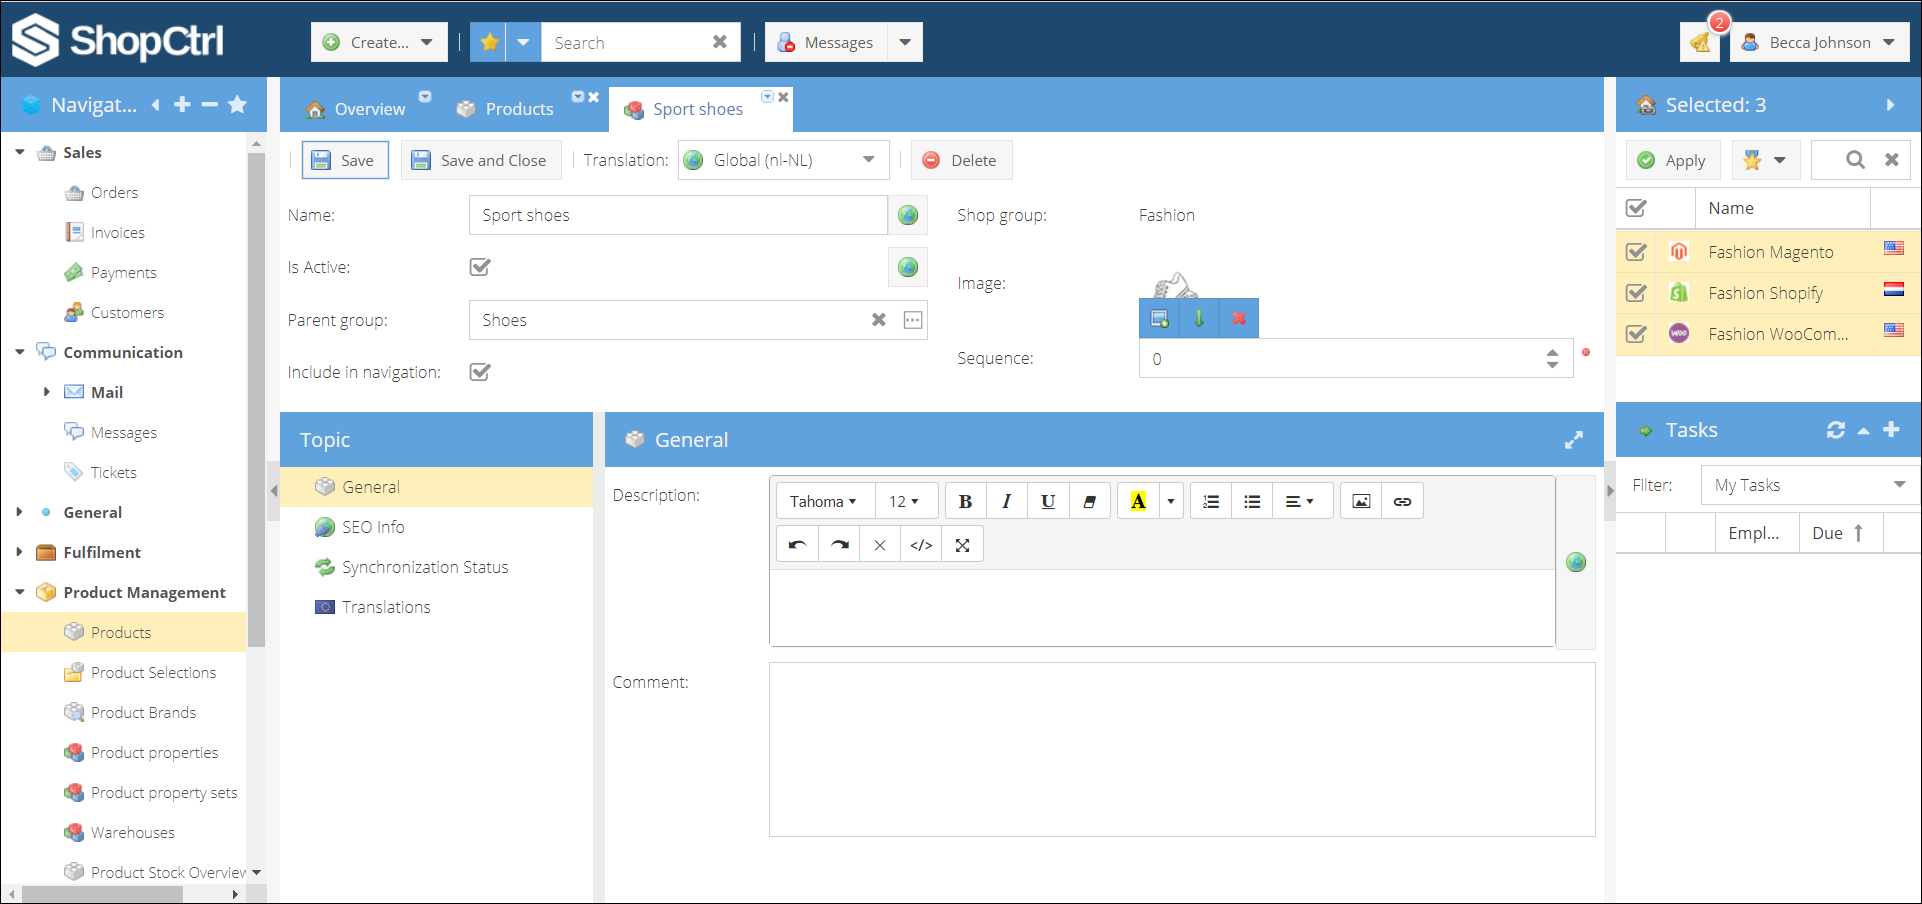
- In the Topic menu > General tab, enter the group Description. You can use the built-in WYSIWYG redactor or switch to HTML view to enter text using HTML syntax.
- (Optional) Enter a Comment that will be used for internal purposes only. Same throughout the translations.
- Select SEO Info in the topic menu and enter Meta Title, Keywords and Description.
- Repeat the steps for other translations if needed.
- Select the translation to be edited in the top Translation dropdown.
- The specific translation page will be loaded, and you can proceed to fill in the fields data in the language chosen.
- Open the Topic menu > Synchronization Status to manage the synchronization with your webshops connected.
- Uncheck the Sync enabled checkbox if you do not want to synchronize the product group to the webshops immediately.
- Sync now - synchronize the selected row. A task will be created and launched in the background.
- Resync all - synchronize the group with all of the webshops.
- Click Save or Save and Close to apply changes.
After the product group is saved, you can fill it with products by dragging and dropping one or multiple products into the selected category.
Another way to change the group a product is assigned to is by editing the product details. Select the "Product groups" menu item on the product details page and activate the appropriate checkboxes to include the product edited into the relevant product groups.
How to copy product group
You can also copy an existing product group, including description, SEO info, and translations:
- Open Product Management > Products tab.
- Select a product group in the tree pane.
- In the top menu, click More > Copy.
- Copied group will be opened for editing. Fill in the group name and change the data accordingly.
- Click Save or Save and Close.
How to edit product groups
To open a product group for editing:
- Open Product Management > Products tab.
- Select a product group in the tree pane.
- In the group tree panel top menu, click Edit.
- You can now change the product group details, visibility, and manage translations and synchronization status. Open the Topic > Translations tab to manage the translations across the shops.
- You can change the group place in the group's tree by changing the sequence number of the product group.
- Click Save or Save and Close to apply changes.