How to Set Up Price Export to Amazon 3P
Setting up an efficient price export system is crucial for maintaining consistency and accuracy across your sales channels. ShopCtrl serves as the point of truth, exporting prices to all marketplaces and sales channels to ensure the correct Product Information Management (PIM) across all points of sale. This tutorial will guide you through the steps needed to set up price export to Amazon 3P, ensuring your prices are always up-to-date and synchronized with Amazon. Follow the steps below to get started.
Step 1. Verify Product Prices in ShopCtrl
Before setting up the price export, ensure all products published on Amazon have correct prices in ShopCtrl. Price updates can be performed via product Excel import: How to import product price and change product availability per shop.
You can use the same profile to export products and check for any missing data. For final verification, use the same shop specific 'Price update' profile to export products from ShopCtrl, ensuring all products are updated.
Now we can move to the next step.
Step 2. Configure and Test Price Validation in ShopCtrl
The price validation feature can be used independently from the price export. It checks for product price differences in the background. Alerts will be created for all products with prices differing from those in ShopCtrl.
Steps to Enable Price Validation:
- Locate the shop with set up Amazon 3P synchronization in ShopCtrl and open it's settings.
- In the topic menu select Synchronization settings > Amazon 3P Synchronization.
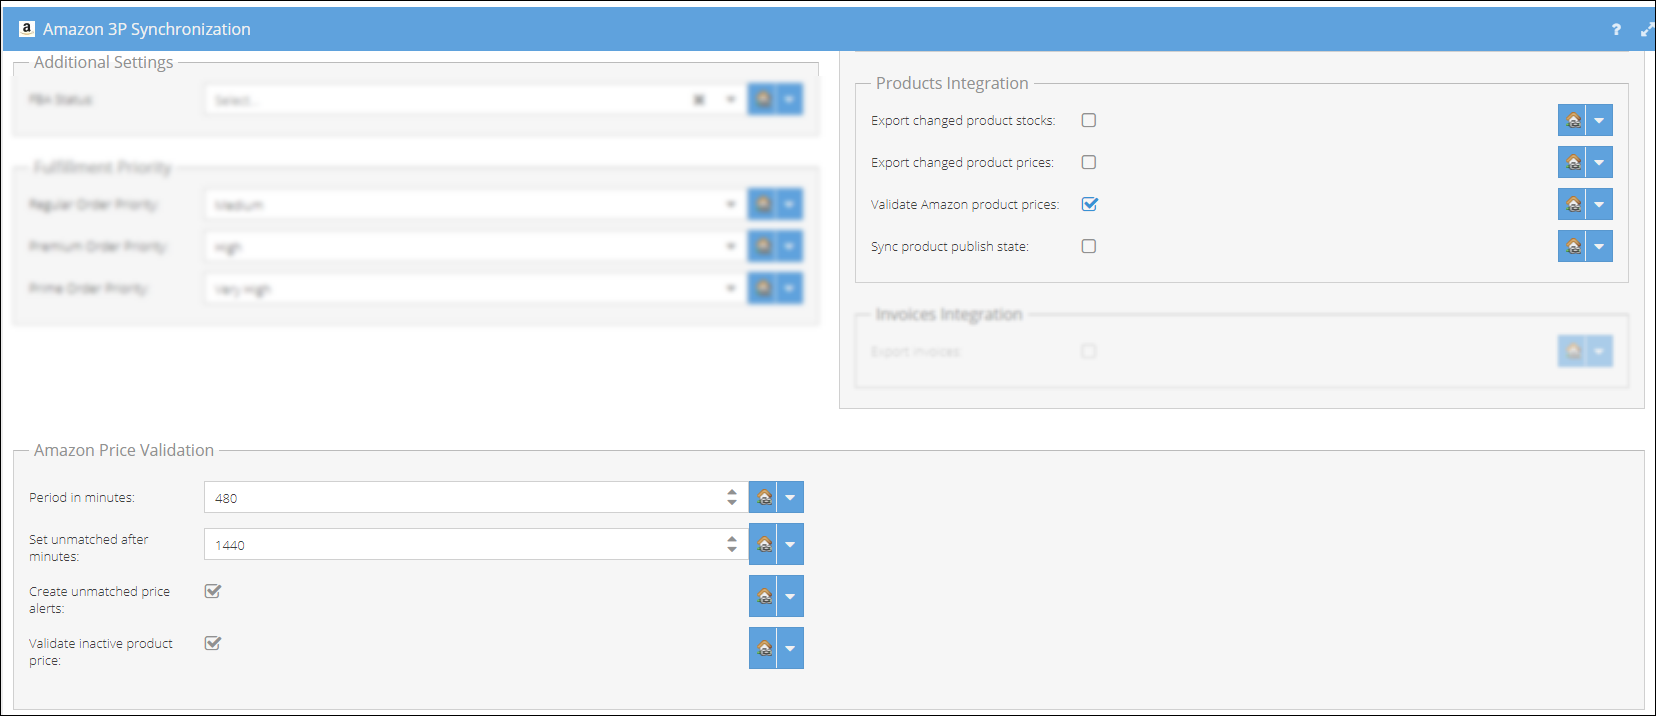
- In the Synchronization Customization pane under Products Integration enable:
- Validate Amazon product prices: Periodically requests a report from Amazon and validates price discrepancies.
- Configure the Amazon Price Validation pane:
- Period in minutes: Specify the interval (in minutes) for requesting the price inventory report from Amazon. The recommended setting is 8 hours.
- Set unmatched after minutes: Define the time period (in minutes) after which a price is considered unmatched on Amazon Seller Central. The usual setting is 24 hours (1440min). ShopCtrl is considered the source of truth.
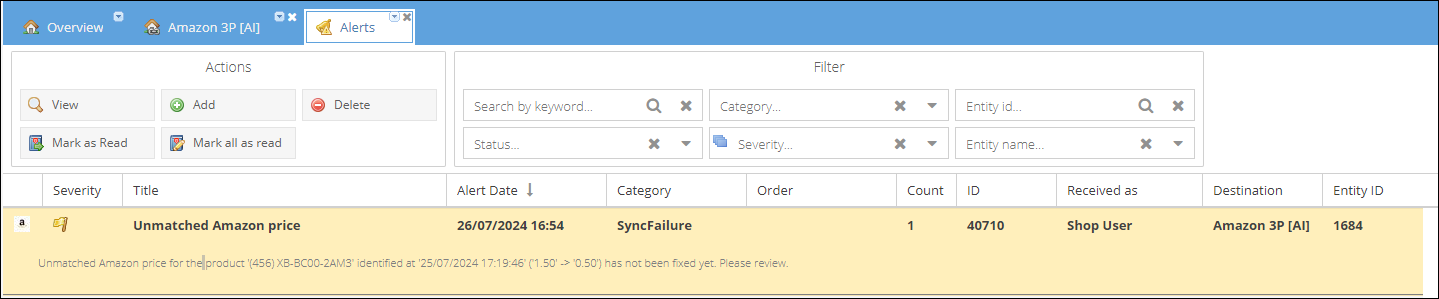
- Create unmatched price alerts: Decide whether to generate alerts after the specified period for unmatched prices. These alerts will include detailed information about the product and the price difference with Amazon Seller Central.
- Validate inactive product price: Choose whether to compare prices for inactive products on Amazon. If not selected, these products will be excluded from the report, reducing the number of products to compare.
- Click Save or Save and Close to apply changes to the shop.
Testing the Price Validation Feature
To test the Price Validation feature, Price Export feature doesn't need to be enabled. For testing purposes, we recommend to temporary set the Set unmatched after minutes and Period in minutes periods to 1 hour. This way the Price Validation will be tested within one working day.
If all product prices match the Amazon listing prices, you can test with several specifically chosen products. Change the product price in ShopCtrl to the amount that differs from Amazon (with the Amazon Price export feature disabled in ShopCtrl, so the change won't be synced to Amazon). ShopCtrl will request a report from Amazon, analyze it, and create an alert after the set period of time.
After testing is finished, return the periods and prices to their default values. Frequent report retrieval might affect the overall Amazon 3P feature performance on the environment.
Step 3. Configure and Test Price Export from ShopCtrl
After enabling synchronization, ShopCtrl will start recording price changes. Note that price updates made before enabling this feature will not sync to Amazon. This way, you can monitor the changes and test them with a limited set of test products.
To Test the Feature:
Ensure no changes are made by other employees to the product prices in the same environment during the testing period. As an option you can test on the so it won't affect your sales. Choose one or several out of stock products on Amazon with inactive status. Amazon doesn't accept updates for closed listings, but out of stock listings' prices can be updated.
Enable the product price export:
- Locate the shop with set up Amazon 3P synchronization in ShopCtrl and open it's settings.
- In the topic menu select Synchronization settings > Amazon 3P Synchronization.
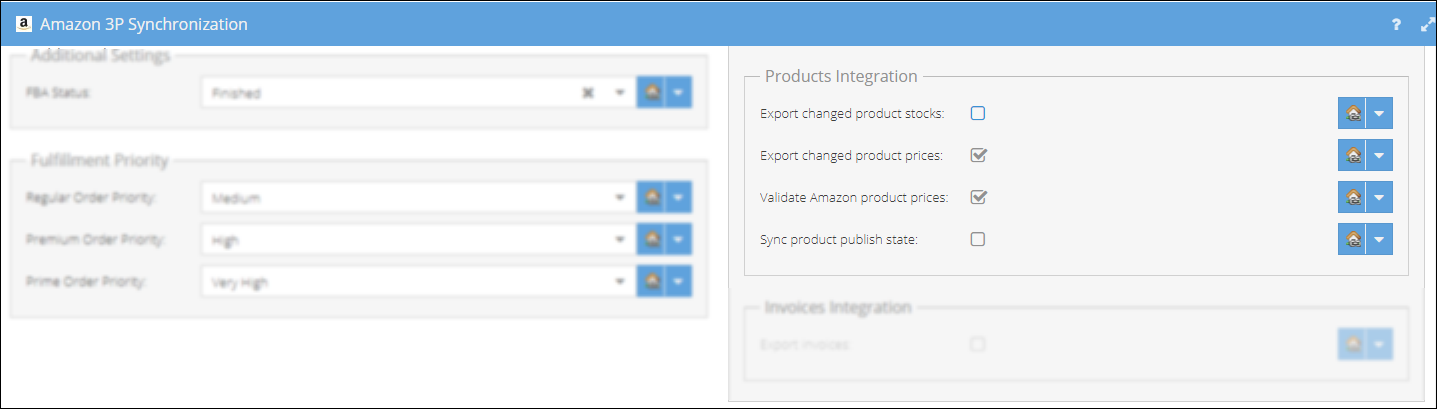
- In the Synchronization Customization pane under Products Integration enable:
- Export changed product prices: Updates corresponding listing prices.
- Ensure Sync product publish state feature is disabled for the shop.
- Click Save or Save and Close to apply changes to the shop.
Now we can change product price at ShopCtrl.
Update product price manually or via Excel product import feature.
How to update product price manually:
- Open the product in ShopCtrl and proceed to the Retail price tab.
- Double-click on the Amazon 3P row and change the Foreign Price Including VAT value for the Amazon shop.
- Save the product.
The product price change will sync to Amazon within 15 minutes. However, Amazon might take longer to process this change. Log in to Seller Central and verify the price change was applied for the specific product after 1-12 hours. If the price change violated Amazon price rules, check the notification on the product.
ShopCtrl will also request a product report from Amazon in the background and create alerts if prices are not changed within the specified period (default 24 hours).
If you have many out-of-sync prices before enabling synchronization, contact ShopCtrl support to perform an initial bulk export.