Manage Returns
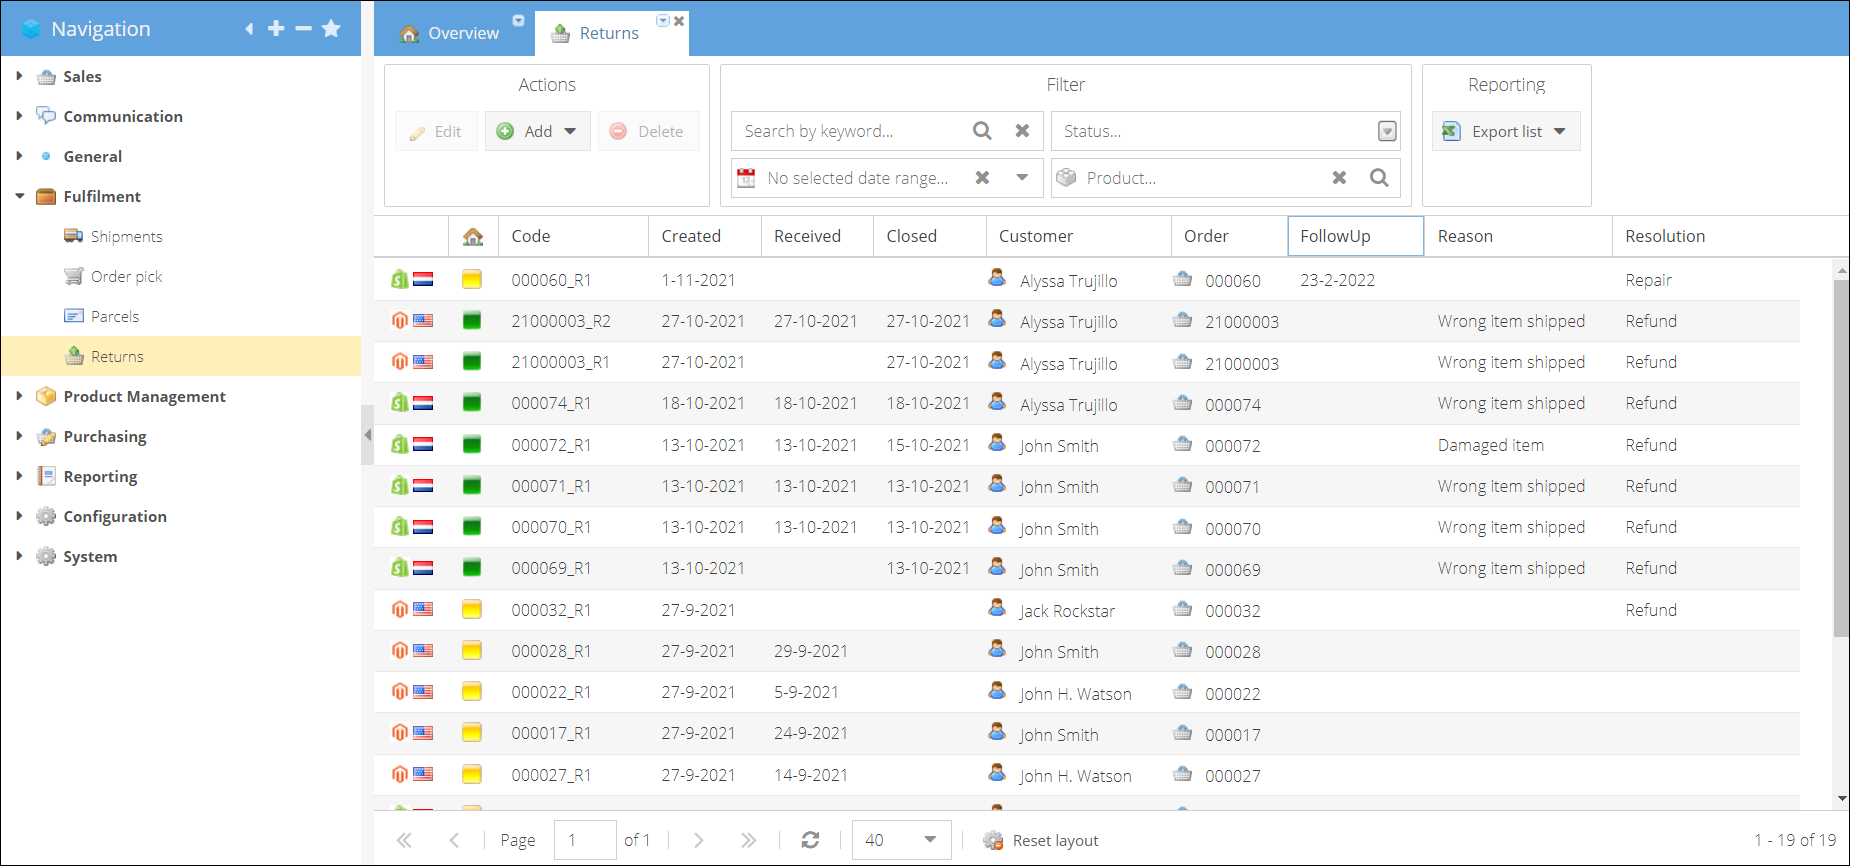
Your client's return requests could be registered and managed from the Fulfilment > Returns page. Here you can register the products that need to be re-sent or repaired. Re-stock the items returning to the warehouse and automatically create a credit invoice and corresponding refund payment to the customer.
You can set up any return reasons and conditions for the items to be returned. Check more here - Configure returns.
Return resolutions
There are several resolutions that could be applied to the product being returned:
-
Resend - for the returned parcels that need to be resent to the customer.
-
Repair - for the products that need to be repaired and sent back to the customer.
Resend and repair resolutions do not imply that the product will be re-stocked to the warehouse.
-
Exchange - for this option, you can re-stock the returned item (even as a different product) back to the - warehouse.
-
Refund - allows to re-stock the product and provide a refund for the customer.
Creating return
If you receive a return notice from a customer, the first step will be to register this request.
You can create a return from the Fulfillment > Returns tab or directly within the specific Order details page > Topic menu > Returns.
To register a return request, create return:
- Go to Fulfillment > Returns.
- Click Add and select a shop from the dropdown list where the order was shipped from. A new return will be opened on a new page.
- Type and select Order code in the orders field.
- Select a warehouse where the return is heading. By default, the warehouse where the order was shipped from is preselected.
- You can now enter the customer comment, notes, link, or create a ticket.
- Select a Follow Up date if needed.
- Save and close the page to apply changes to the return.
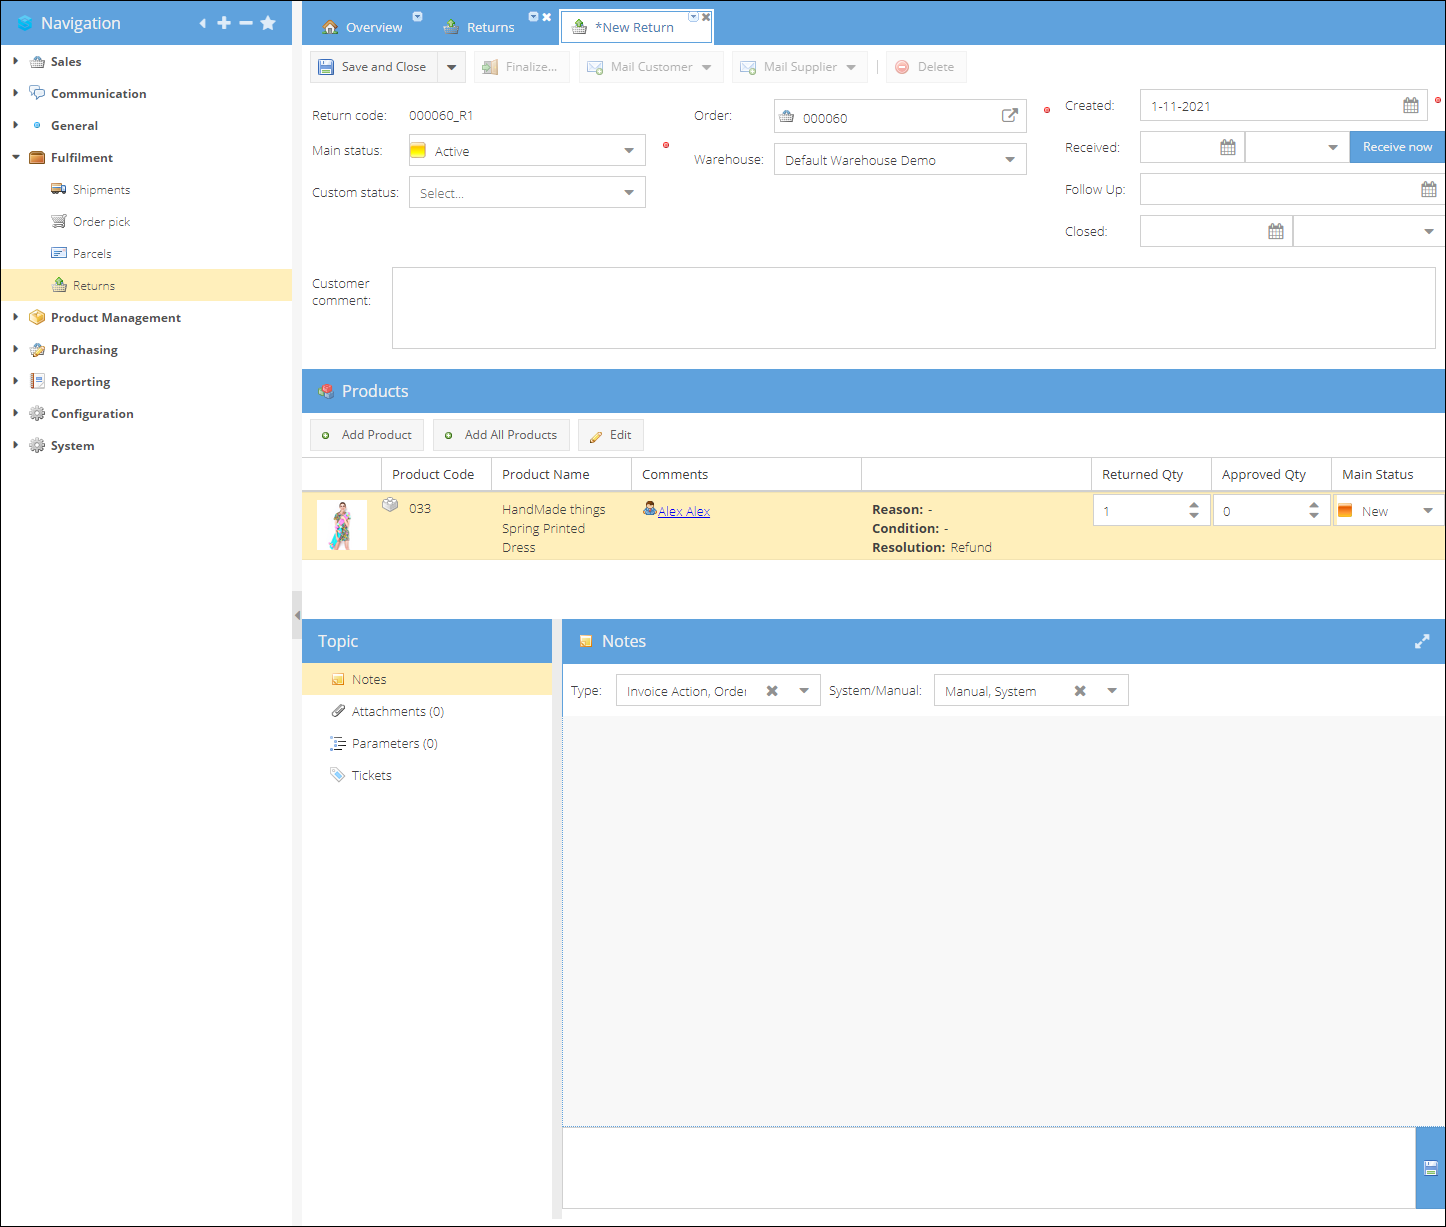
Once the return arrives back at your warehouse, you can continue registering it. The following steps will differ depending on whether the product needs to be re-stocked or not.
- Open the return for editing.
- Select the Received date and time.
- Click Add product to select a specific product from the order to return. You can add a separate row for each of the stock items returned.
- (Alternatively) Click Add All Products to add all of the products shipped for the order.
- Add a note to the return if needed, attach the documents or any other relevant information.
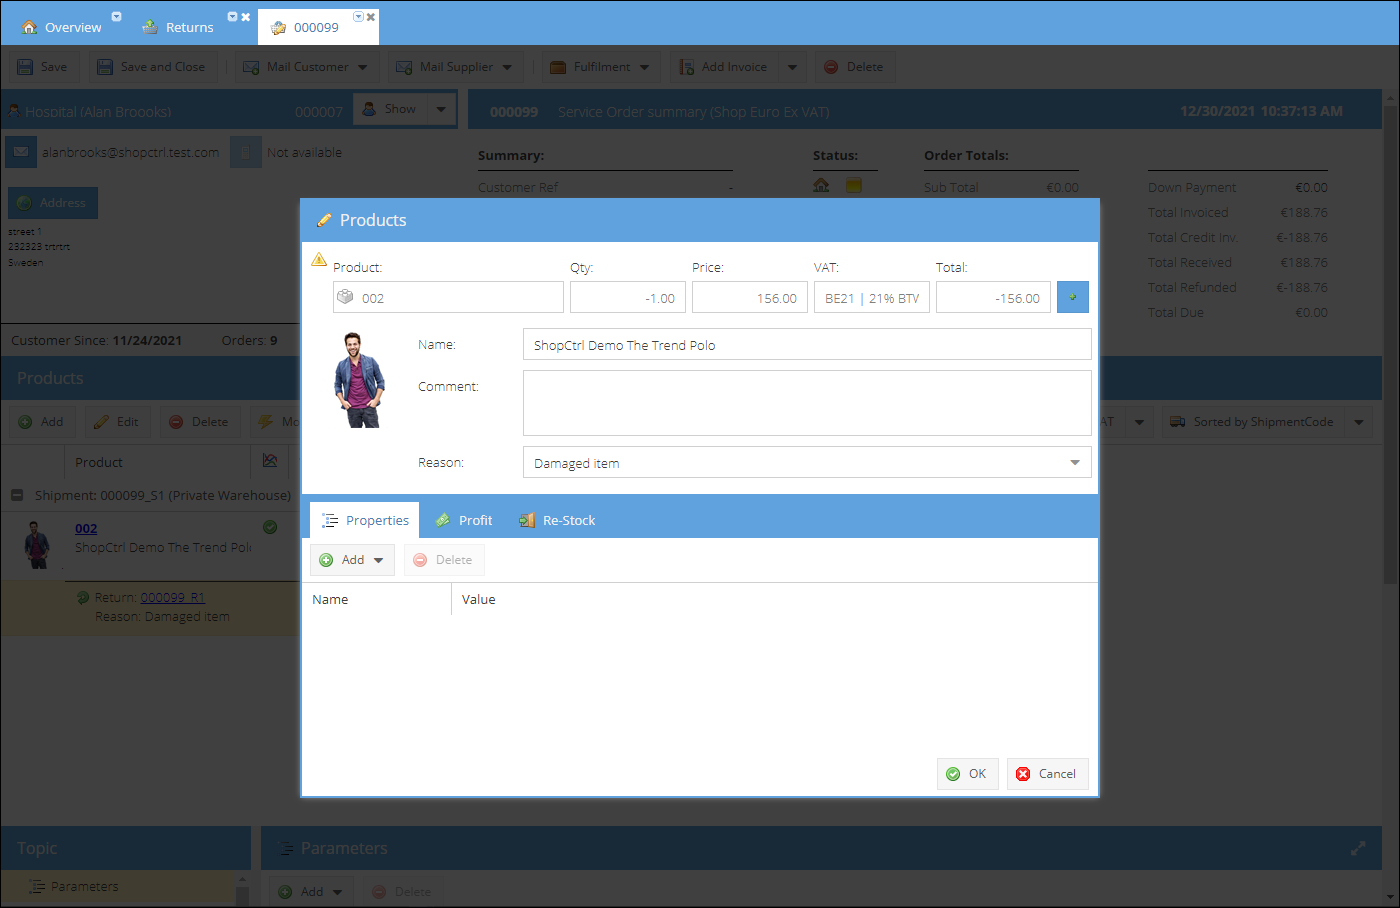
- Select a product row that has been received and open it for editing.
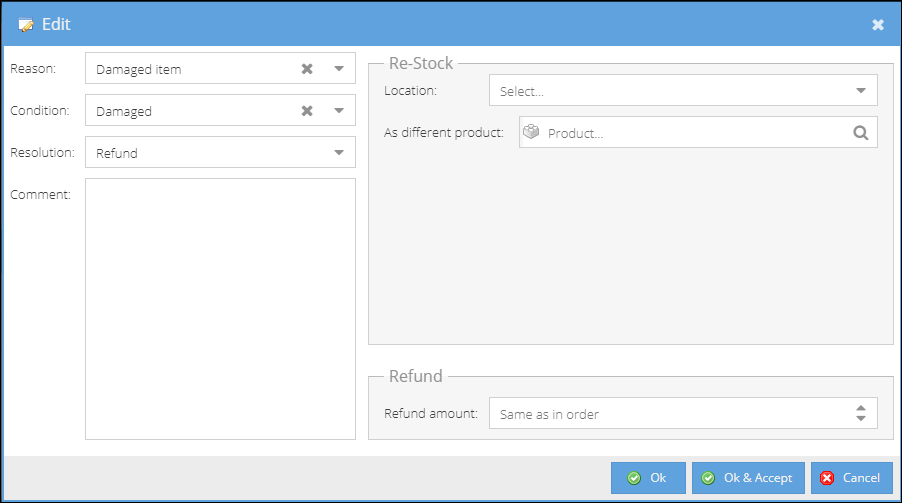
- Select a Reason why the product is being returned.
- Select a Condition in which the product arrived.
- Decide what Resolution to apply to the product.
- If the product needs to be Exchanged or Refunded and thus re-stocked, you need to specify the location the product is going to be re-stocked to. It could be a quarantine location to isolate the item from the regular stock.
- (Optional) You can add the item to stock as a different product.
- If the customer asks for Refund, enter the amount to be credited or leave the value default to "Same as in Order."
- Click Ok to save the change. Or Ok & Accept to change the row status to Accepted.
- Repeat for the other products being returned.
- Click Save and Close to apply changes.
Finalizing return
Once the decision has been made on each return row, you can proceed to finalize the return and create a credit invoice.
To finalize the return and refund the order:
- Open the return for editing.
- Click the Finalize button on the top action menu.
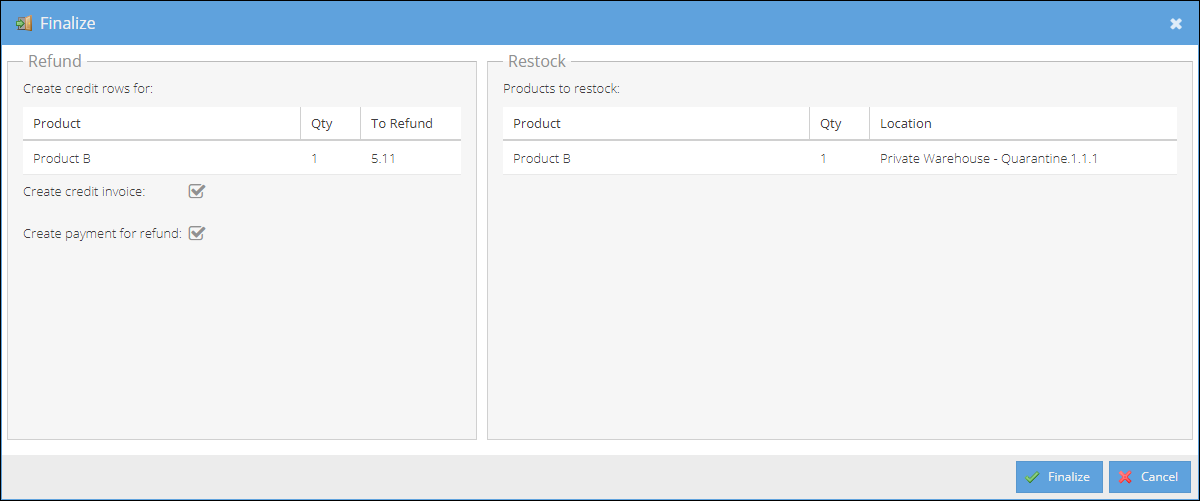
- Choose whether you would like to Create credit invoice and Сreate the payment for refund.
- Click Finalize to generate the credit invoice, create a payment, provision received stock items to the warehouse, and change the return status to finished.
The credit invoice will be generated based on the template set on the specific shop. Return reason along with the return code will be displayed for the credit row on the order details page.
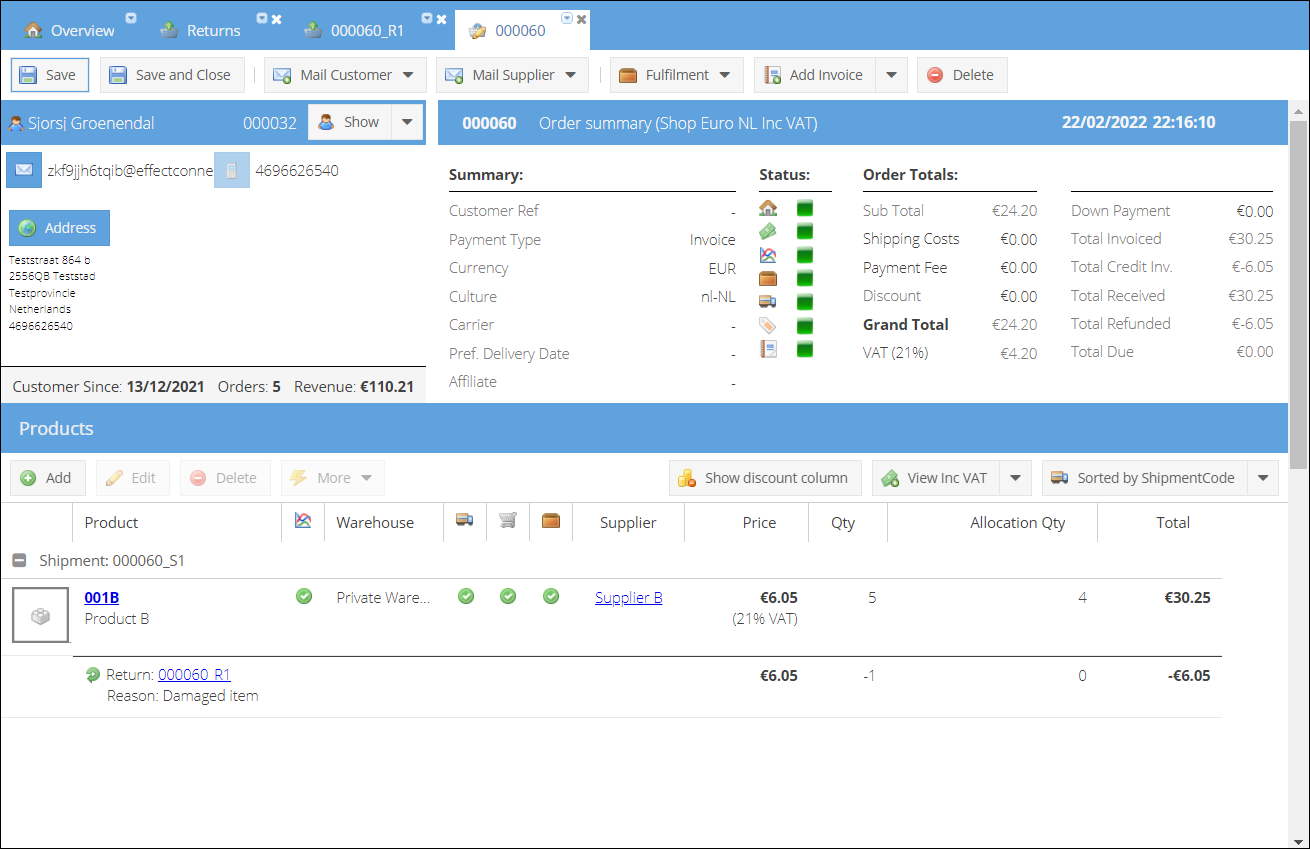
The return reason is also used as a credit reason on the order row.
Once the return is finalized, it is not possible to edit it anymore.
Exporting returns to Amazon
To synchronize returns created in ShopCtrl to Amazon, enable the Export returns feature in Shop Settings > Amazon Synchronization tab of the designated shop. Please check the Setup your Amazon synchronization in ShopCtrl for more information.
After the Export returns feature is enabled, returns created in ShopCtrl are synchronized to Amazon. Currently, only Refund resolution is supported and only returns with this resolution are syncronized to Amazon.
Once you receive the returned item or whole order, register it back at your warehouse by creating a return with corresponding reason and resolution. When finalizing a return, you can choose whether to refund an item(s) or the whole order.
Finalized returns will be syncronized back to Amazon, and Amazon will issue a full or partial refund to the customer.