Ticket Detail Window
Using the ticket detail window, you can add or modify (existing) ticket information. To display the ticket details, simply double click on a ticket or click the edit button in the main ticket screen.
An example of the ticket detail window:
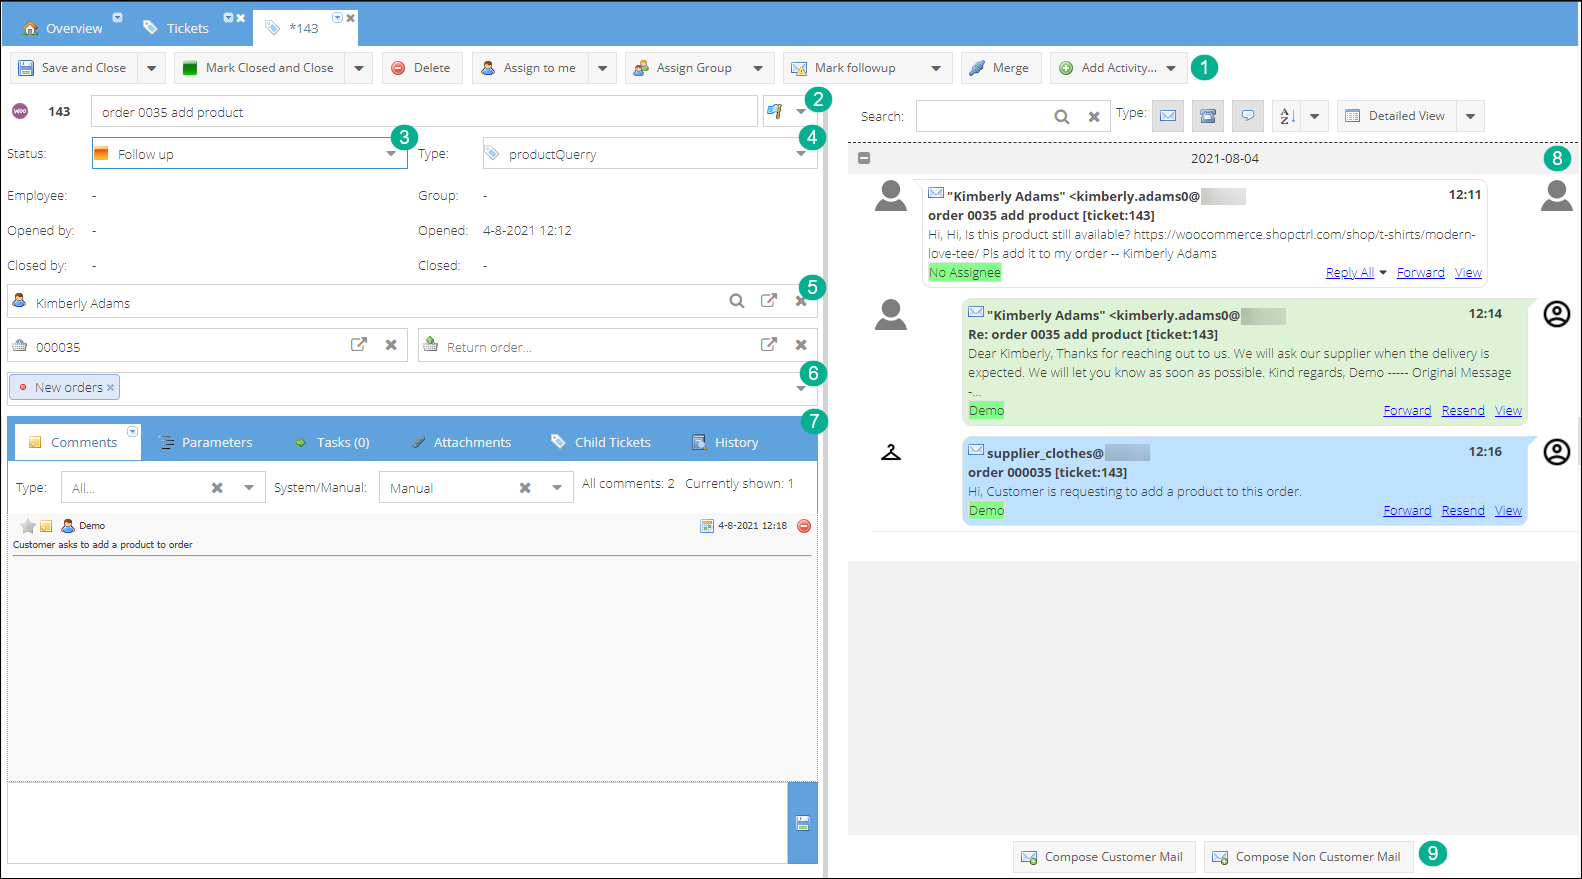
1. Action buttons
The Menu section of the ticket detail window contains all necessary action buttons.

Save (and close): Store this ticket (and close the ticket detail window)
Mark closed and close Update the ticket status to ‘Closed’ and close the ticket detail window
Wait for customer and close: Update the ticket status to ‘Waiting for customer’ and close the ticket detail window. The ticket will still be visible until the customer responded.
Delete Remove this ticket
Assign to me … Once a ticket has been opened, use this button to assign the ticket to yourself or another employee.
Assign Group … Once a ticket has been opened, use this button to assign the ticket to a group or team.
Mark follow-up Push this ticket to the background for a certain amount of time. After the follow-up period, the ticket will be displayed again.
Merge Merge the ticket with it's duplicate.
Add Activity Specify a category and hours for a new activity connected with the ticket.
2. Ticket Priority
Set or view the ticket priority.
3. Ticket Status
Set or view the ticket status. Ticket status can be managed in the Configuration menu (submenu Statuses). Predefined status types:
| Ticket status | Description |
|---|---|
| Closed | Ticket was closed after solving/answering the initial question. |
| Closed – Waited for customer | If a ticket conversation is inactive for a certain amount of time without a response from the customer, ShopCtrl will close the ticket automatically. The preferred inactivity time can be determined using ticket settings. |
| Follow up | When setting the ticket to a follow-up status, the ticket will be ‘off radar’ and not appear as an open ticket. After a predefined number of days, the ticket will become visible again in the ‘open’ ticket section. Please note, the ticket will also turn active again when receiving a reply. |
| Open | Ticket is open and requires a reply |
| Open – From close | Ticket was reopened after it was previously closed. A closed ticket will also reopen after a new inbound message was received. |
| Open – From follow up | ShopCtrl assigns this status to a ticket that was previously in the ‘follow up’ state. |
| Waiting for customer | A message was sent to the customer. The ‘waiting for customer’ status is assigned until the customer replies. |
4. Ticket Type
Set or view the ticket type.
5. Customer name
Using the email address or phone number, ShopCtrl attempts to retrieve an existing customer. It’s also possible to select a customer manually.
6. Ticket Category
Set or view the ticket category. A ticket can be assigned to multiple categories. You can manage the category list within the Configuration Menu -> Mail categories.
7. Ticket Context menu
Comments Read/Write internal comments. These comments will not be shared with customers and/or suppliers. Parameters Manage ticket parameters History The history panel displays extensive logging of all actions performed on this ticket. Attachments Add / download /delete attachments related to the selected ticket.
8. Communication window
A listing of all messages within the selected ticket. This includes all the communication channels (Mail, Phone, Whatsapp or socials), and also external messages (for example, suppliers or other web care teams). There is a clear distinction in message types. Light gray: incoming customer message Light green: reply of the customer support agent Blue: non-customer communication
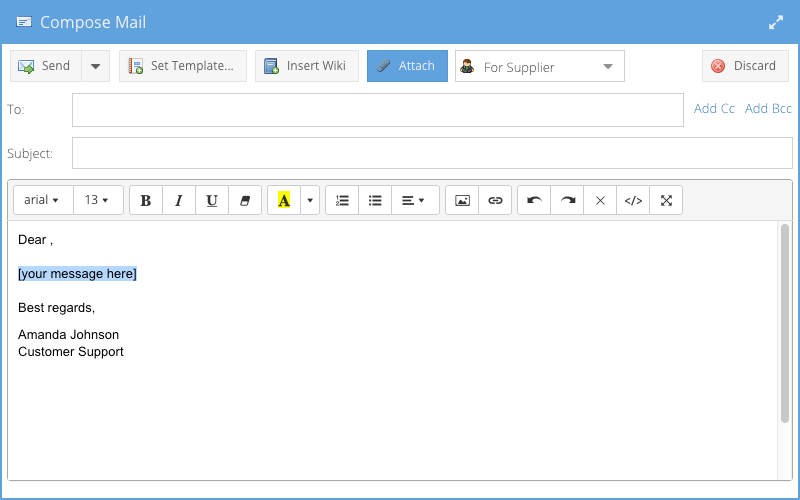
9. Reply section
Click the ‘Compose customer mail’ to send a direct reply to the customer Click the ‘Compose non-customer mail’ to reply to a third party (teammate, supplier, etc.) A reply window is similar to the screenshot below: