Ticket Configuration
An employee must be assigned to the shop with a Shop Owner Admin role to perform actions referred to in this article.
To start using the ShopCtrl ticketing features, it is necessary to update the communication settings of the designated shop.

See also: Setting Service Level for a shop.
General settings
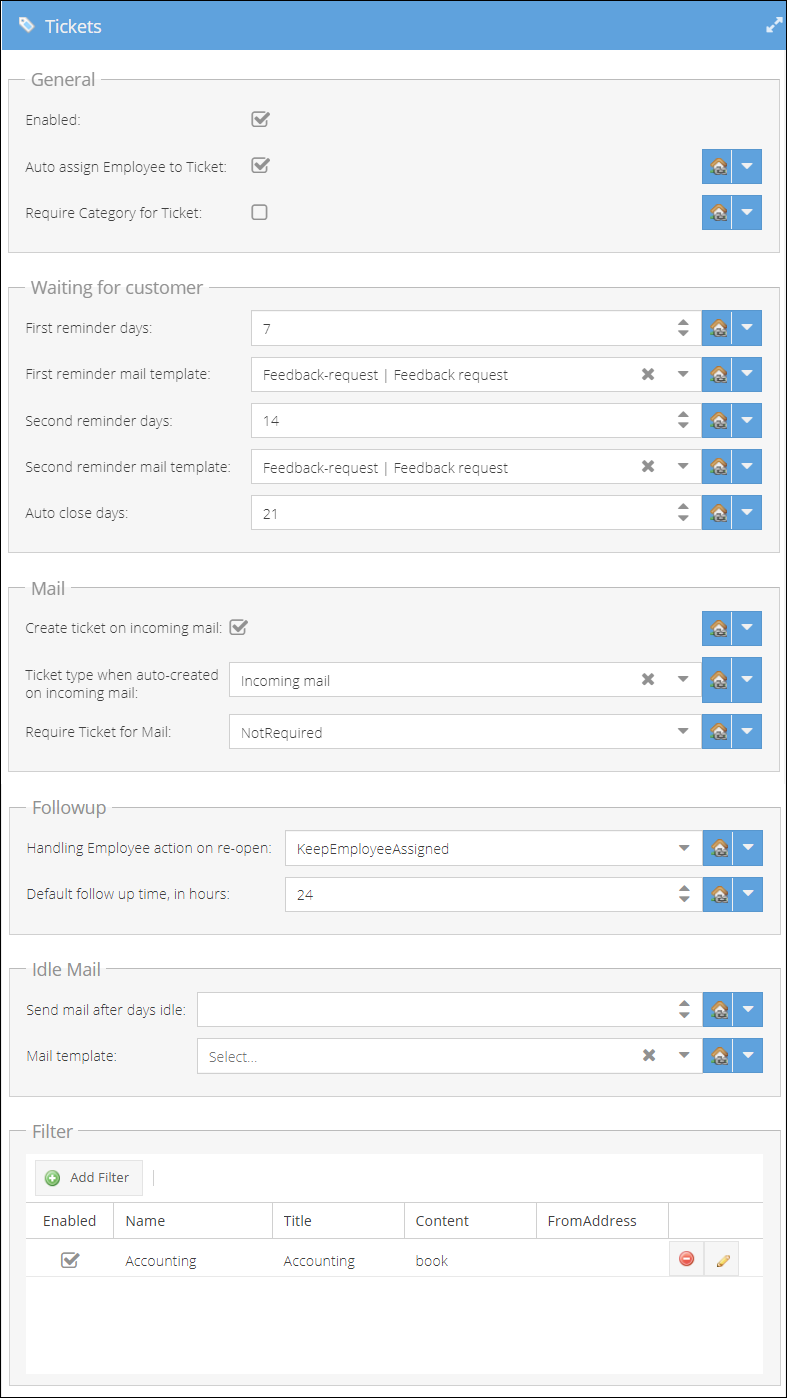
- Open the Shop Details page > Communication > Tickets
- The ticket feature is either on or off. When it is not activated, incoming mails will be visible in the ShopCtrl Mail module. To enable the ticketing functionality, mark the Enabled checkbox.
- Click Save to apply the changes.
- (Optional) Mark the "Auto assign Employee to Ticket" checkbox if you would like to auto-assign a non-assigned ticket to the employee who opens it for viewing or editing.
- (Optional) Choose whether you would like a category to be a required field for a ticket.
- Click Save or Save and Close to apply the changes to the shop.
Please note that some settings are only available after you have enabled the ticket option and saved the shop settings for the first time.
Waiting for customer
You can set up auto-reminders for the Wait for customer status tickets to automate the follow-up work. The days' calculation in all three cases starts from the moment an employee changes the ticket status to Wait for customer and close. You can specify the mail templates that will be used for autogenerating reminders. If the customer doesn't answer within the set period of days, the ticket status will be automatically changed to Closed.
Mail settings
Create ticket on incoming mail. If you want to have a ticket created with each new email, mark the checkbox.
You can assign a ticket type on new incoming emails and manage the ticket types within the basic configuration.
Decide whether the ticket is required for the new outbound mail:
- NotRequired - ticket is not required for the outgoing emails
- AutoCreateTicket - a ticket will be created and closed the moment the email is sent.
- WarnUserWhenNoTicket - an employee will receive a warning when sending an email if there is no ticket created for this email
- PreventSendingMail - it won't be possible to send an email without a ticket linked to it.
Follow up - ticket (re)open behavior
Once the system marks a ticket as open, it can be assigned to the same agent, or the assignment can be removed.
Example: Agent answers a customer's question, and the customer is satisfied with the reply. Agent closes the ticket. One day later, the customer asks an additional question using the same ticket ID.
Using the behavior settings, you can determine how you want ShopCtrl to manage this:
KeepEmployeeAssigned: The same agent remains assigned UnassignEmployee: The ticket will be marked as Open and given to a new agent.
Default follow up time, in hours: determines default follow up time. This period will be added to the current user time when changing ticket status to 'Follow up'. You can always use a Mark follow up drop-down on ticket details to set a more specific follow up date.
Idle mail
Here you can set a mail template and a date when the email will be generated and sent to the waiting customers.
Ticket filter
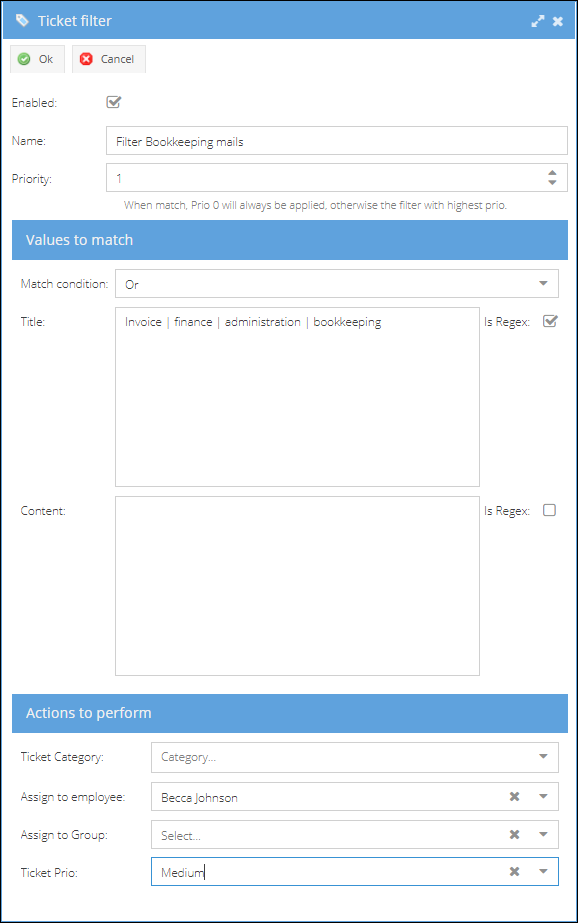
Using the robust filtering algorithm, ShopCtrl enables you to use regular expressions to route specific messages to the correct team or agent. In the sample filter below, we will point out some of the filter features:

- Click the Add Filter button to start creating a new filter rule.
- Provide a brief Name of the filter.
- Select a Priority (0 = highest priority).
- Specify what values to match:
- Choose conditional operator for the following filter: And, Or.
- Enter your search criteria for Title - a subject of the incoming email.
- Or for the Content - email body.
- (Optional) You can use the advanced search and look for specific patterns using regular expressions. Check the Is Regex checkbox and specify the search criteria using regex syntax.
- Decide which Actions to perform when the criteria match:
- What Category to apply to the ticket.
- Which Group or Employee the ticket should be assigned to.
- Choose ticket Priority: Low, Medium, High.
- Click Ok to save the filter.
For more information on Regular expressions syntax please view .NET regular expressions.
Filter Priority. When match, the filter with 0 priority will always be applied. Otherwise, the filter with the highest priority.
How to Create a Spam Filter for Marking Tickets as Spam
To use the "Mark as Spam" feature in the tickets grid, you need to create and configure a dedicated spam filter.
Steps to create the spam filter:
-
Navigate to Shopowner > Communication > Tickets.
-
Create a new filter at the shopowner level so it applies to all shops.
-
Click Add Filter.

-
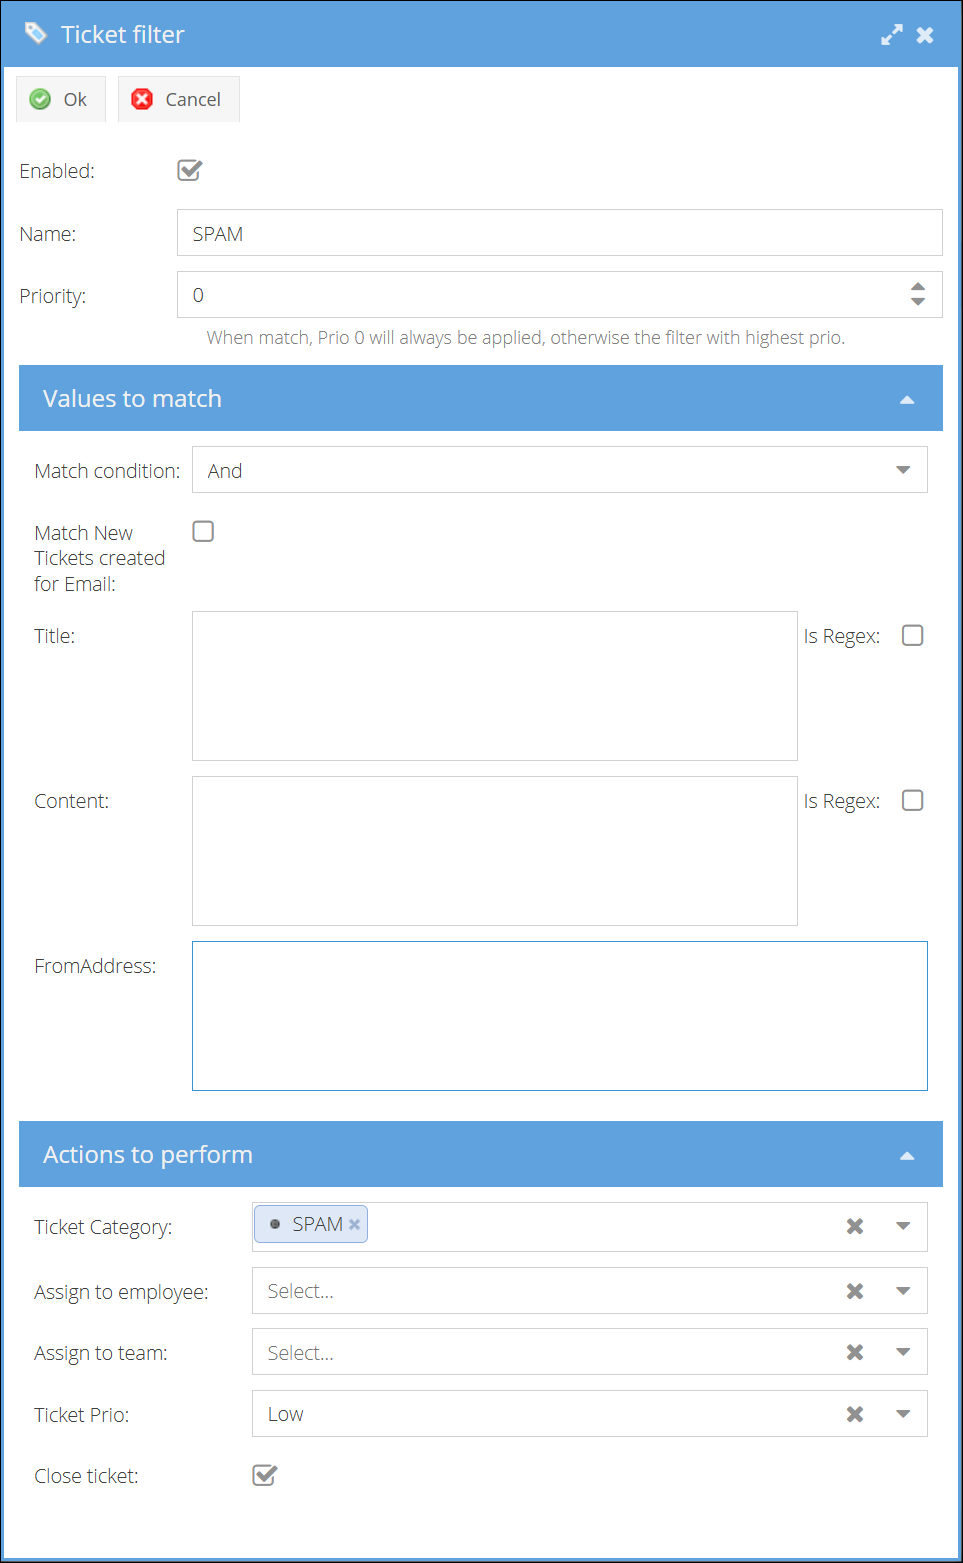
Configure the filter settings:
- Name: Enter "Spam" (recommended).
- In the Actions to perform section, select a "Spam" ticket category to assign to filtered tickets.
- Enable the Close ticket option.
- Ensure the Enabled checkbox is marked to activate the filter.
-
Click Ok to add the filter.
-
Click Save Shopowner to save your changes.
To set as default spam filter:
-
Refresh the shopowner settings tab.
-
Navigate to Shopowner > Communication > Tickets > General pane.
-
Select your newly created "Spam" filter as the default Spam Filter.
-
Click Save or Save and Close.

You can now test the filter from the tickets grid by selecting tickets and using the "Mark as Spam" button.
Employee groups
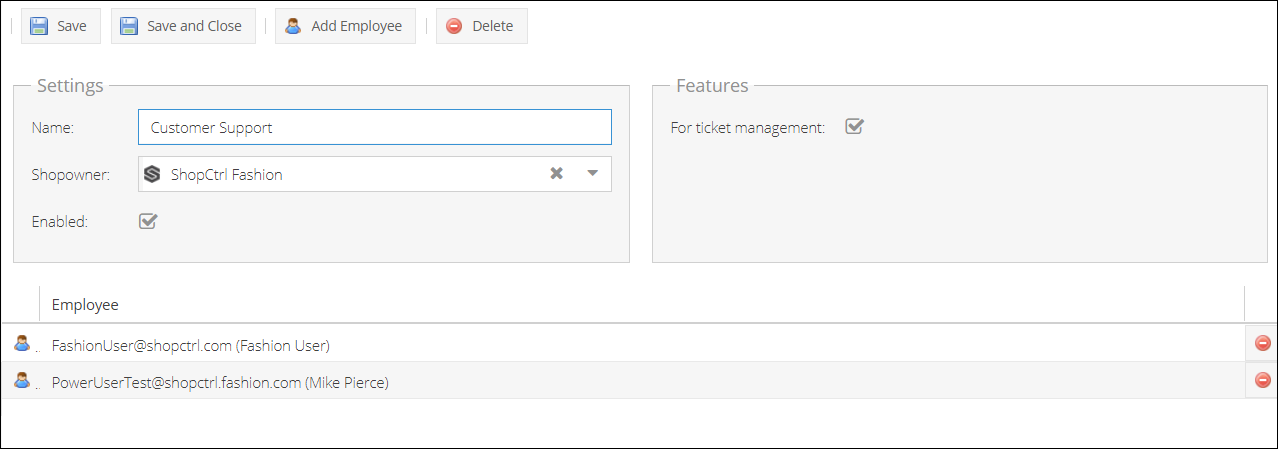
You can create new employee groups in Configuration > Employee Groups or use the existing ones to distribute the inbound tickets between applicable employees. Please make sure to turn on the "For ticket management" checkbox setting on the Employee group details page to make this group available for assigning tickets.
