Getting started with purchasing
An employee must be assigned to the shop with a Shop Owner Admin role to perform actions referred to in this article.
To start using the purchasing order feature and registering purchase data through ShopCtrl, it is necessary to create a separate shop exclusively for purchasing, set up document and email templates, and create suppliers.
Step 1. Create and set shop for purchasing
A purchasing shop is used for registering purchase orders, sales orders are not supposed to be issued from this shop. This is why a limited set of configurations have to be set for the purchasing shop.
How to create a shop for purchasing:
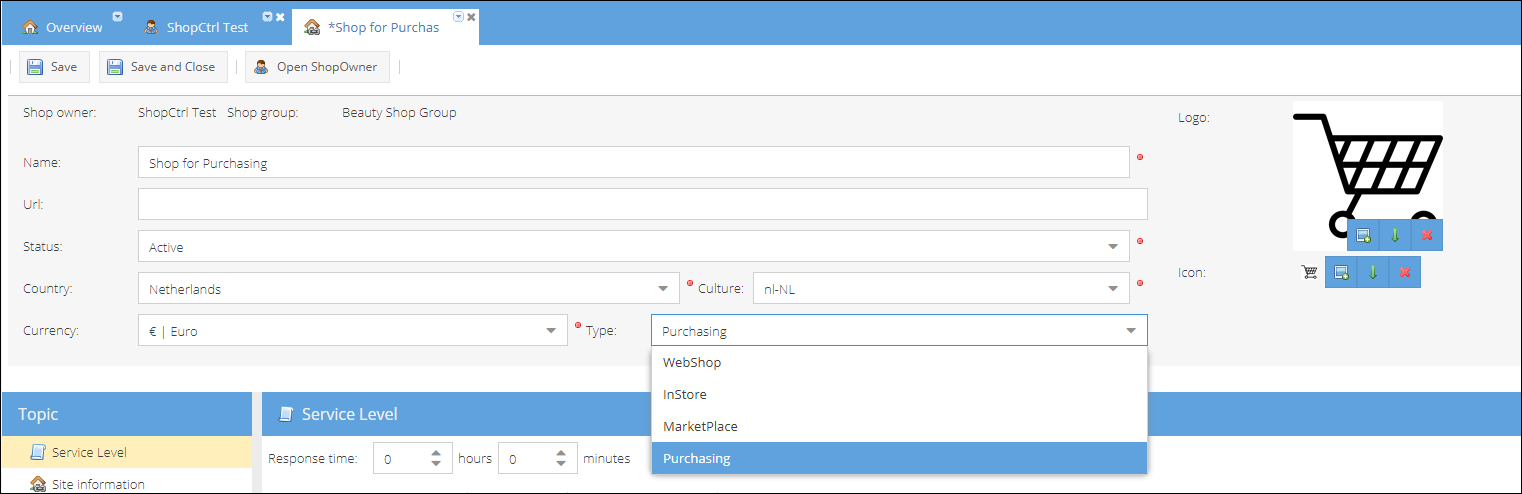
- Open the Configuration > Shops in the main navigation pane.
- Click Add and select a shop group.
- The new shop details page will be opened in a separate tab.
- Fill in the Name of the shop
- Your company Country, Culture and Currency.
- Select shop Type: Purchasing
- Click Save or Save and Close.
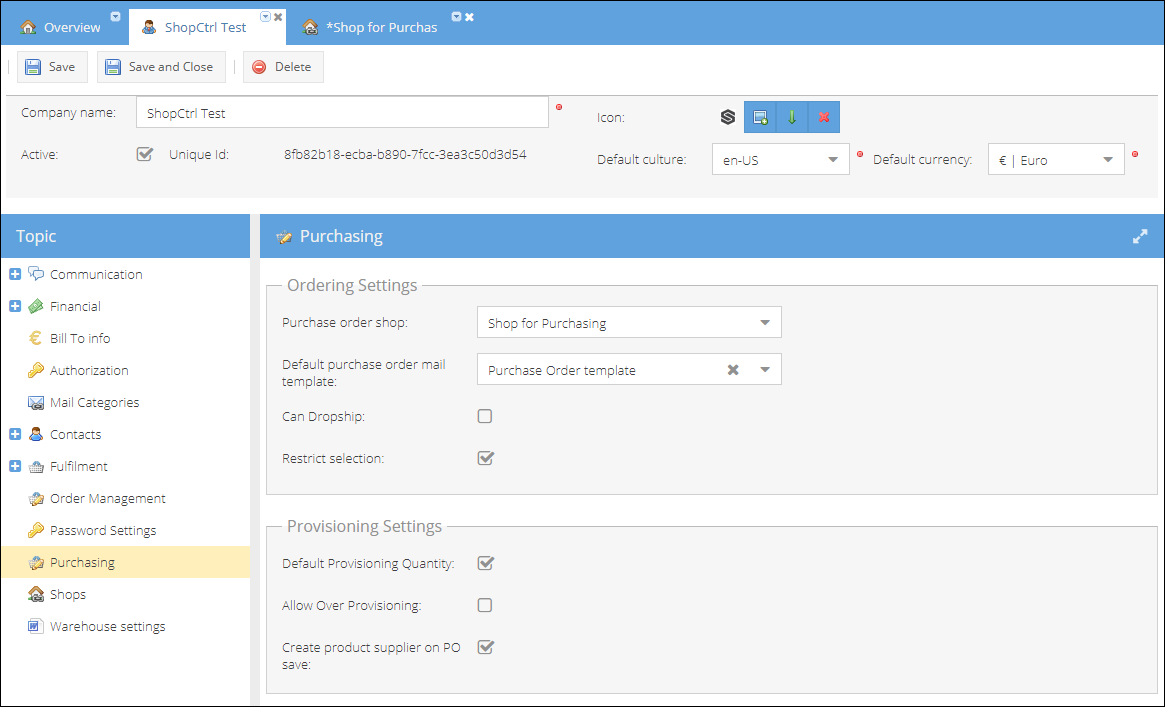
To finish the setup, set the newly created shop as a main shop for purchasing. To do this, proceed to the Shop owner details > Purchasing tab and on the ordering settings select a Purchase order shop.
Step 2. Configure purchasing settings
Provide bill to information for the shop owner
The purchase order invoice address on the purchase order documents is populated by the Shop Owner Bill to information. Which can be modified from the ShopOwner settings > Bill to tab.

Configure purchase order document template
The default purchase order document template can be modified from the Configuration > Templates > Document Templates page. Choose the default Purchase order type template file and open it for editing. Please check Creating and Editing Document Templates for more information. The default template for the purchase order is chosen based on the shopowner culture. Template can always be changed manually before sending to the supplier from the purchase order details page.
Templates can be altered according to specific supplier requirements. To link the modified template to a particular supplier, set it as default on the Purchasing> Supplier Details Page > Topic Menu > Purchasing > Purchase order template.
Create and set purchasing mail template
You can create a universal mail template to be sent along with the purchase order populated by specific supplier data through merge fields and conditional ranges.
To be available for use on purchase orders, a template must have a Mail kind: PurchaseOrder and Type: For Supplier.

Please check Creating and Editing Email Templates for more information.
To set the newly created mail template as default to send with purchase orders, proceed to Shop owner details page > Purchasing tab. From the dropdown list against Default purchase order mail template select a template to use. Save the shop owner details page to apply changes. To set a different template to a certain supplier, proceed to Supplier Details Page > Topic Menu > Purchasing > Purchase order mail template.
Configure provisioning settings
The default provisioning settings imply that the product quantity to be provisioned is prefilled with the ordered quantity, and that over provisioning is not allowed. You can change that on the ShopOwner Settings > Purchasing > Provisioning Settings page.
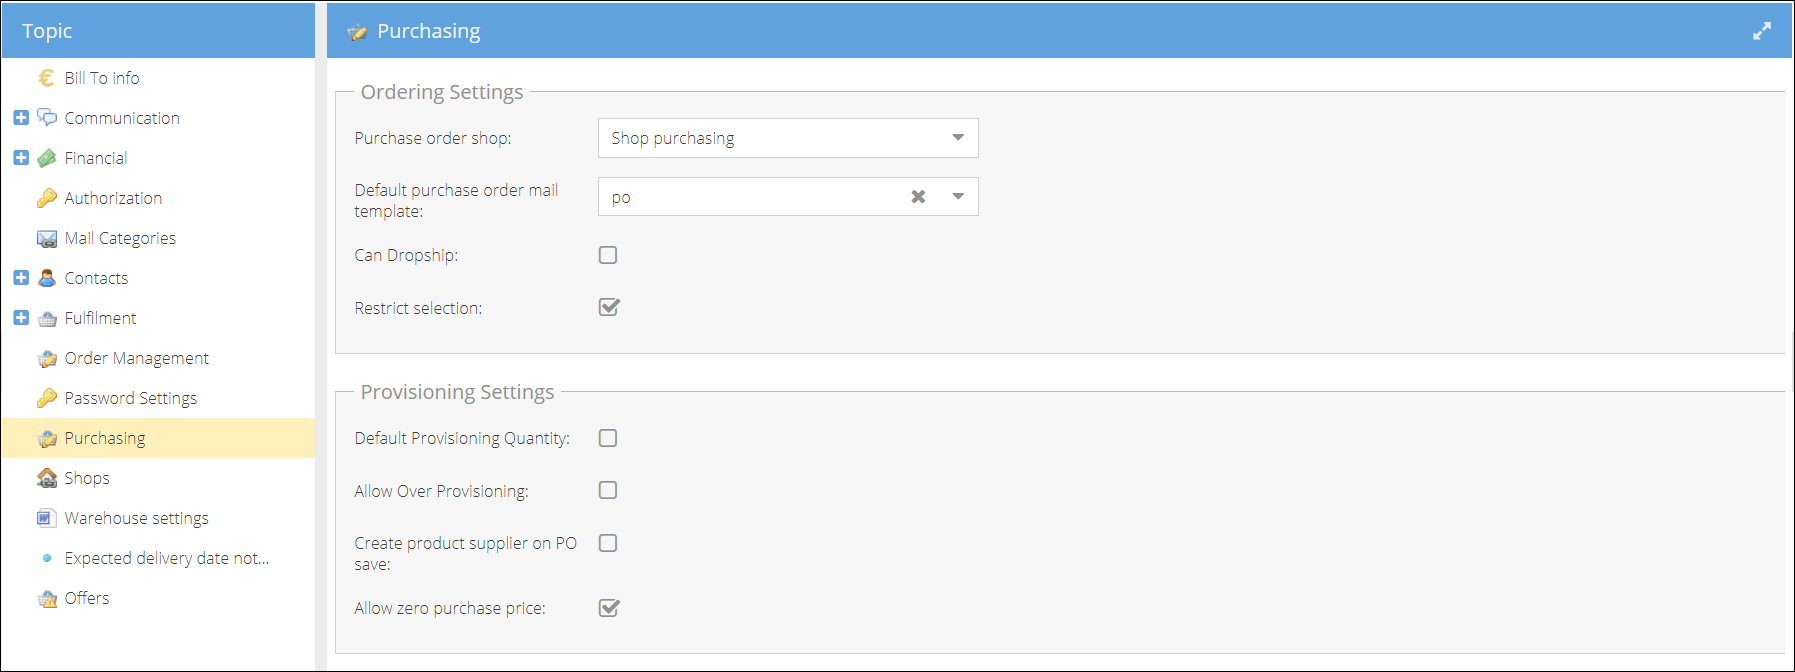
Ordering settings: Can Dropship - It could be convenient to turn this on, if most of your suppliers are also dropship suppliers. Restrict selection to single supplier - this option restricts the selection of products on the Purchase Order suggestion page to one supplier.
Provisioning Settings: Default provisioning quantity - if turned on, the quantity will be prefilled with ordered quantity while provisioning. Allow over provisioning - when turned off it won't be possible to provision more than ordered. Create product supplier on PO save - If supplier price was not quoted for the product before, this setting enables creation of a record on Allow zero purchase price - If not allowed, a purchase price of zero will be overriden by the preferred supplier price.
Step 3. Create suppliers
After the main setup is done, you can proceed to creating suppliers and providing purchase prices for the products.
Please check Create Supplier and Dropship Supplier for more information.