Create Supplier
In order to view content or perform actions referred to in this article, you need to have the appropriate permissions enabled. An employee must be assigned to the shop with a Power User role or higher.
How to create supplier
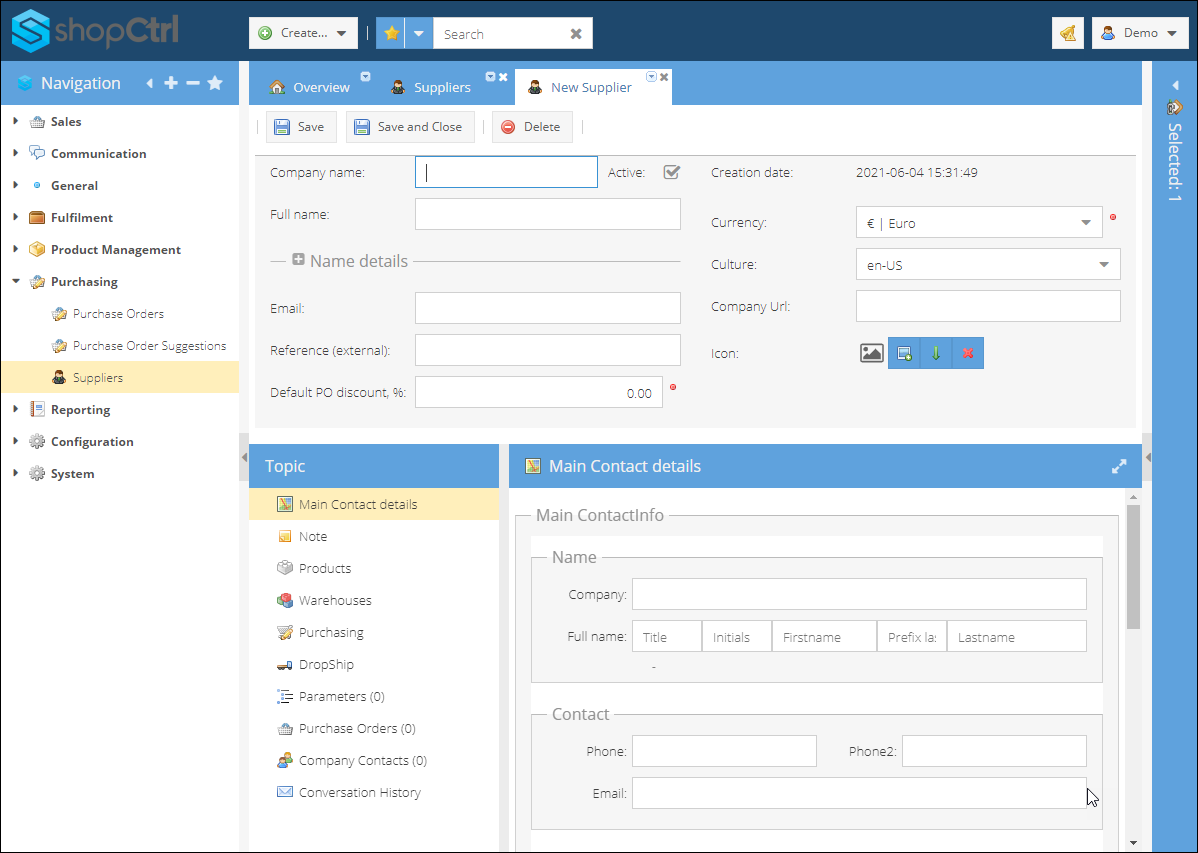
To create Supplier:
- Go to the Purchasing > Suppliers and click Add.
- Enter the Company name and supplier Full name.
- Enter other details:
- Email - it will be used to send Purchase Order emails y default
- Reference (external) - used by the contact
- Currency - choose a currency you purchase goods in.
- Culture - please select Supplier language and country
- Company Url
- Icon - upload an icon to distinguish the supplier in the supplier's list easily
- Default PO discount
- Click the Save or Save and Close.
Edit main contact details
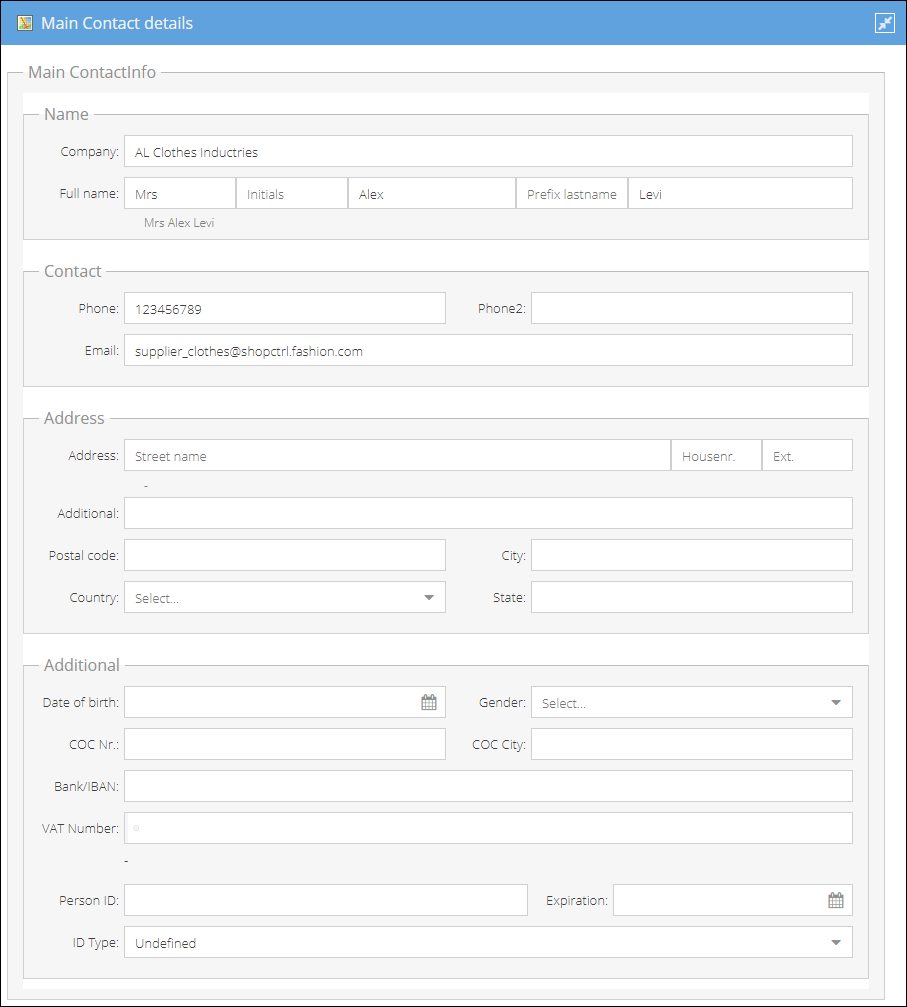
Go to the Main Contact details tab in the supllier topic menu to fill in the applicable data:
- Enter the Name details, as required:
- Supplier Company name
- Contact person Full name
- Enter the Contact details as required:
- Phone numbers
- Additional supplier Email
- Fill in the Address:
- Choose from a suggestions list to fill in a Country
- Manually fill in the City, State, Postal code, and Address.
- Enter the Additional address if required.
- (Optional) Enter the Contact Person additional details:
- Enter the Date of birth
- Select Gender
- Fill in the COC number and COC city as applicable
- Fill in the Bank name and IBAN
- Enter the VAT number as applicable.
- Choose a person ID type: Passport or Drivers License, and fill in the person ID and expiration date as applicable.
This contact information will be used to create supplier documents (purchase order) and as a general supplier knowledge base.
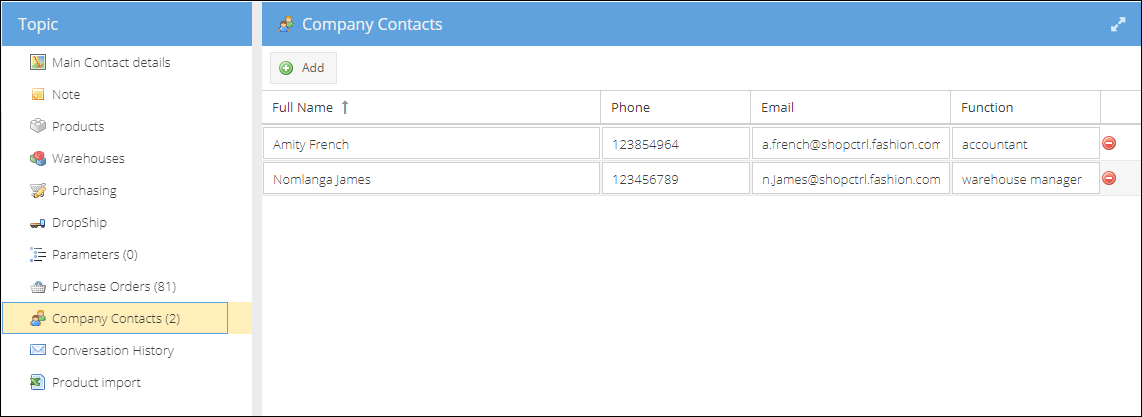
Edit additional company contacts
You can create additional contacts for a supplier in the Company Contacts tab. Company contacts are the people you deal with in the supplier's company. It could be particular people working, for example, in accounting or IT department.
Enter private supplier note
Go to the Note tab to enter and format private notes about the supplier available for internal reference only.
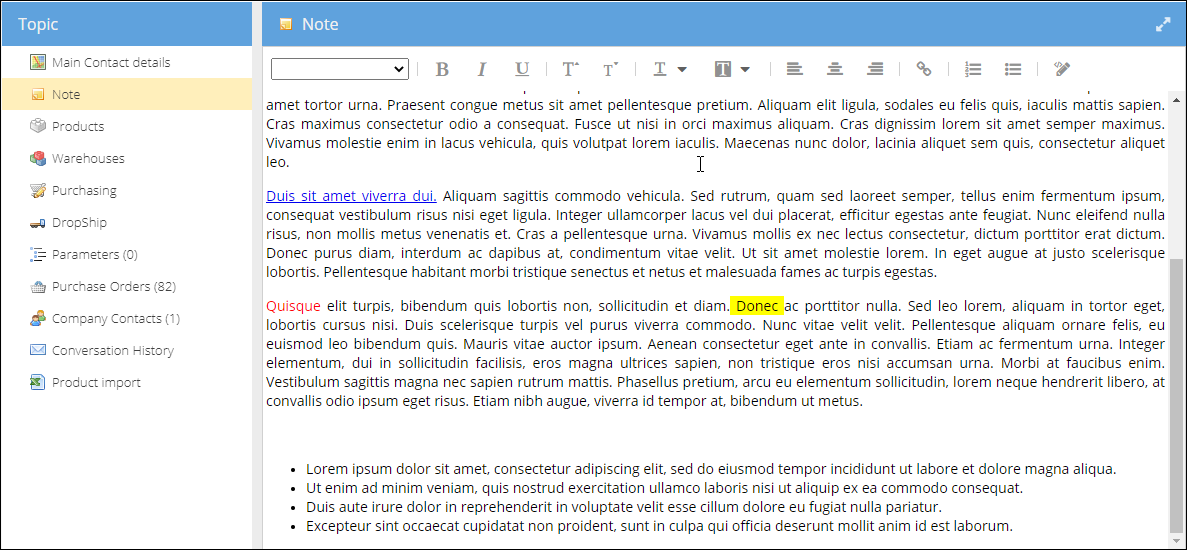
The top action menu contains all the necessary controls for text editing. It is also possible to switch to HTML by clicking the Source Edit button.

Set purchasing email and document templates for a supplier
Go to the Purchasing tab to set the purchase order email and documents templates. Please make sure that the required mail and document templates were created and saved first. View Email and Document templates for more information.
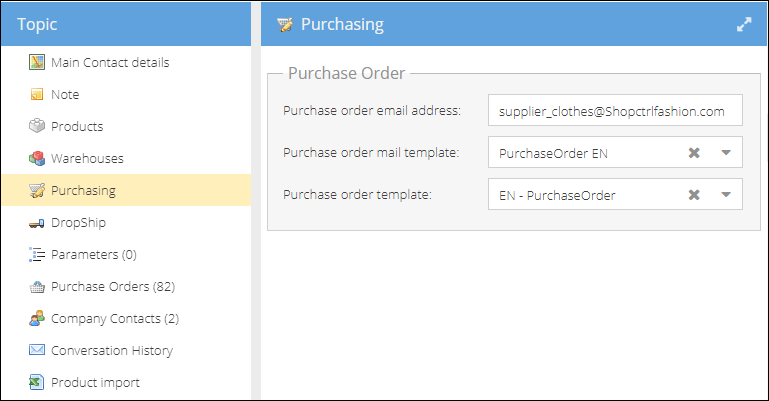
Purchase order email address. If you send purchase orders to a different email, compared to the one set in the main contact info, enter it in this field. Otherwise, the default supplier email address will be used.
Purchase order mail template
Choose a mail template that will be used to autogenerate new emails with purchasing requests for this supplier. After clicking the arrow, all "purchase order" kind mail templates with the type "for supplier" will be displayed. Based on this template, emails will be autogenerated for regular and back-to-back purchase orders. Otherwise, the default purchase order mail template set in shop owner settings will be used.
Purchase order template
Choose what document template will be used to autogenerate purchase order documents for regular, back-to-back, and dropship (if other is not defined) purchase orders. After clicking the arrow, all document templates with the type "purchase order" will be displayed. Otherwise, the default purchase order mail template set in purchasing shop settings will be used.
The dropship email and document templates are set in a dropship tab and on a shop level. Please view [Dropship Supplier]/User-Guide/09-Purchasing/Suppliers/dropship-supplier.md for more information
Create dropship supplier
To configure the dropship settings for a specific supplier, first, create a supplier. Then follow the dropship configuration steps. For more information please view the [Dropship Supplier]/User-Guide/09-Purchasing/Suppliers/dropship-supplier.md.
Manually create supplier purchase products
To manually create a supplier purchase product:
- Go to Product Management > Products. Select a product to edit and open it in a new tab.
- On the product details page, go to Topic Menu > Supplier
- Click Add to add a new linked purchase product for the specific product
- Choose a specific supplier whose price list you want to update and double click the supplier name.
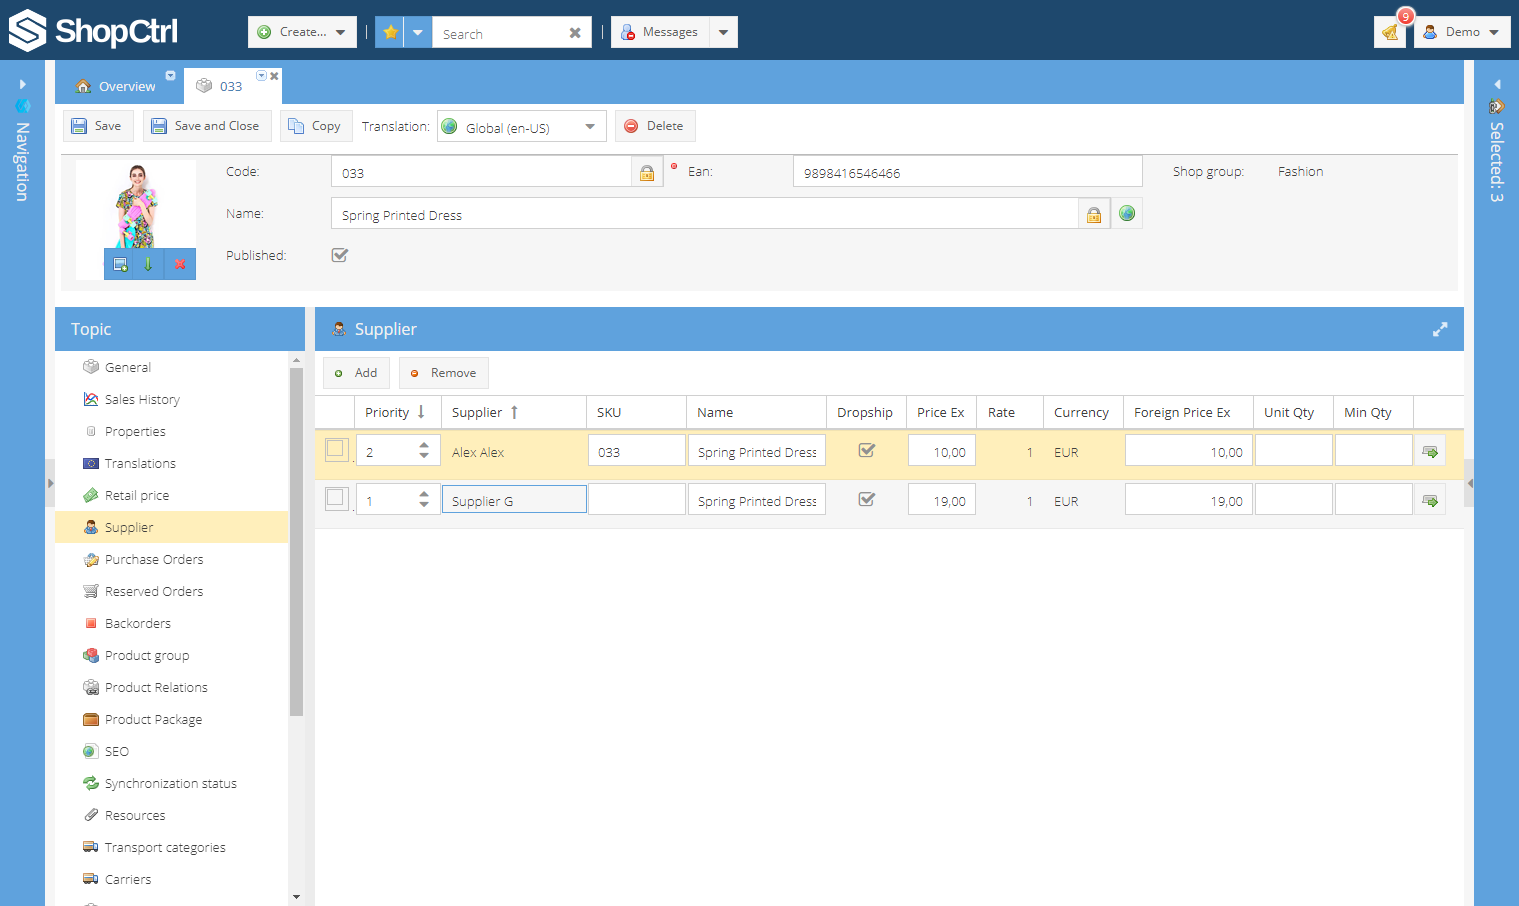
- Manually enter the purchase product details:
- SKU, Product Name
- Price Ex - Price excluding VAT in shop owner currency. The 'Foreign Price Ex' will be auto-calculated based on a rate set in the shop.
- OR Foreign Price Ex - product price in supplier currency excluding VAT. 'Price Ex' will be auto-calculated.
- (Optional) Enter the Unit Qty and Minimum Qty required for Order.
- Select whether the supplier can dropship this particular purchase product by checking the Droship checkbox.
- Choose supplier Priority for the specific Product.
- Click Save or Save and Close.
Specify supplier tiered pricing for a product
Sometimes suppliers offer to different volumes of products corresponding pricing levels. If this is the case, you can specify tiered prices per quantity to be later applied when creating purchase orders.
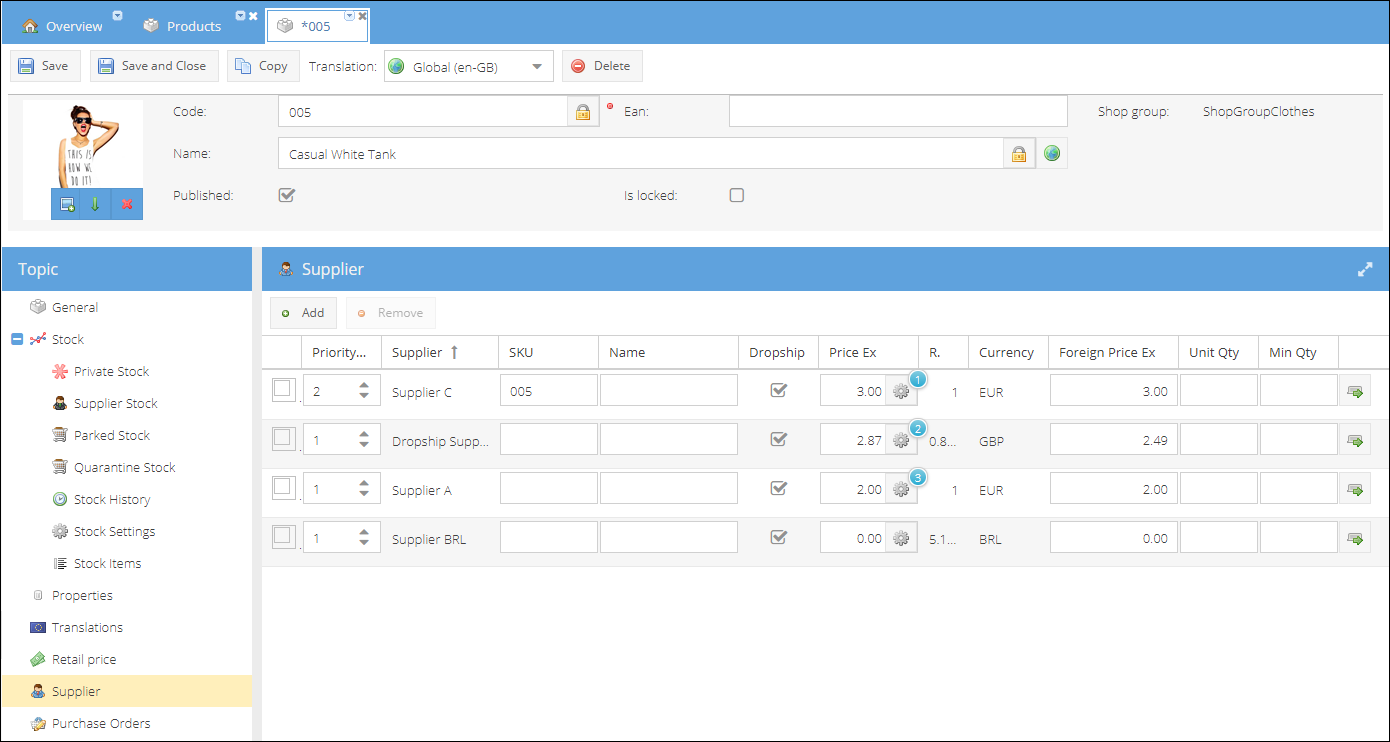
To add a new tier-price:
- Open the Product Management > Products.
- Locate and select a product and open it for editing.
- On the product details page navigate to Supplier tab in the topic menu.
- Select a supplier purchase price record and click on the gear ⚙ icon in the Price Ex column.
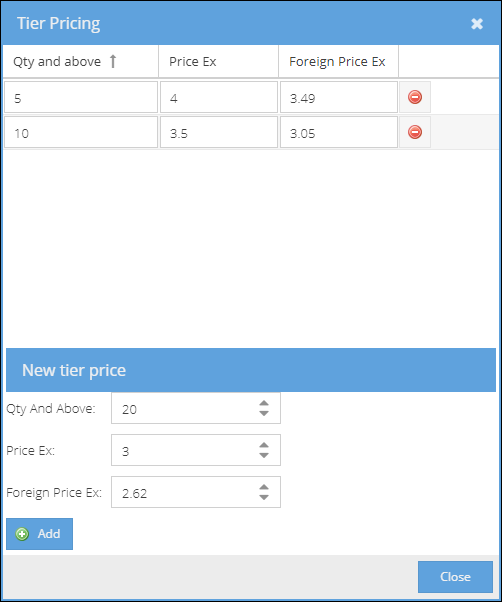
- On the Tier Pricing window enter the Quantity above which the new tiered price will be applied.
- Enter Price per 1 item excluding VAT in any of the fields. The other price will be auto calculated based on a current currency rate:
- Price Ex - in a shop owner base currency
- Foreign Price Ex - in a supplier currency
- Add new tier-price.
- Continue with other quantities. Click Close when ready.
- Save or Save and Close product to apply changes.
Set automatic purchase products and stock import
Go to the Product Import tab on the supplier details page to import purchase products (names, SKUs, prices, and delivery dates), update purchase products stock on suppliers warehouse, and schedule automatic product import. Learn more in How to Import Purchase Products.
Product import - this menu item becomes visible only after the supplier was saved. If this menu item is still not visible in your topic menu after the supplier was saved and a page refreshed, please contact the ShopCtrl support team for more information.
View purchase orders history
All of the purchase orders that were placed with the specific supplier are displayed in this tab. The columns in general replicate the columns in the purchase orders table.
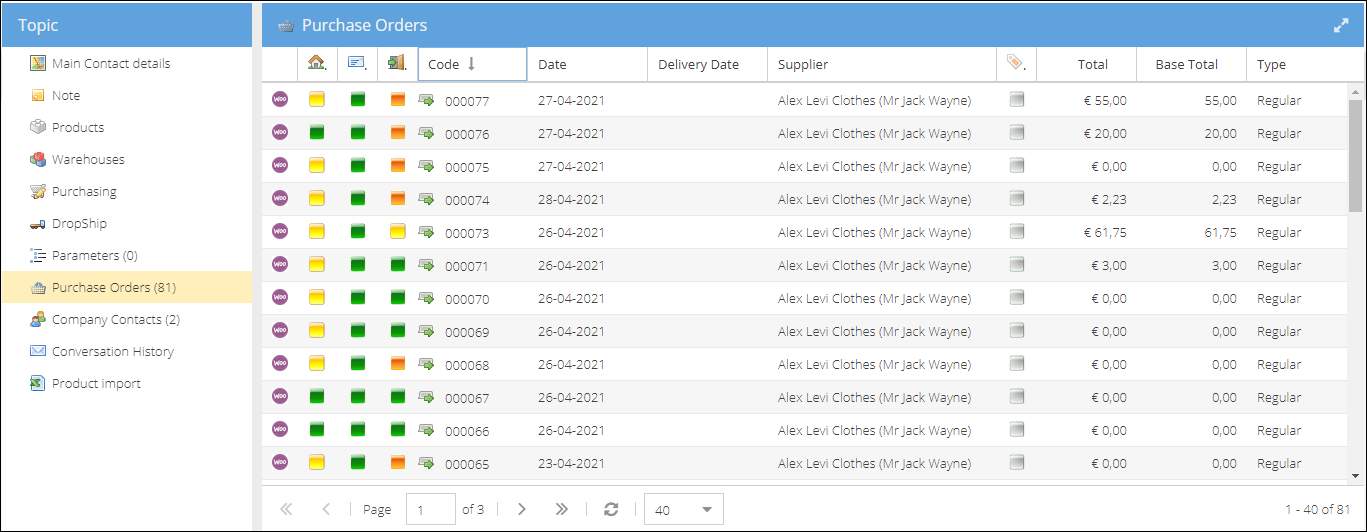
Double click on the purchase order row, or the icon in the code column opens the purchase order in a new tab for editing.
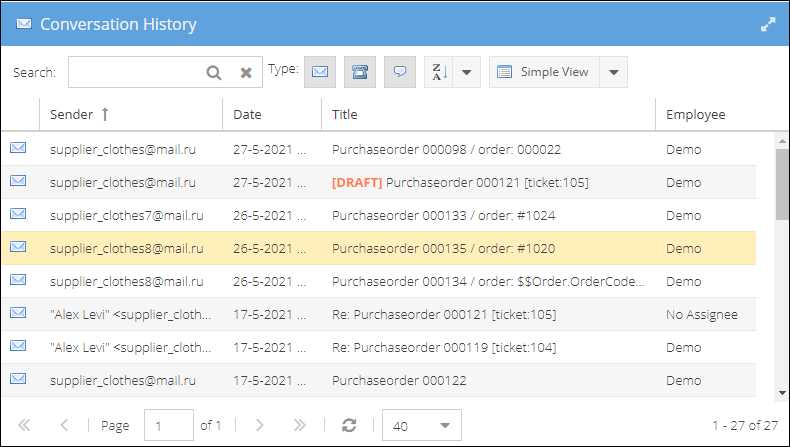
View conversation history
Conversation history is a convenient way to keep track of the email correspondence with a supplier. By default, the conversation history is displayed in a detailed view grouped by date. The newest dialogs are shown first.
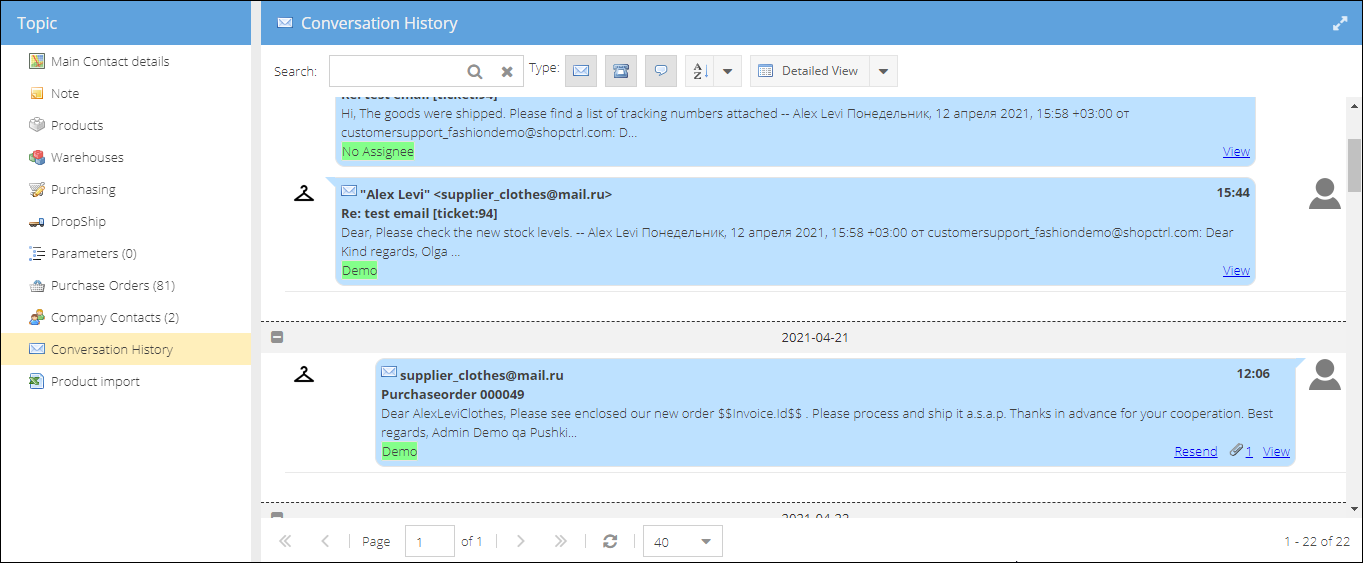
Double click the dialog body or click the Envelope button to expand the letter below. Click the View button in the email to open the sent email in a new tab.
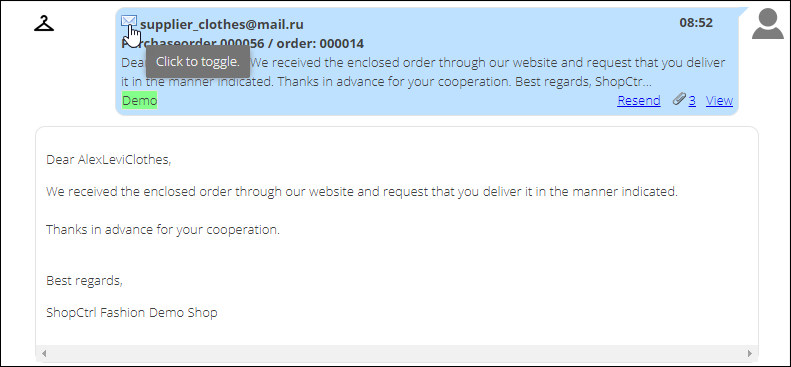
All the attachments could be downloaded or viewed within the same dialog window.
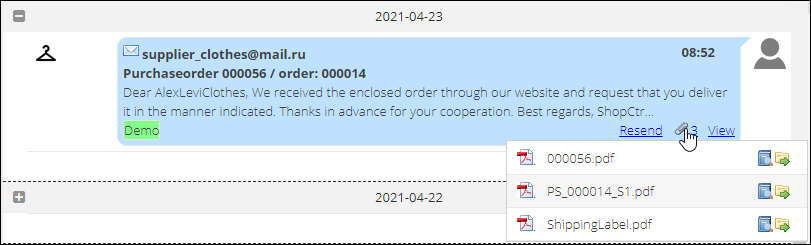
The emails in which an error occurred while sending are displayed in red. Hover a mouse over the email to view the details. Or click the Edit button to open the email in a new tab for editing.

How to collapse all of the conversations except the one you are interested in.
Hold the Ctrl key and click the expand icon to expand the conversation of a particular date and collapse all the others.
Switch to a simple view to have a list of all emails sent and received from the supplier.