Setting up mailbox in ShopCtrl
An employee must be assigned to the shop with a Shop Owner Admin role to perform actions referred to in this article.
To set up the sending and receiving emails, we need to configure incoming and outcoming server settings for mail in shop settings. Currently ShopCtrl supports both POP3 and IMAP protocols. This section covers configuration of email protocols (pop imap smtp) using Basic authentication.
Setting up incoming mail server
-
On the sales channels panel, click the designated shop icon and select Settings from the list.
-
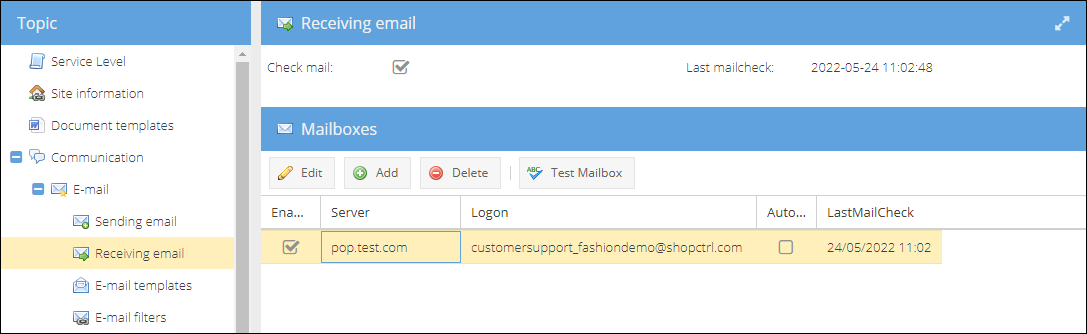
In the topic menu go to Communication > E-mail > Receiving email.
-
Click Add to create a new connection.
-
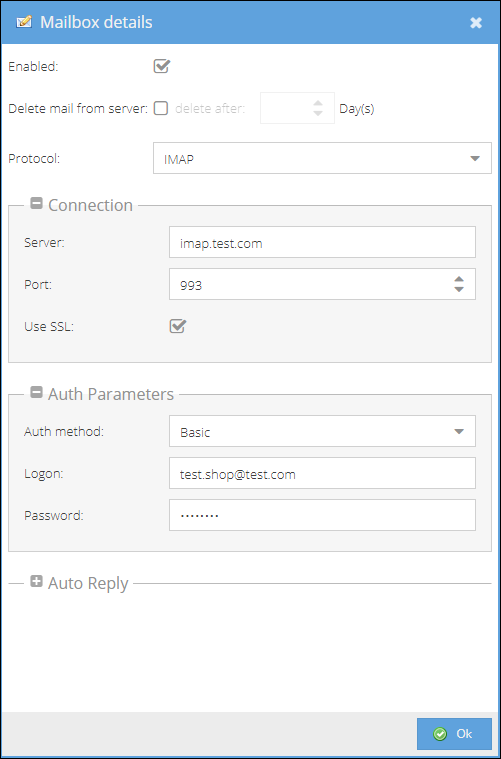
Select Protocol you are going to sync mail with: POP3 or IMAP.
-
Provide the Server of your mail account (POP3 or IMAP accordingly).
-
Enter the Port to use for connecting to the mail server (POP3 or IMAP accordingly).
-
Mark the Use SSL checkbox.
-
Expand the Auth parameters pane and select Basic Auth method.
-
Enter the Login and Password for your mail account.
-
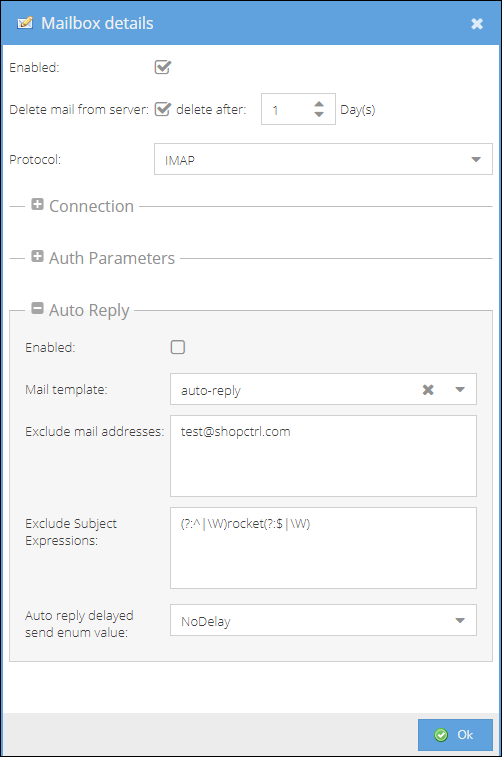
(Optional) You can set up an Auto Reply mail option for this mailbox.
- Select a Mail template based on which an auto-reply email will be generated.
- Provide the list of mail addresses separated by a comma to exclude from auto reply.
- You can also exclude emails with a specific subject. To do this, use regular expression syntax to specify the rule in the Exclude Subject Expressions field.
- Choose whether to postpone the delivery of auto-messages for a number of minutes or hours - Auto reply delayed send enum value. You can send reply right away by choosing No Delay option; within an hour - Random Minutes; or within a day - Random Hours.
-
Enable the connection on the top of the window.
-
(Optional) You can Delete mail from the server after a set amount of days. This option needs to be enabled first in your mail account settings.
-
Click Ok to save settings.
-
Click Save to apply changes to the shop.
Test connection to the mail box
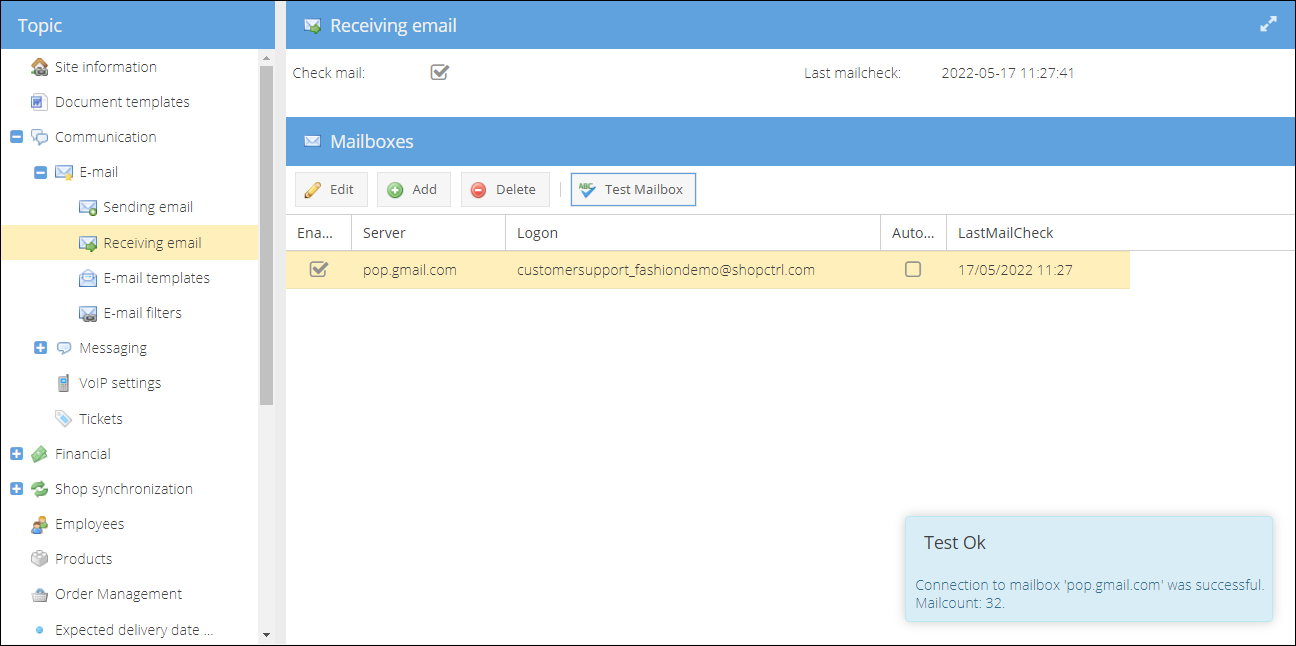
To test if the mailbox was configured correctly, click the Test MailBox button. The popup message will inform you if the connection was successful. In case there were authentication errors, please verify the credentials provided. There is also a chance you will need to enable access of third parties to your mail account in the mail box account settings.
Once the connection is established, mark the Check mail checkbox to start receiving emails to ShopCtrl.
Setting up outcoming mail server

- On the sales channels panel, click the designated Shop icon and select Settings from the list.
- In the topic menu go to Communication > E-mail > Sending email.
- Provide the Mail address to be used as Sent From on this shop.
- Choose the event to raise on replying to an email:
1. Do not warn
2. Warn when newer unread mail is available
3. Warn only when mails are assigned to the same order
5. Click Add to create a new SMTP connection.

- Select Protocol: SMTP.
- (Optional) If you are using several smtp servers, set the priority to determine which server to use first.
- Provide the SMTP Server for your mail account.
- Enter the SMTP Port to use for connecting to the mail server.
- Mark the Use SSL checkbox.
- Expand the Auth parameters pane and select Basic Auth method.
- Enter the Login and Password for your mail account.
- Click Ok to save settings.
- Click Save to apply changes to the shop.
Disable Chunking setting
When processing large messages, message chunking facilitates sending the message as multiple independent chunks. Message chunking is enabled by default for your mailbox. However, some legacy mail servers might not support chunked messages. Should you receive an error in your Out mail box on sending your mail to a specific recipient saying that: " Socket connection has timed out. This could happen because the SMTP server does not support CHUNKING properly.", please consider disabling sending chunked messages for this mailbox.
Send test mail
To check if outcoming server details were provided correctly, click Send test mail and enter an email address to send a test email to.
To minimize the chance of automatically sending an email to a real customer, each acceptance server has a Mail override turned on by default. All email recipients are automatically changed to a fake email address.