Migrating your Google Account mailbox to use App passwords
This article describes a process of changing your basic user and password authentication to Google mail account through ShopCtrl, to a more secure App password authentication.
Google announced that will no longer support the use of third-party apps or devices which ask you to sign in to your Google Account using only your username and password.
ShopCtrl suggests using App password authentication, which is more secure compared to user password authentication:
- App passwords do not provide access to the entire account and its settings. Only a certain set of services are accessible.
- App passwords are granted and tracked per application/device
- An App password can be revoked individually without affecting other authorized apps
Please follow the four steps below to migrate to a more secure way to authenticate to your mailbox using a generated App password.
Video instructions. Migrating your Google Account mailbox to use App passwords
Step 1. Deploy 2-Step verification in your admin console
This is a required step if you use an organization Google account
Allow users to turn on 2-Step Verification:
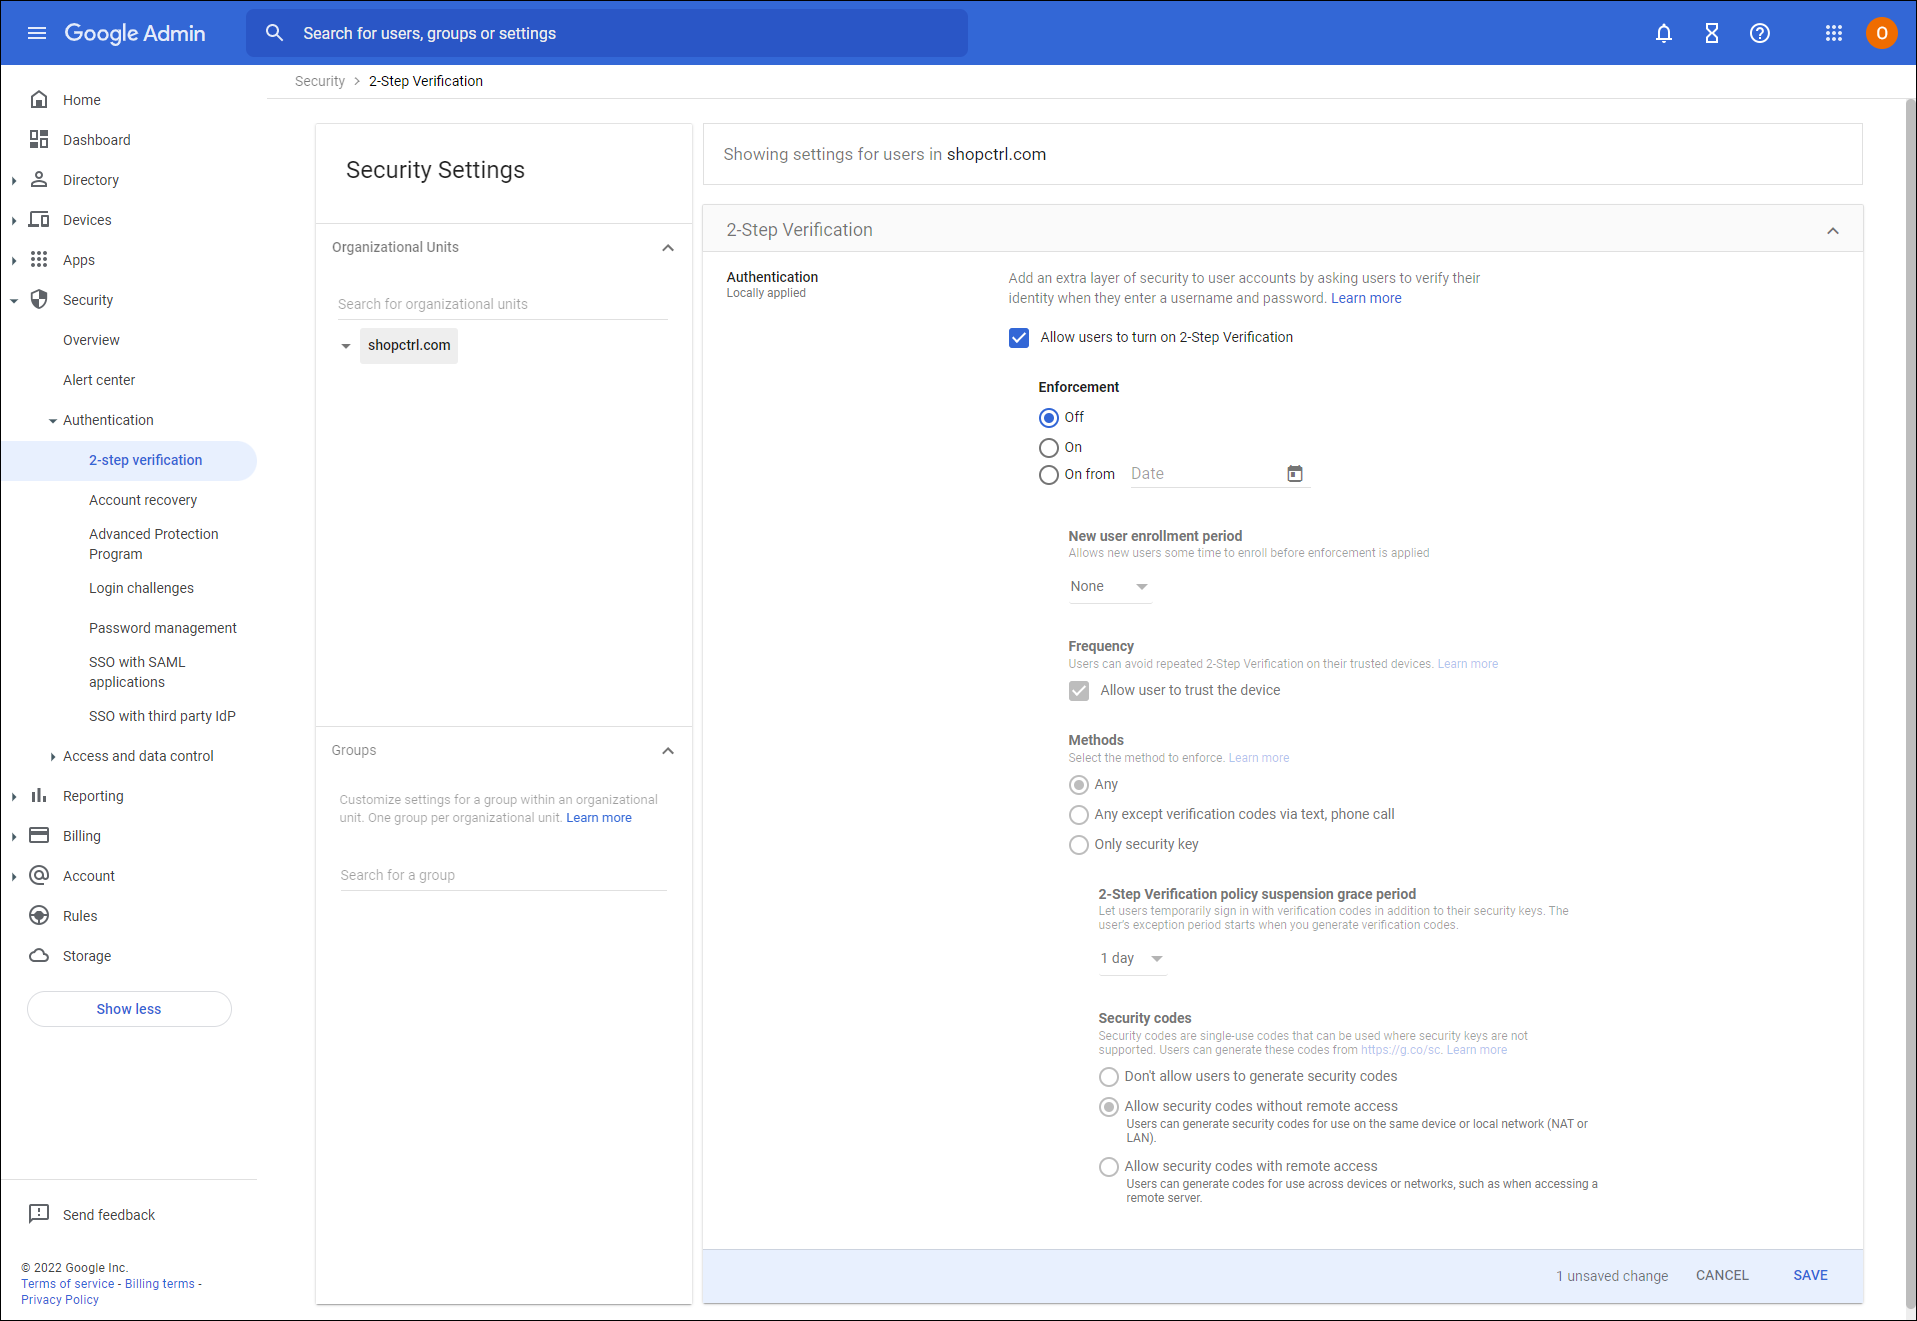
- In your Google Admin console (at admin.google.com) go to Security > 2 Step Verification.
- On the left, select an organizational unit or exception group.
- Let users turn on 2-Step Verification and use any verification method, but don't require 2-Step Verification yet:
- Check Allow users to turn on 2-Step Verification.
- Select Enforcement > Off.
- Click Save.
It is recommended to enforce 2-Step Verification. See more on how to ensure a smooth transition Enforce 2-Step Verification (optional).
Step 2. Activate 2-Step verification for your shop mail account.
Activate 2-Step Verification for the mailbox configured for your shop in ShopCtrl
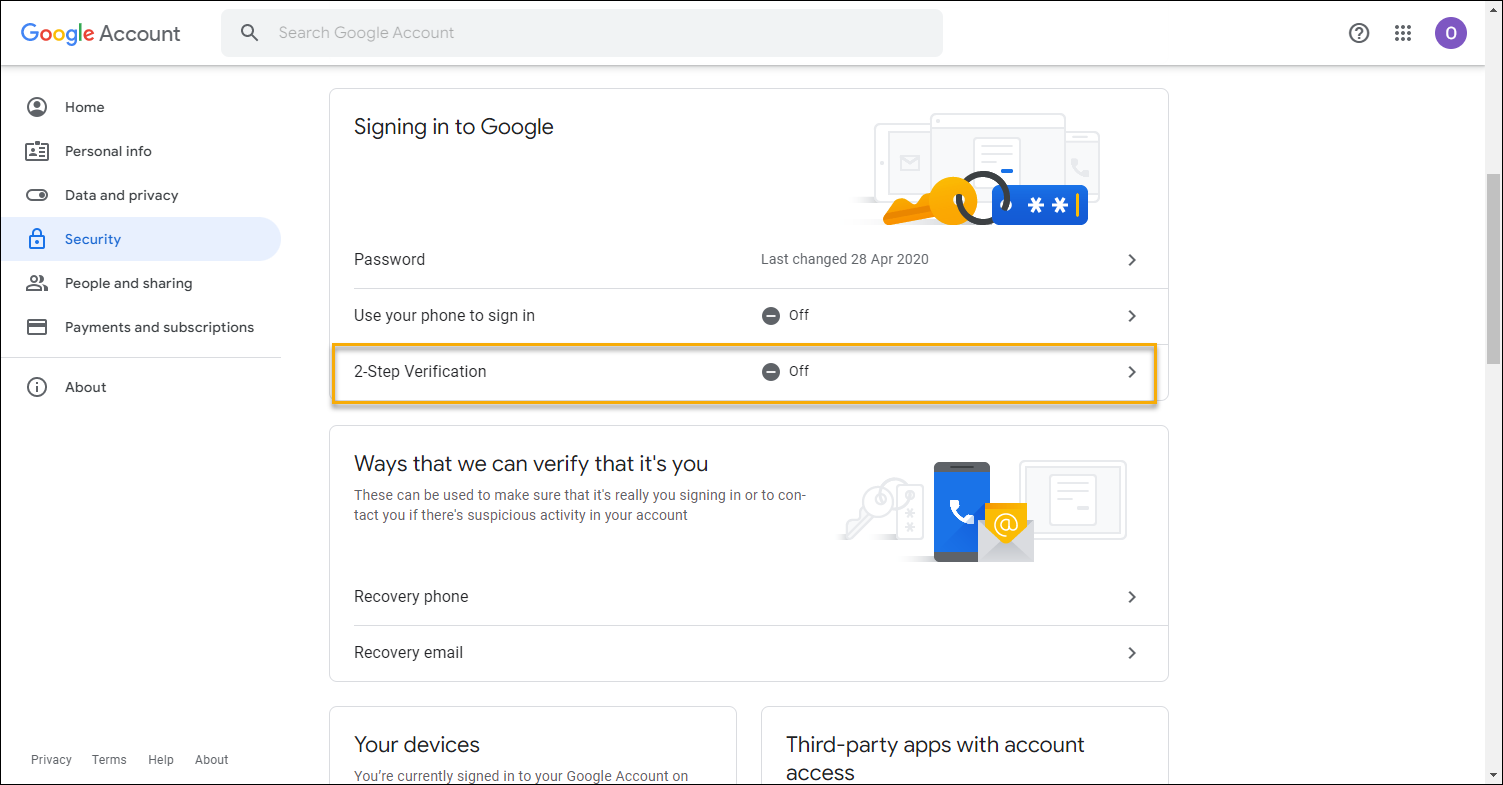
- Open your Google Account.
- In the navigation panel, select Security.
- Under "Signing in to Google," select 2-Step Verification > Get started.
- Follow the on-screen steps.
Verify it's you with a second step.
For more information, please check Turn on 2-Step Verification.
Enabling 2-step verification will disable Less secure app access to your google account. You will need to generate a separate App password for each application configured to access your Google account using the main password.
Step 3. Create App Password for ShopCtrl
-
Go to your Google Account.
-
Select Security.
-
Under "Signing in to Google," click on 2-Step Verification.
-
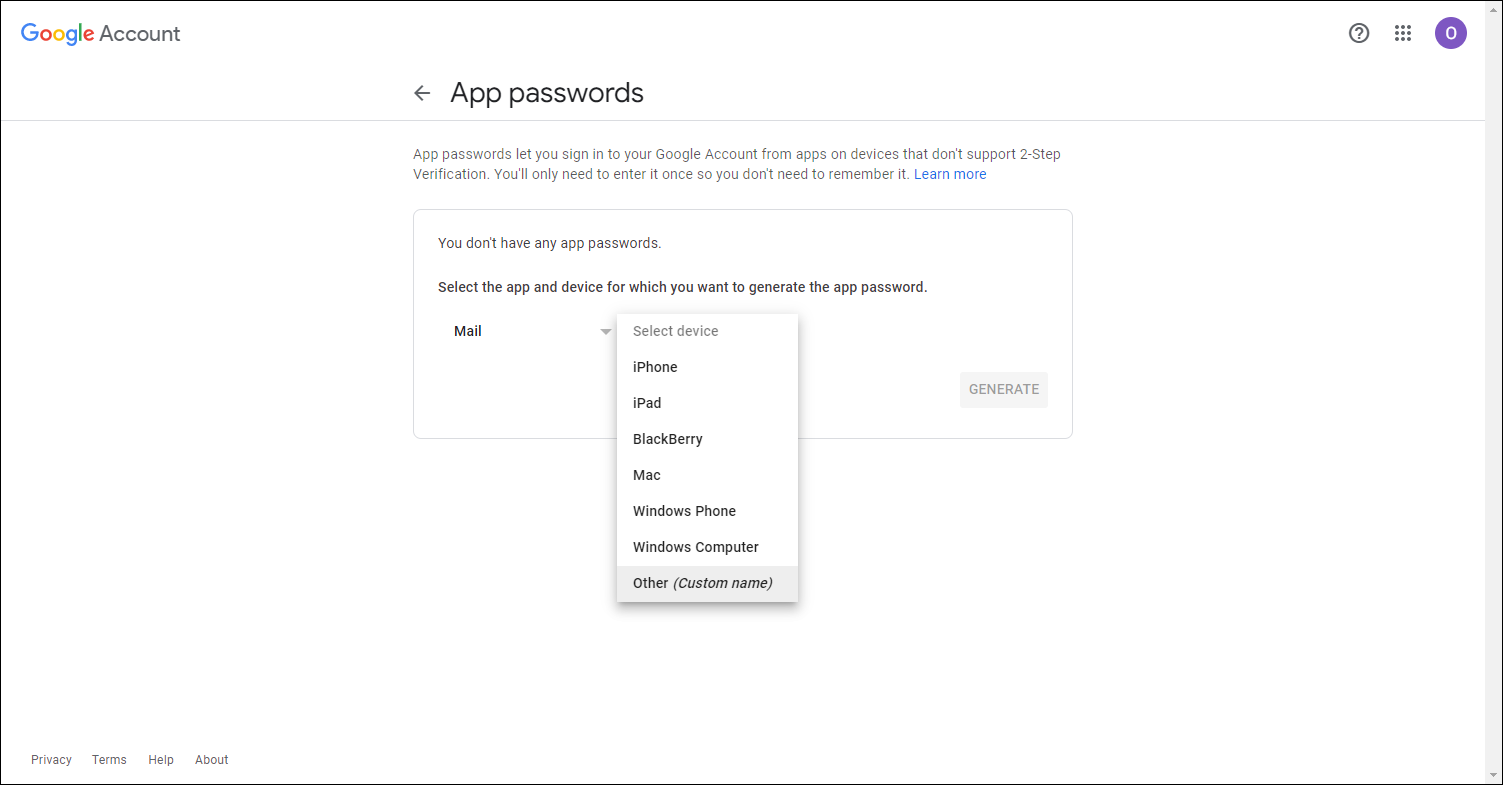
At the bottom of the page select App Passwords.
-
At the bottom, choose Select app and choose Mail and then Select device> Other (Custom name). Type ShopCtrl and then Generate.
-
Copy the App Password and save it in a secure place like you would normally do with passwords. The App Password is the 16-character code in the yellow bar on your device.
-
Tap Done.
For more information, please see Create & use App Passwords.
Please keep in mind, that App Passwords are revoked after Google account password change.
Step 4. Enter your app password in your mailbox settings in ShopCtrl
Change your password for receiving mails:
-
On the sales channels panel, click the designated Shop icon and select Settings from the list.
-
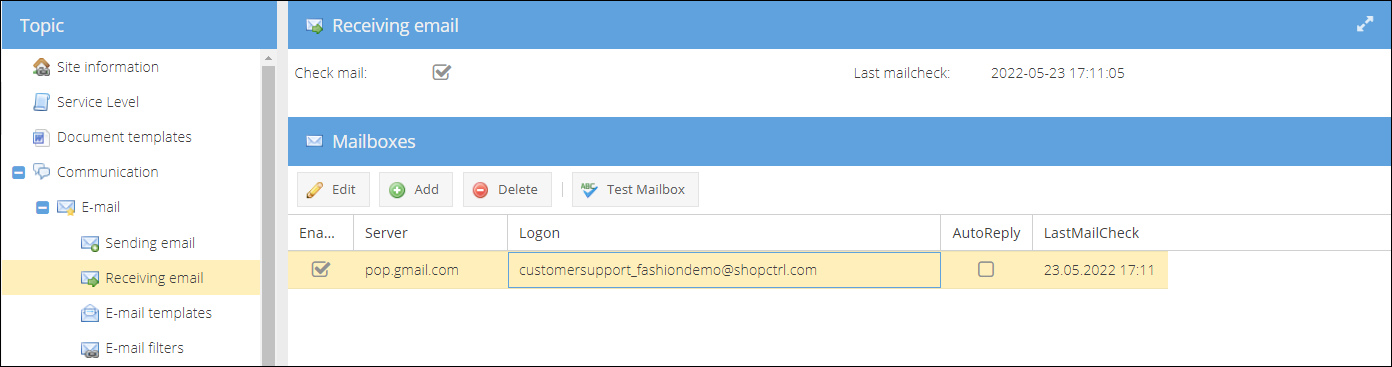
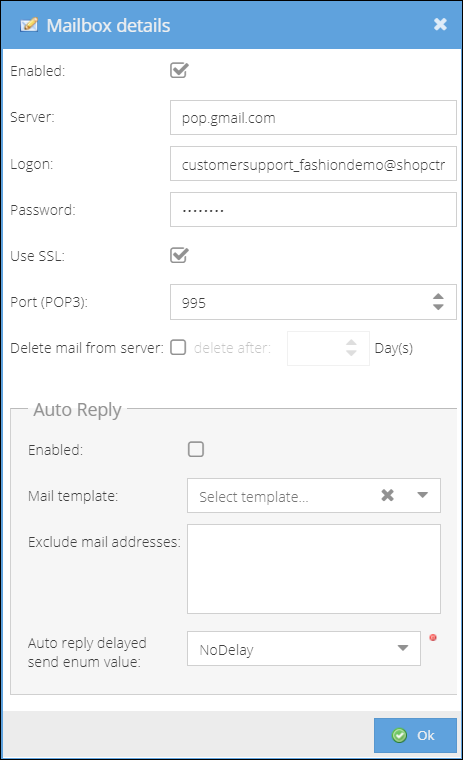
In the topic menu go to Communication > E-mail > Receiving email.
-
Select a mailbox to change and open for editing.
-
Change the Password to your newly created ShopCtrl App password.
-
Click Ok to save settings.
-
Click Test Mailbox to check if the authorization was successful.
-
Click Save to apply changes to the Shop.
Change your password for sending mails:
-
On the sales channels panel, click the designated Shop icon and select Settings from the list.
-
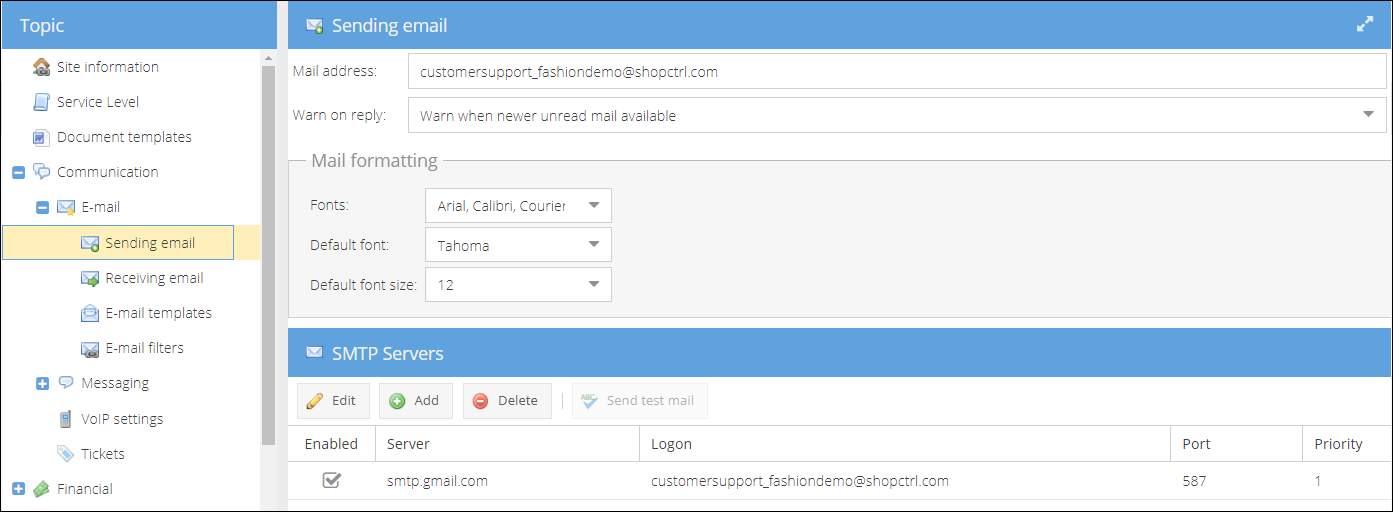
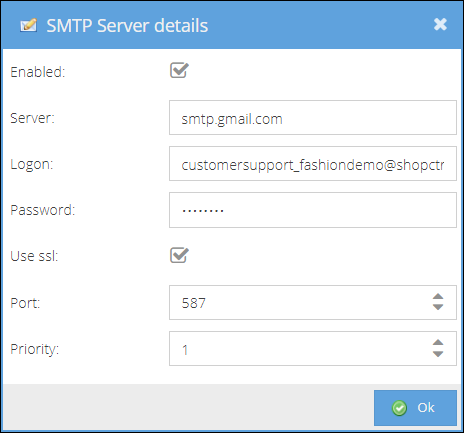
In the topic menu go to Communication > E-mail > Sending email.
-
Select a mailbox to change and open for editing.
-
Change the Password to your newly created ShopCtrl App password.
-
Click Ok to save settings.
-
Click Send test mail to check if authorization was successful.
-
Click Save to apply changes to the Shop.