Provisioning with UDI Scan
ShopCtrl supports UDI (Unique Device Identification) scanning during the provisioning process to streamline data entry for stock items. While each stock item in ShopCtrl is tracked with a unique internal ID, you can now also store important identifiers such as serial numbers, lot numbers, expiry dates, and custom parameters directly through barcode scanning.
This functionality significantly reduces manual data entry errors and speeds up the provisioning workflow.
How It Works
- Configure the barcode format for each product based on its physical labeling
- Scan UDI barcodes during provisioning
- Auto-populate stock item fields with the extracted data
- Verify and save the provisioned items
Configuration Steps
Prerequisites: Setting Up Stock Item Parameters
Before configuring UDI scanning, ensure your stock item parameters are set up correctly:
Default Fields (Always Available):
- Lot Number
- Serial Number
- Expiry Date
Adding Custom Parameters
If your products require additional fields:
- Log in as a user with shopowner admin role permissions.
- Navigate to Configuration > Parameters > StockItem Parameter Def.
- Create new parameter definitions with appropriate names.
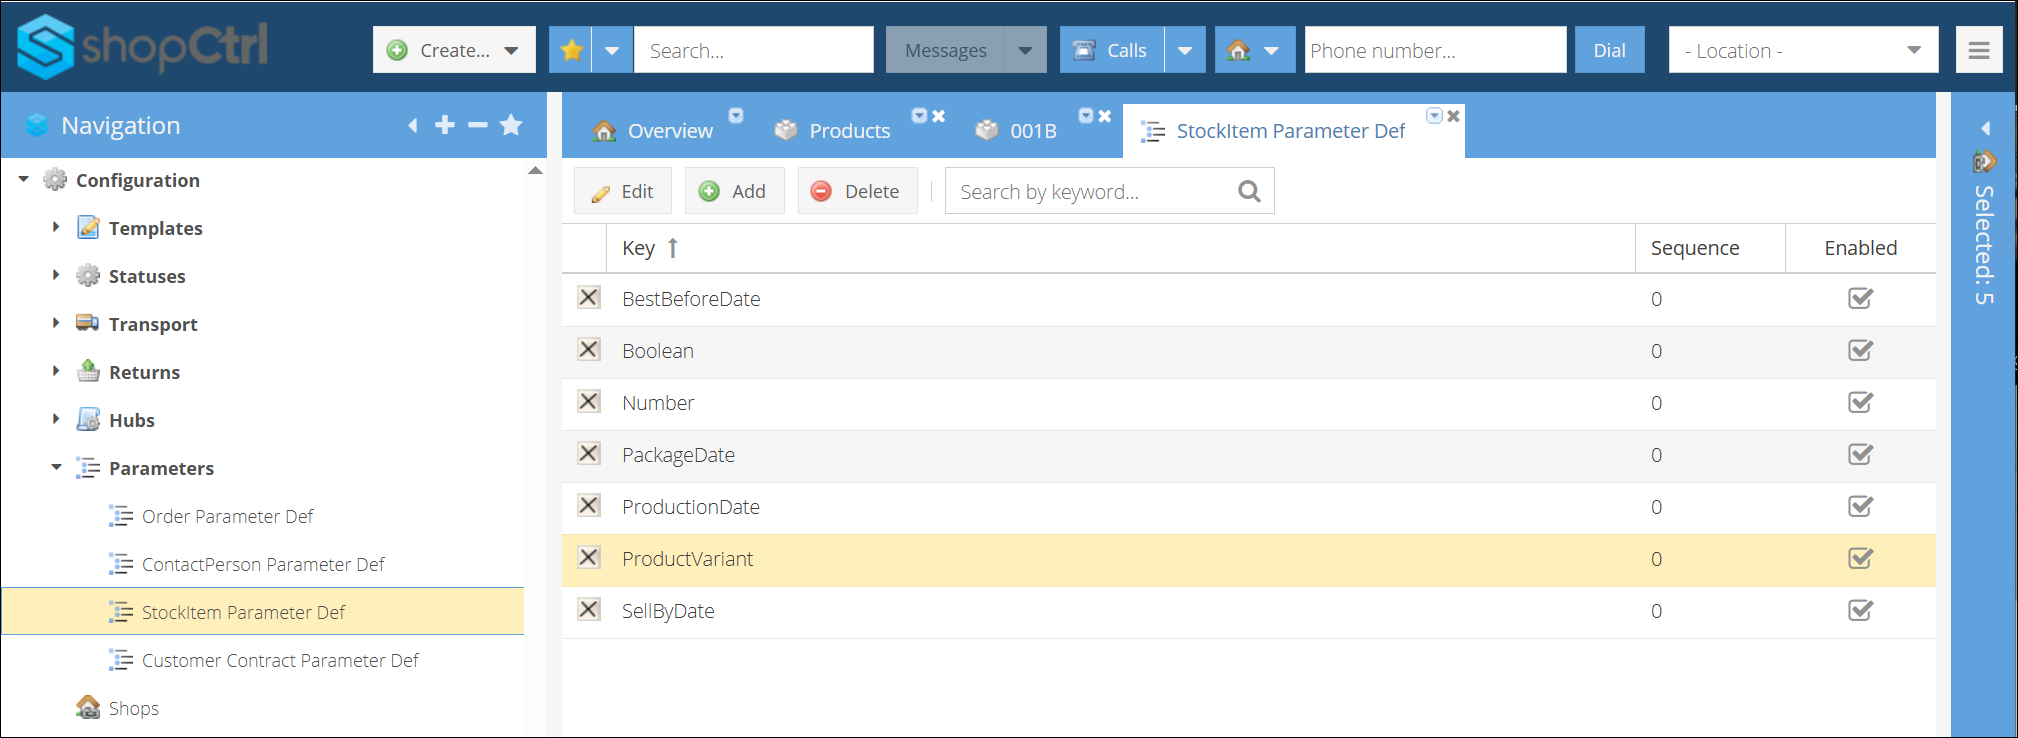
- Select the data type (Text or Date).
- Go to Product > Stock settings > Stock item parameters > Custom parameters.
- Assign the created parameters to your product.
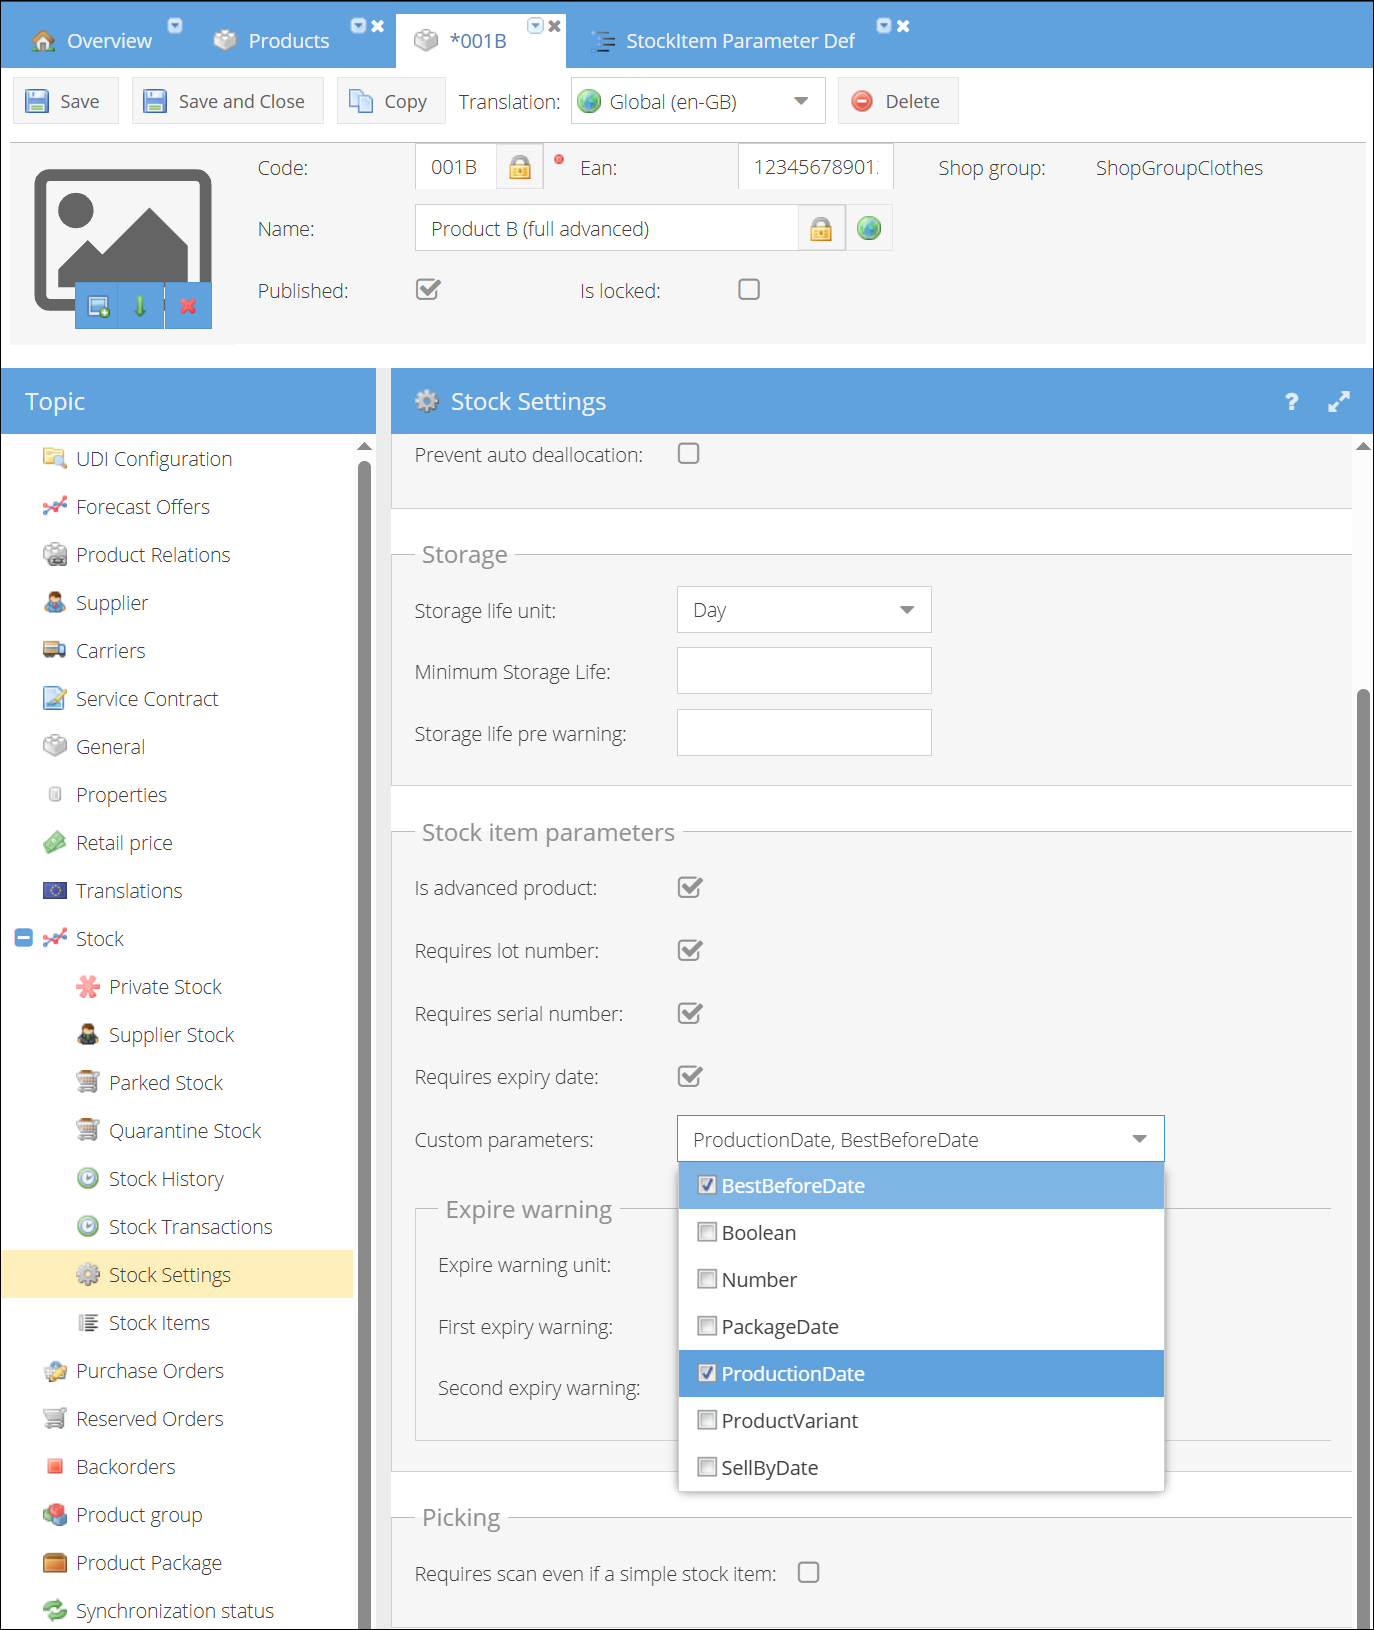
- Save the product to apply changes. These fields will be available for each stock item the next time this product is provisioned.
To save the complete scanned UDI string: Create a parameter named "FullUdiString" (String type). This will store the entire raw barcode value for reference. You do not need to assign this parameter as a product custom parameter—it will work automatically once defined. If the FullUdiString parameter is not defined, scanning itself still works, but no stock item parameter is created to store the complete UDI string.
Configuring UDI Barcode Format
- Navigate to Product > UDI Configuration.
- Build Your Barcode Format:
- Select fields from the left column (Available Fields).
- Click the arrow button to move them to the right column (Selected Fields).
- Arrange fields in the exact order they appear on the physical barcode.
- Use the arrow buttons at the start of each row to adjust the order if needed.
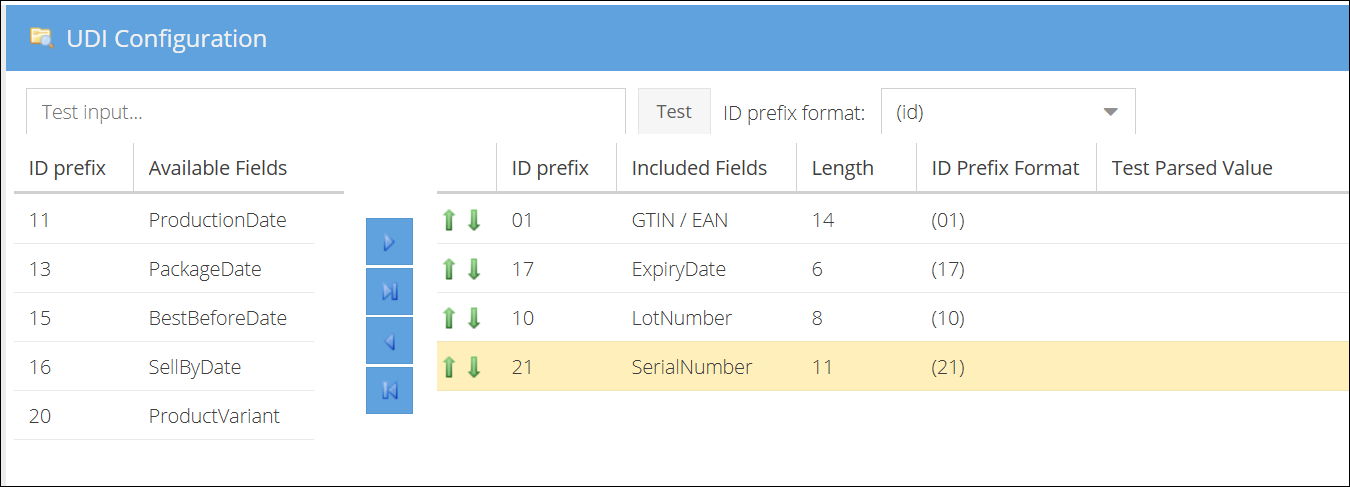
- Field-Specific Settings:
- For LOT Number, Serial Number and Product Variant: Specify the exact length (number of characters).
- For Date fields: No length specification needed (standard format).
- Configure Format Literals:
- For fields that include literal characters in the barcode, select ID prefix format
(id)from the top dropdown. - This supports various barcode standards including GS1 with different bracket styles.
- For fields that include literal characters in the barcode, select ID prefix format
- Test Your Configuration:
- Use the Test input field at the top of the configuration page.
- Paste a sample barcode value.
- Click Test to verify that values are correctly parsed to their corresponding fields.
- Review the parsed results in the table below.
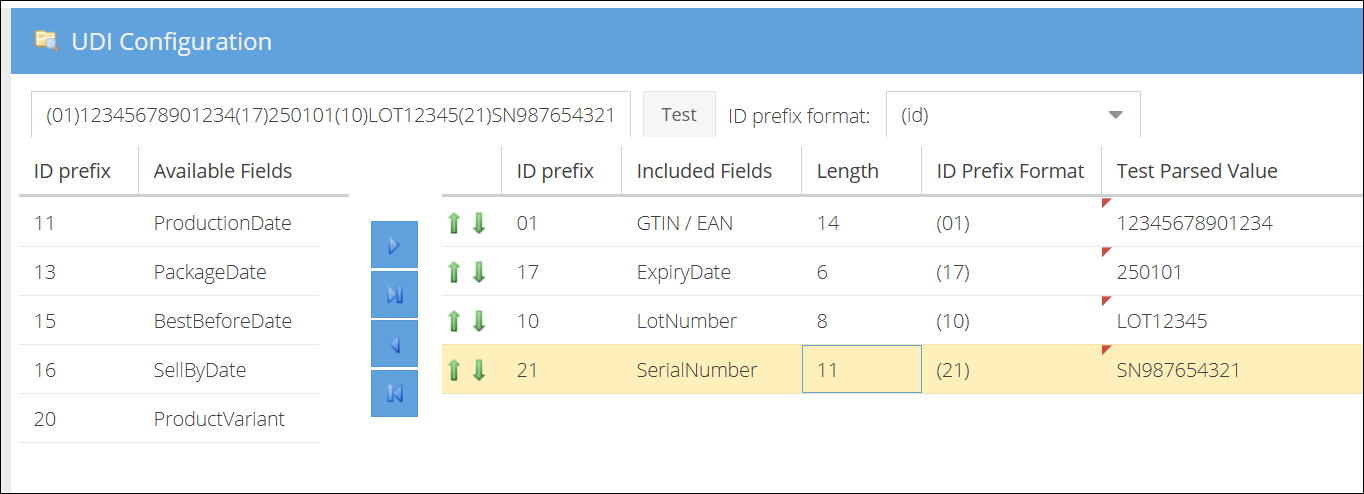
- Save the product to apply changes.
Common GS1-128 Format Example:
(01)12345678901234 (17)250101 (10)LOT12345 (21)SN987654321
This example shows a typical UDI barcode with:
(01)- GTIN (Global Trade Item Number)(17)- Expiry Date (YYMMDD format)(10)- Lot/Batch Number(21)- Serial Number
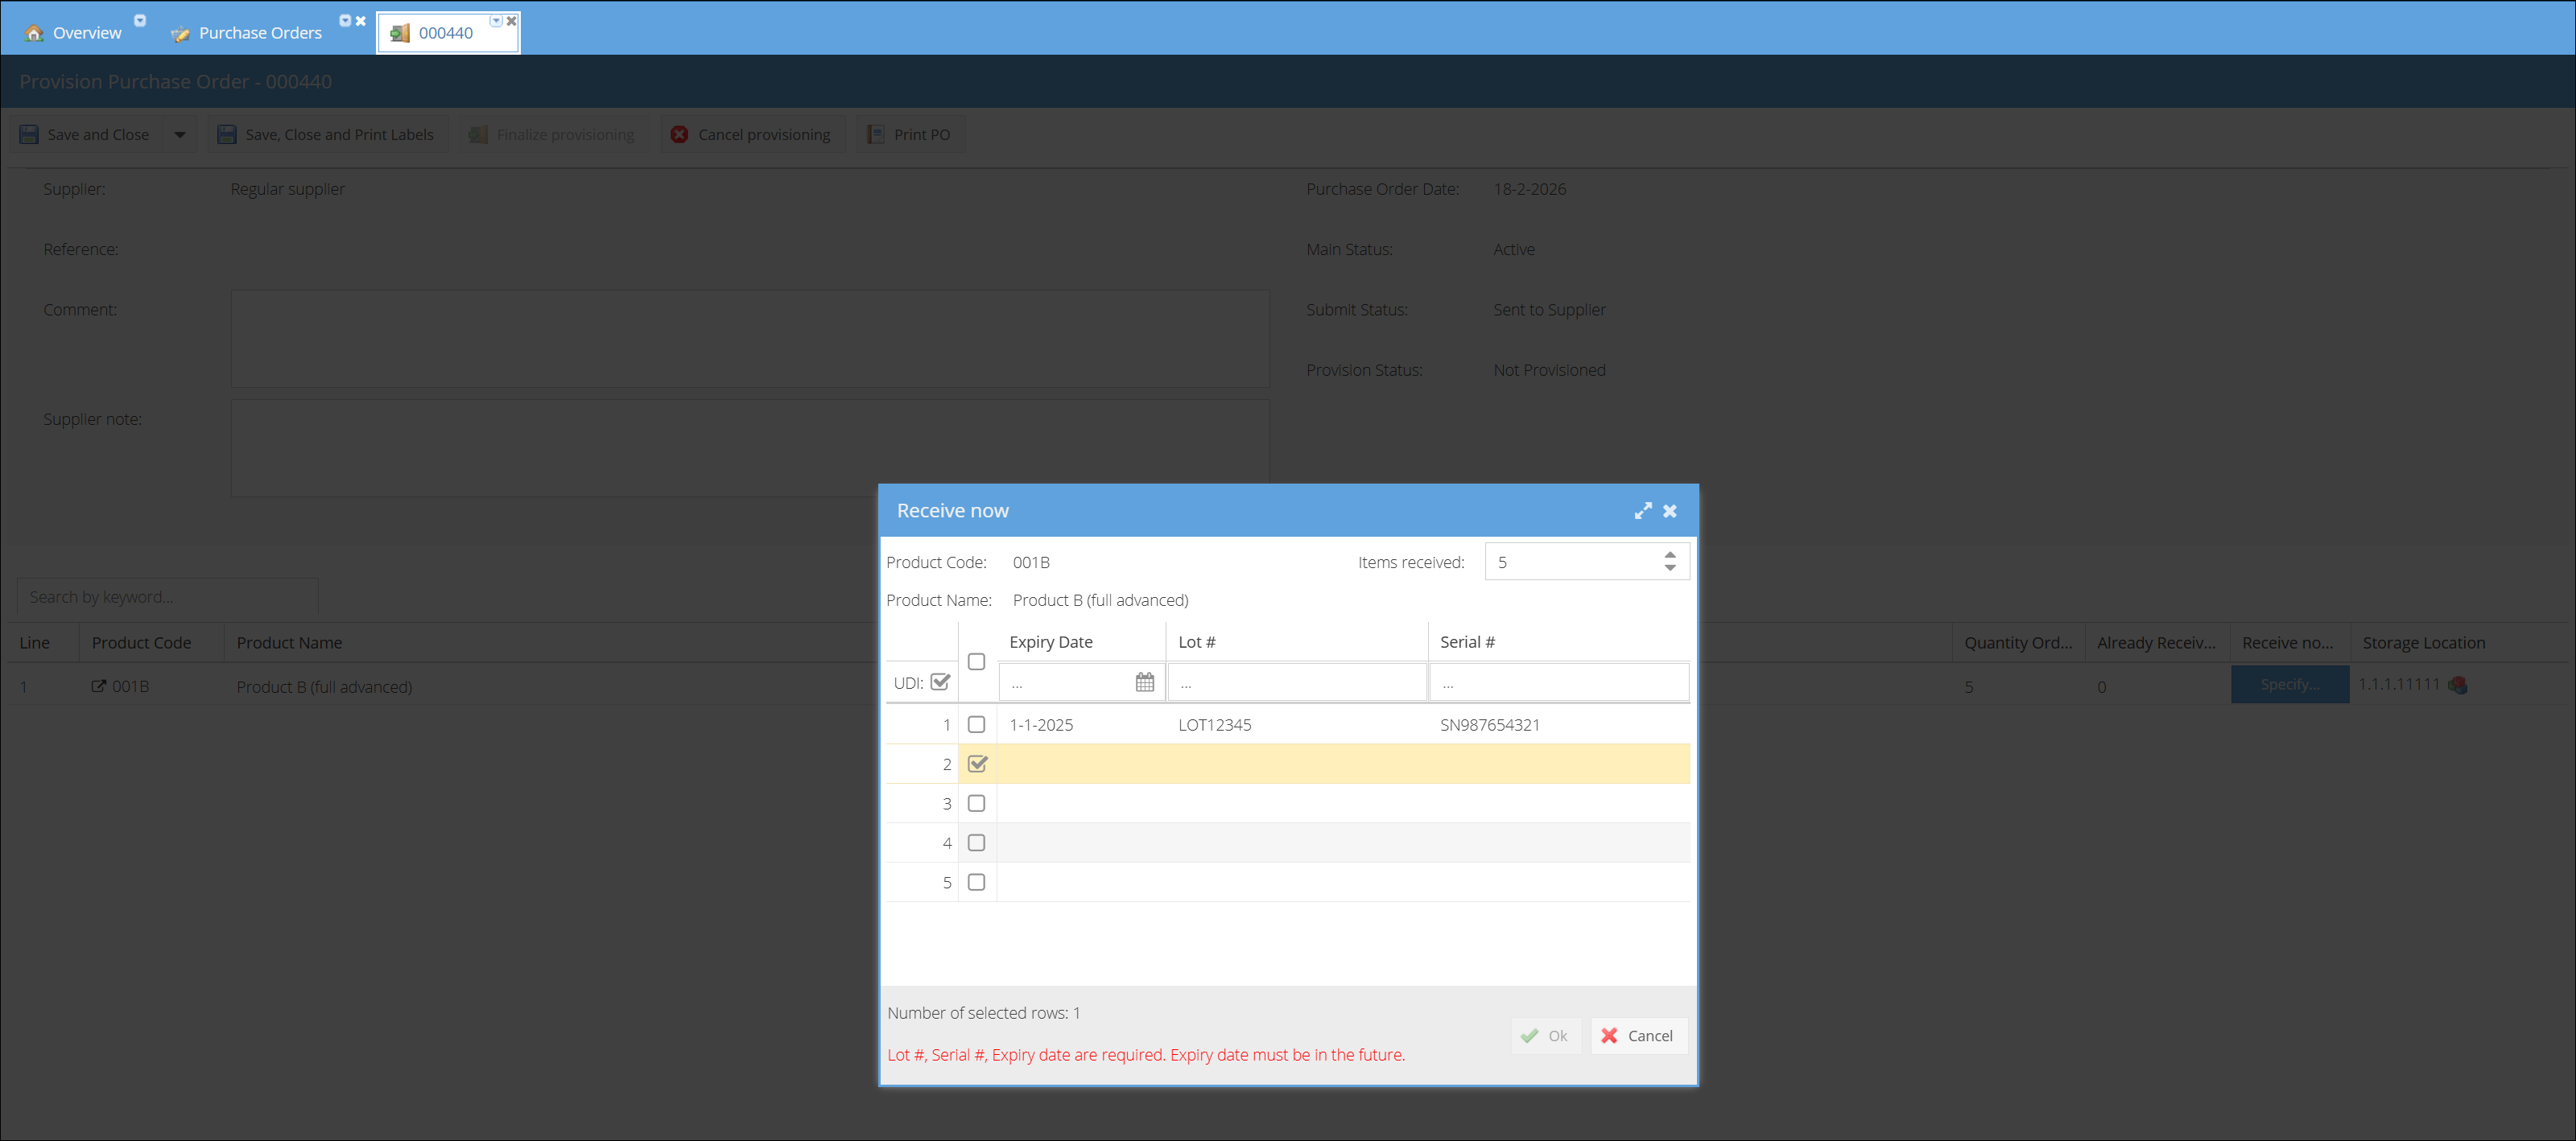
Using UDI Scanning During Provisioning
Follow these steps to use UDI scanning when provisioning a purchase order:
- Navigate to the purchase order and open the provisioning screen.
- Click the Specify button to open the Receive now window.
- Toggle the UDI scan checkbox to enable scanning mode.
- Select a row by clicking its checkbox field.
info
Do not manually edit any fields in the row before scanning, as this will disable the scan functionality for that row.
- Scan the UDI barcode using your scanner. The system will automatically populate:
- Lot number
- Serial number
- Expiry date
- Any custom parameters configured for the product
- Review the populated data to ensure accuracy.
- Repeat steps 4–6 for each additional stock item—select the next row and scan its barcode.
- Once all items are scanned and verified, click Save to complete the provisioning process. All UDI data is stored against the respective stock items.