Creating a Purchase Order
ShopCtrl supports three types of Purchase Orders:
- Regular - for handling wholesale orders to replenish the stock levels.
- Dropship - the supplier would send the goods directly to the customer on your behalf
- BacktoBack - created for a particular customer's Sales Order. Back to Back is used primarily to manage goods that you do not want to keep in stock but want to bring in and then send to customers as required.
Please make sure that the main set up was done. Products were created, and supplier's price lists were imported to ShopCtrl.
Creating a regular purchase order

- Go to the purchase orders module in the left navigation menu. And click Add A new order window will be opened in a new tab
- Fill in the required fields, marked with red dots:
- In the Supplier field, find and add the supplier.
- Order Date - purchase order date is set to current by default.
- Choose a Currency to be used for the purchase order. By default, it uses the supplier currency settings.
- Select a Destination warehouse where the goods will be delivered.
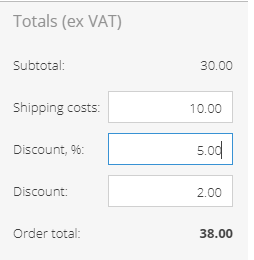
- Optional fields: Expected Date select the date supplier is going to deliver the goods. Discount for a purchase order could be specified in % and is applied to the whole order, including the shipping cost. Once the discount is calculated, the corresponding sum will be displayed in the discount filed below:
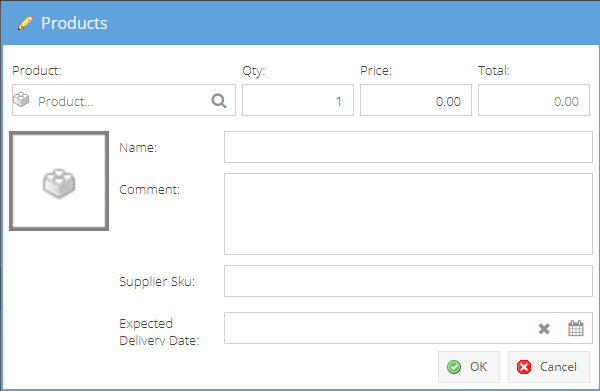
- Start adding products by clicking the Add button. The products menu similar to the one from the sales order will appear.
- If the purchase order will be delivered in several parts, set an Expected delivery date for each product row.
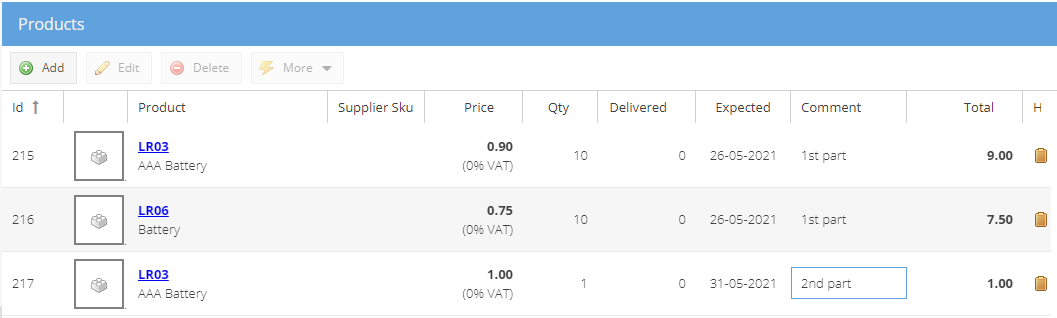
There is an easier and faster way to distinguish which product will be delivered when. Please view Deliveries for details.
- In order to preview the purchase order Invoice, you could click on the Preview PDF button.

The moment you click the Preview PDF button, the newly created purchase order will be saved.
- There are several options for Saving the purchase order.
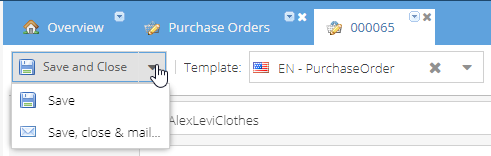
- Save and Close - Saves the purchase order and closes the tab.
- Save - Saves the purchase order.
- Save, close & mail - Saves the newly created Purchase Order. Closes the tab and opens a new email to a Supplier window generated based on a Purchase Order Email Template.
Save, close & mail option is available only for the newly created purchase orders. Once the email is sent, the button is disabled.
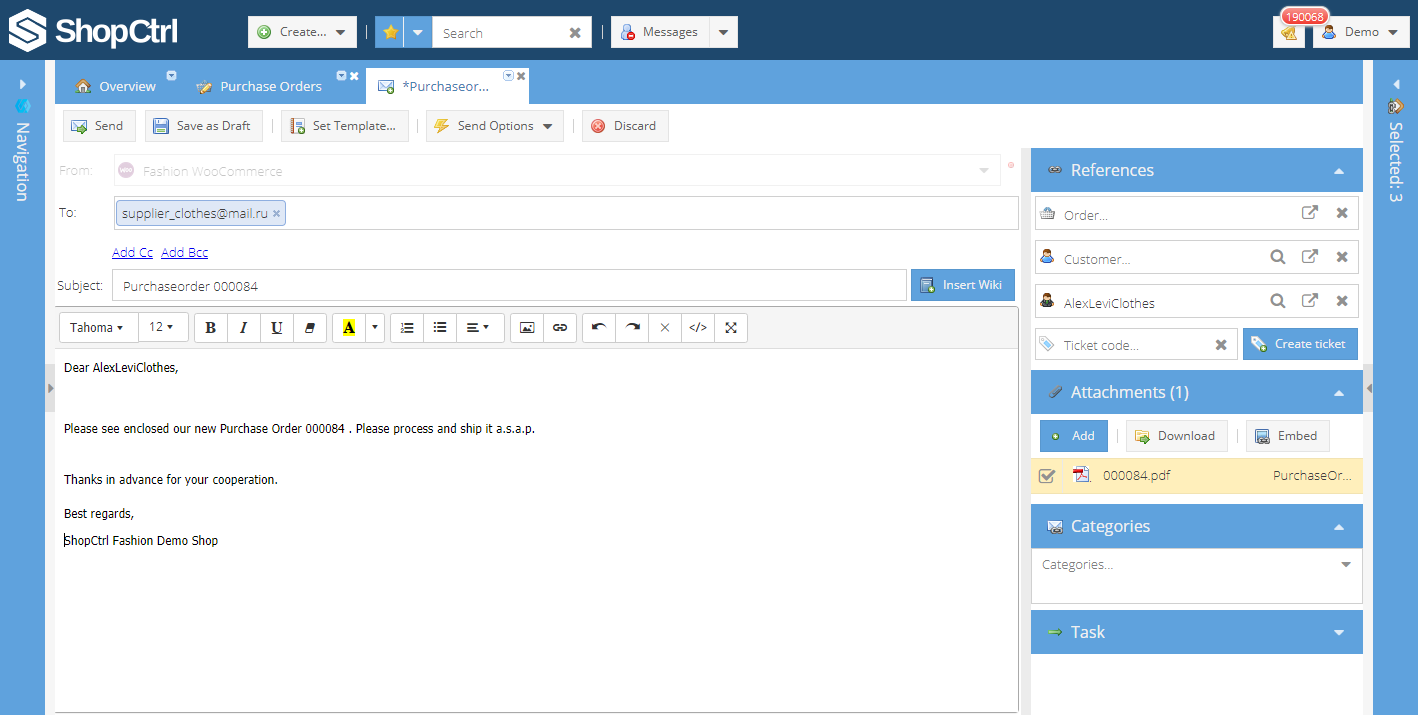
The References pane displays the supplier to which this particular purchase order is linked. The purchase order document is automatically attached to the email and is visible within an attachments pane.
If your purchase order was done in a currency different to a shop owner base currency.
Creating a dropship purchase order
The system will automatically create a dropship purchase order when the dropshipment for the sales order will be created. Based on the product price provided in the suppliers price-list. The purchase order document will be automatically generated as well and could be sent to a supplier. You can choose to either open the dropship purchase order for editing or sent an email to the supplier.
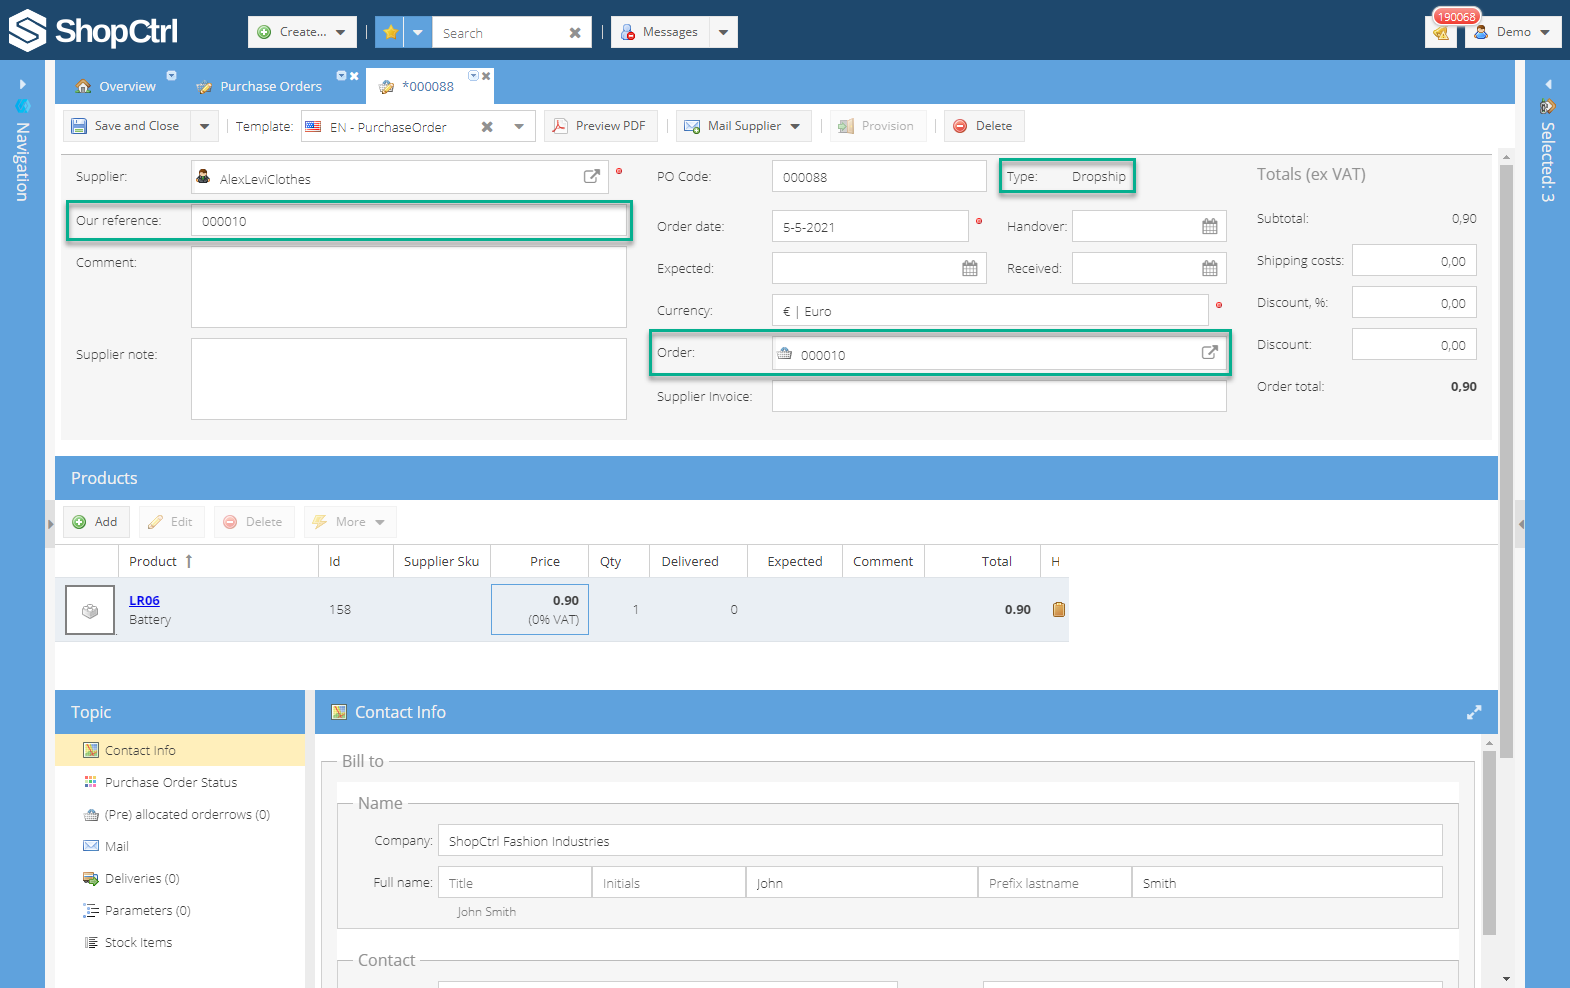
The main differences with the regular purchase order:
- Type is displayed as Dropship.
- Our Reference field contains the sales order code.
- There is no warehouse since the purchase order will be delivered directly to the customer.
- Order field contains a direct link to the sales order for which the purchase order was created. Clicking on the View button will open a sales order in a new tab for editing.
Creating a back-to-back purchase order
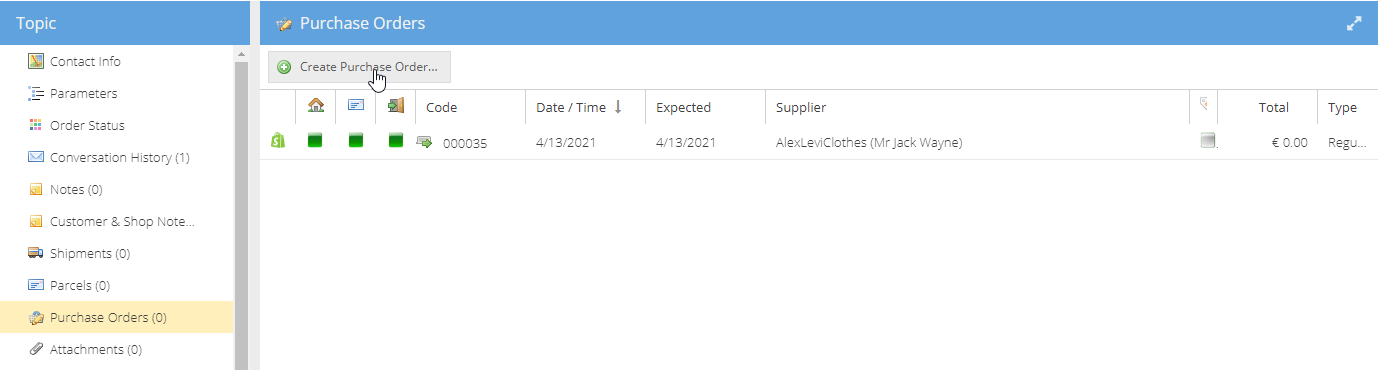
To create a back-to-back purchase order:
-
Open the Sales order for which the back-to-back purchase order should be created. If the product is out of stock, it will be marked as a backorder. ShopCtrl system will automatically identify the supplier for the product.
-
In the topic menu below, choose a Purchase Orders. And click a Create Purchase Order button.
-
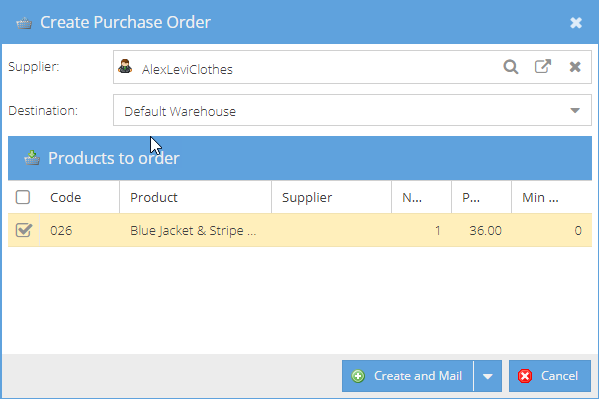
A window will appear offering to choose a supplier, Destination warehouse, and Products to order. The suggestion is based on the supplier's priority set on the product. Preferred supplier is always chosen first. But you can easily choose among the suppliers available.
-
There are several options to Create and Save a back-to-back purchase order.
Create and Mail
- Creates and saves new purchase order
- Purchase order document is generated automatically the moment a purchase order is created.
- Opens a new tab with a new email to a supplier based on the email template set.
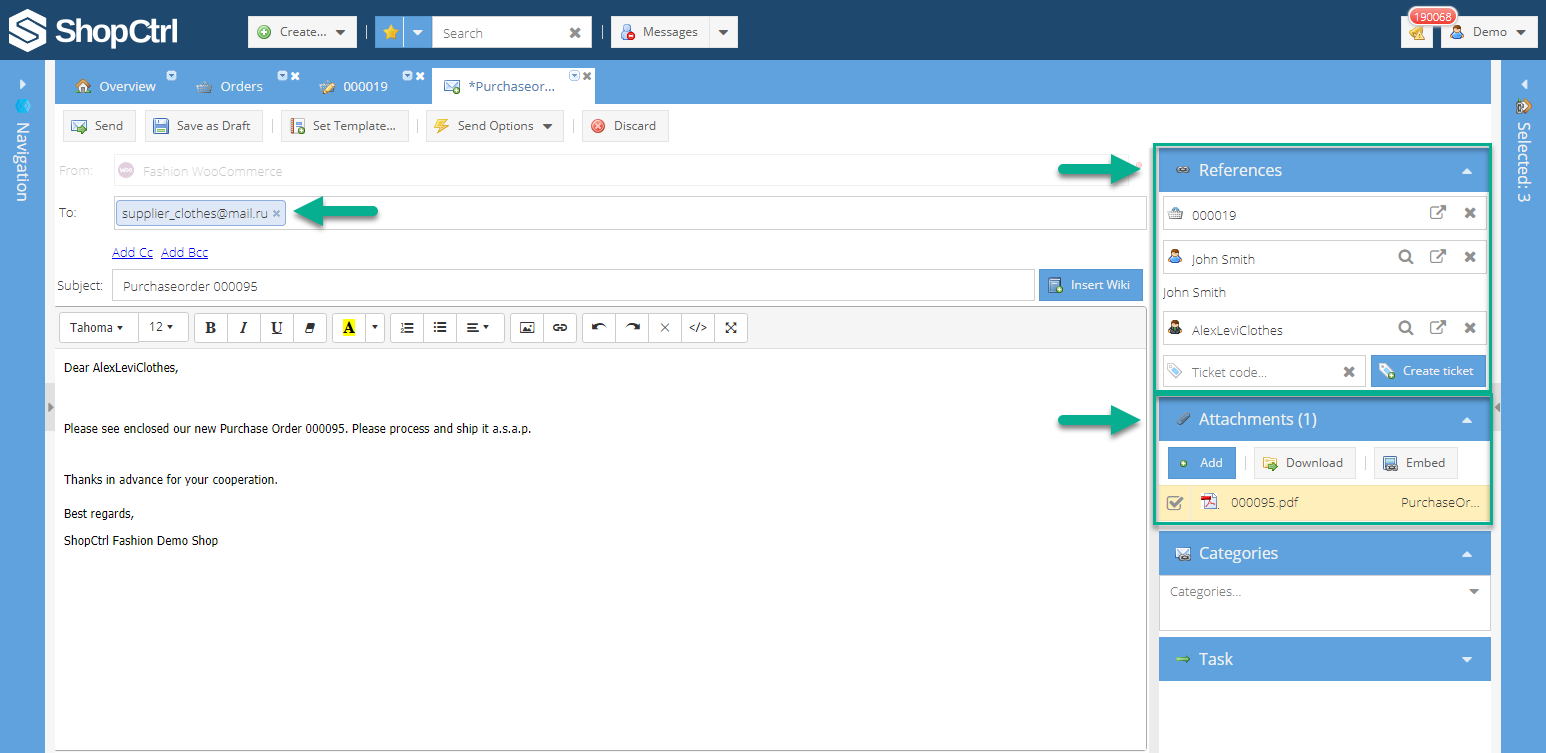
The Reference pane displays:
- Sales order number
- Customer name
- Supplier
- Ticket field code. Please click a Create ticket button to create a new ticket linked to this sales order.
The purchase order document is automatically attached to the email and is visible within an attachments pane.
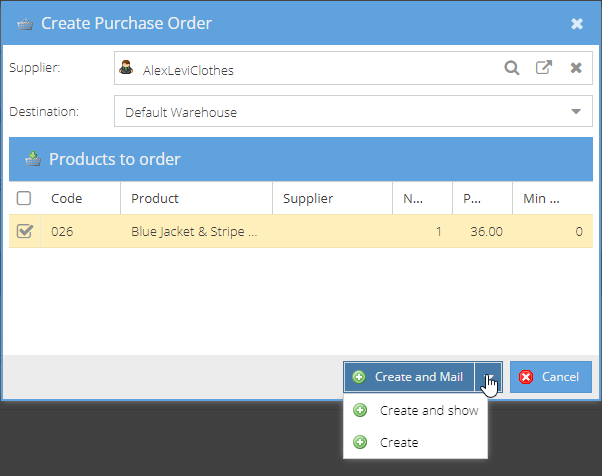
Create and Show
- Creates and saves new Purchase Order
- Purchase Order Document is generated automatically the moment a Purchase Order is created.
- Opens a new tab with a created purchase order for editing.
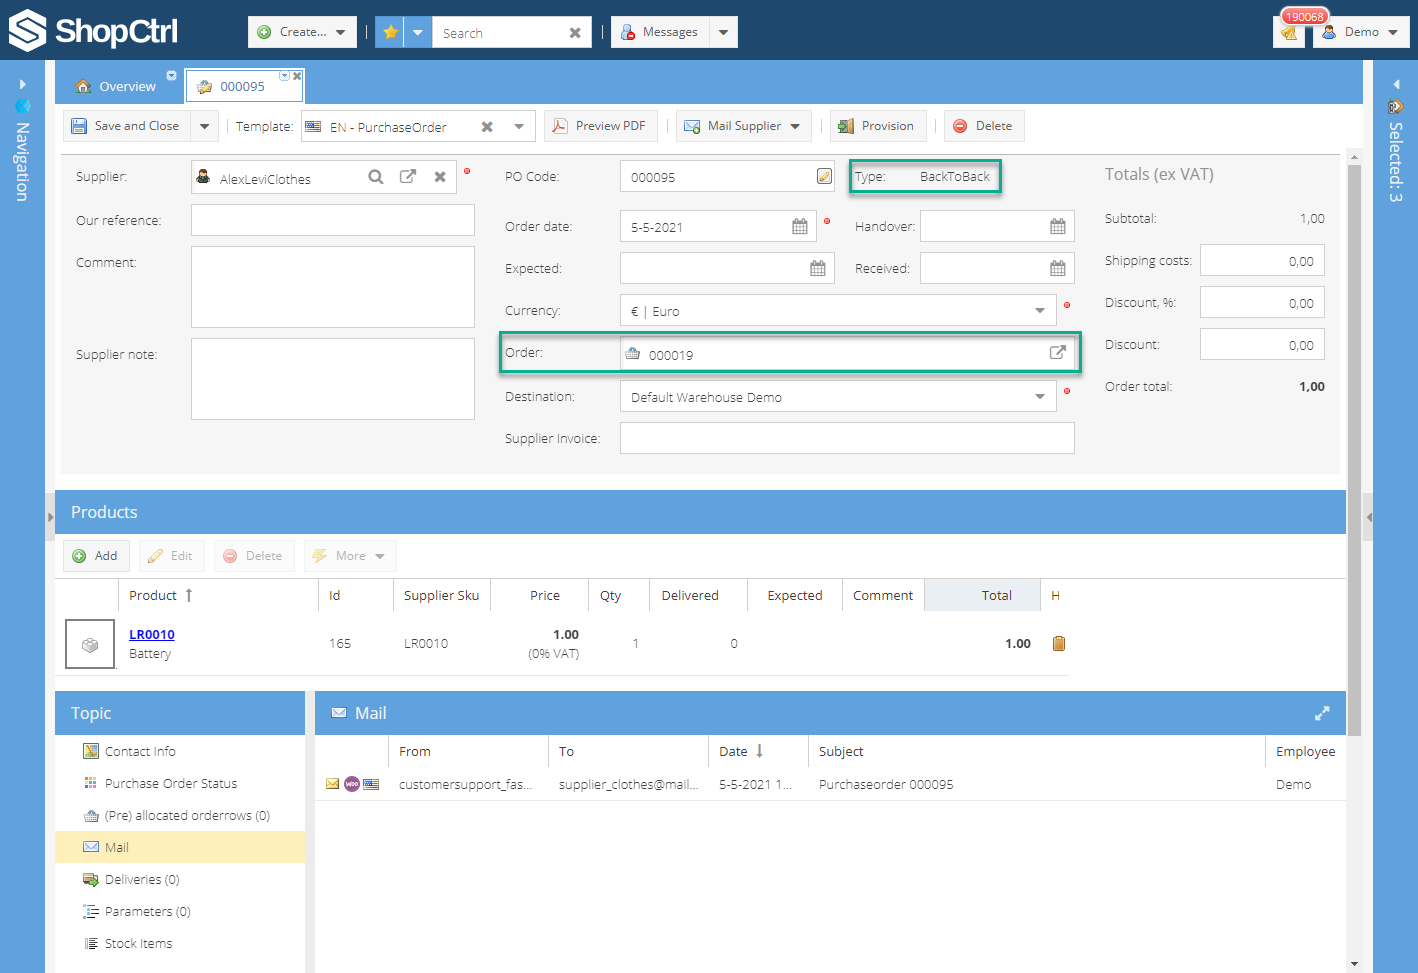
The main differences with the regular purchase order:
- Type is displayed as BacktoBack.
- Order field contains a direct link to the sales order for which the purchase order was created. Clicking on the View button will open a sales order in a new tab for editing.
Create
Creates and saves new purchase order, prompts a pop-up message in the right low corner of the screen.

It is possible to view and edit the newly created purchase order within the purchasing module.