Contracts
An employee must be assigned to the Shop with a Power User role or higher to perform actions referred to in this article.
Contracts functionality enables the auto-creation of orders on predefined periods based on prices quoted in the agreement. You can also configure how often the products should appear in the planned orders. For example, you can set product A to be added to the order each month and product B only once in three months.
Create contract
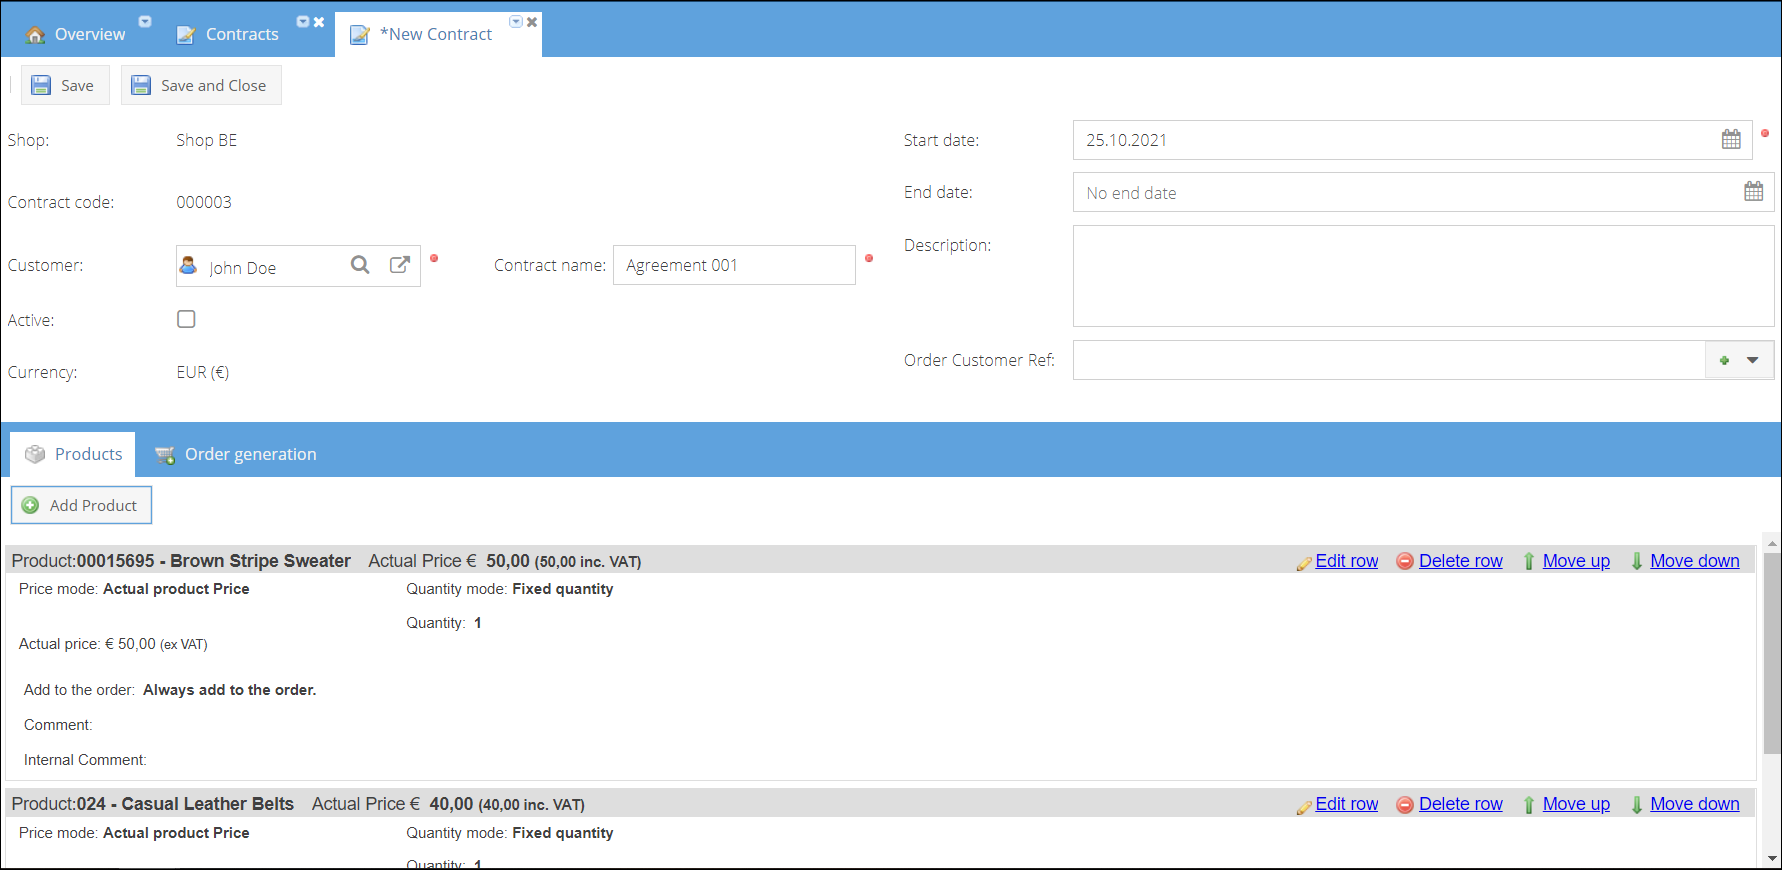
To create a new contract:
- Open Sales > Contracts page.
- Click Add and select a shop from the drop-down list for which you would like to create a contract. A new contract details page will be opened in a new tab. The contract currency will be the currency of the shop chosen.
- Select a Customer.
- Enter Contract name.
- Select a contract Start and End date. Or leave the end date default as "No end date" set if the end date is not stipulated.
- (Optional) Provide a text description for the contract.
- (Optional) Specify the Order Customer Reference that will be copied to the order details after the order creation.
There is a number of Contract Merge Fields available for use as part of customer reference. Click on the plus sign to view a list. Select a merge field and click on it to insert it into the reference field. While generating the order, the merge field will be replaced with corresponding contract data. Merge fields list:
$$PeriodFrom$$
$$PeriodFromMonthNameShort$$
$$PeriodFromMonthName$$
$$PeriodFromYear$$
$$PeriodUntil$$
$$PeriodUntilMonthNameShort$$
$$PeriodUntilMonthName$$
$$PeriodUntilYear$$
$$ContractCode$$
$$ContractName$$
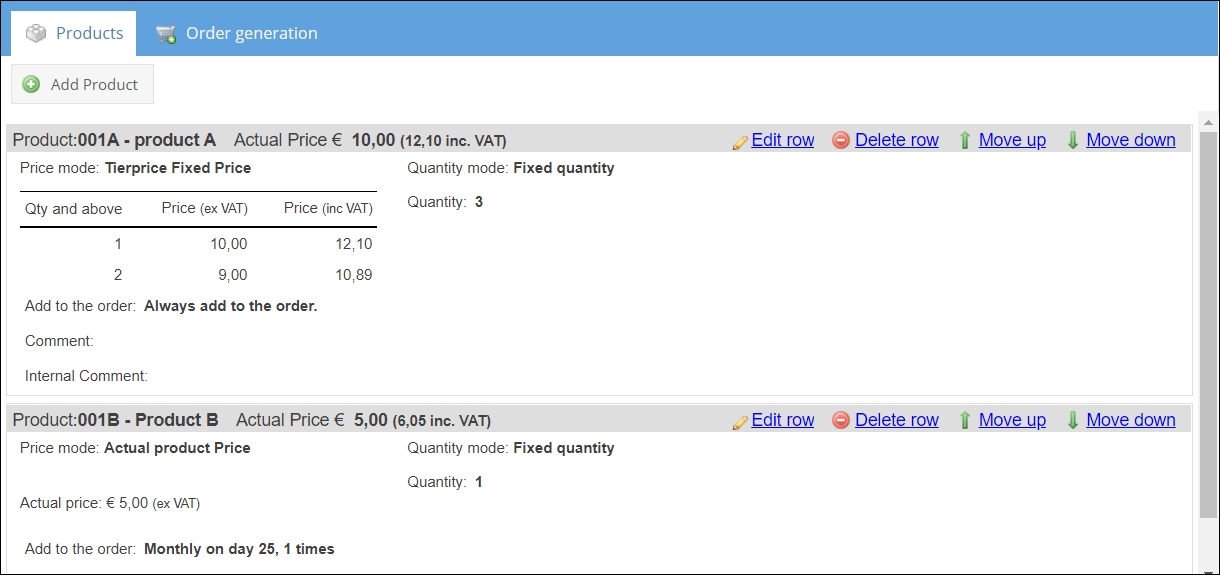
- Click Add Product, find and select a Product that will be added to the contract.
- After the product was added, you can proceed with specifiing the product price settings. Click Edit Row to open the contract product row for editing.
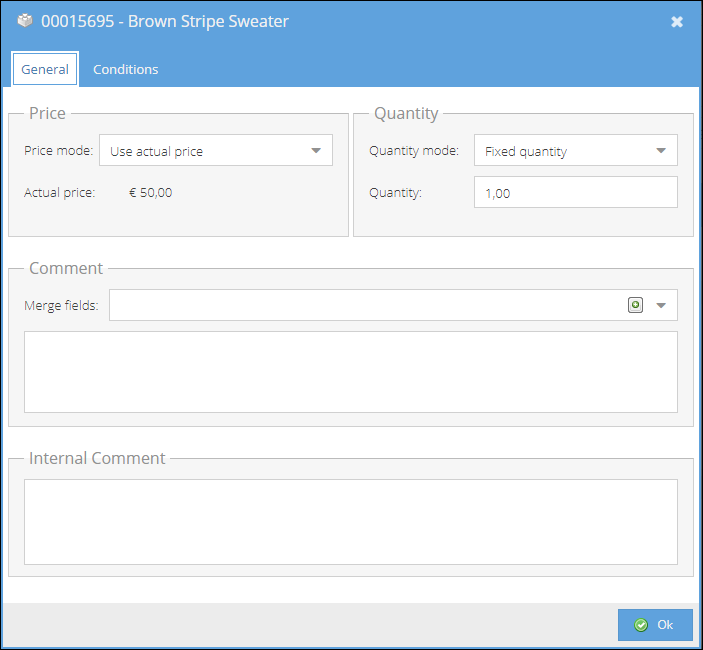
- Choose a Price mode:
- Actual price - the order will be generated using an actual price set at the shop.
- Fixed tier price - specify a price per 1 item based on a quantity ordered. On the example below, the price will differ depending on the number of products ordered. For the quantity three and above, the latest quoted price will be used.
- Stacked tier price - specify a price per tier range. The total quantity is distributed across tiers and each tier produces its own order row. For example, with tiers at 1+ (€0.50), 51+ (€0.35), and 101+ (€0.20), a quantity of 133 would generate three order rows: 50 × €0.50, 50 × €0.35, and 33 × €0.20.
- Flat-fee tier price - specify a fixed fee per tier range. The total quantity determines which tier applies, and a single order row is created with quantity 1 at that tier's price. For example, with tiers at 1+ (€50), 51+ (€75), and 101+ (€100), a quantity of 133 would generate one order row: 1 × €100.
- Choose a Quantity mode:
- Fixed quantity - a specified quantity will be added to each generated order.
- Call service - this will identify that a customer confirmation is needed for the product quantity.
- (Optional) Enter a Comment that will be added to the corresponding order row. You can also use contract-specific merge fields:
$$PeriodFrom$$,$$PeriodUntil$$. When using Stacked or Flat-fee tier price modes, additional merge fields are available:$$TierQtyFrom$$,$$TierQtyTill$$,$$TierRange$$,$$TierQty$$,$$TierPriceExVat$$,$$TierPriceIncVat$$. - (Optional) Enter an Internal Comment visible only within a contract details page.
- Specify on which Conditions contract row will be added to the generated order:
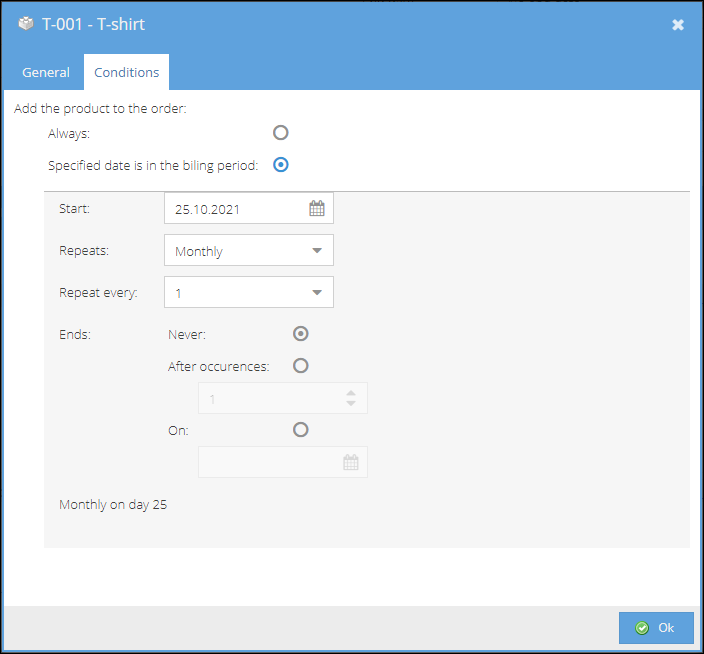
- Always - default. Always add to the order.
- Specified date is in the billing period. In this case, you can set the start period date, select Repeat period (monthly or yearly, each 1, 2-18 months), and set when the period will end: never, after a certain amount of occurrences, or on a set date. The settings preview will be auto-generated and displayed at the bottom of the window.
- Click Ok to save the product row settings. The product row will be updated with the configuration set.
- Repeat with adding other products to the contract. Once all of the products were added, you can change the contract row sequence by clicking the Move buttons controls on each of the rows.
- Save the contract by clicking the Save or Save and Close button on the top action menu.
Automatic order generation
After the products were added to the contract, we can proceed to Order generation settings:
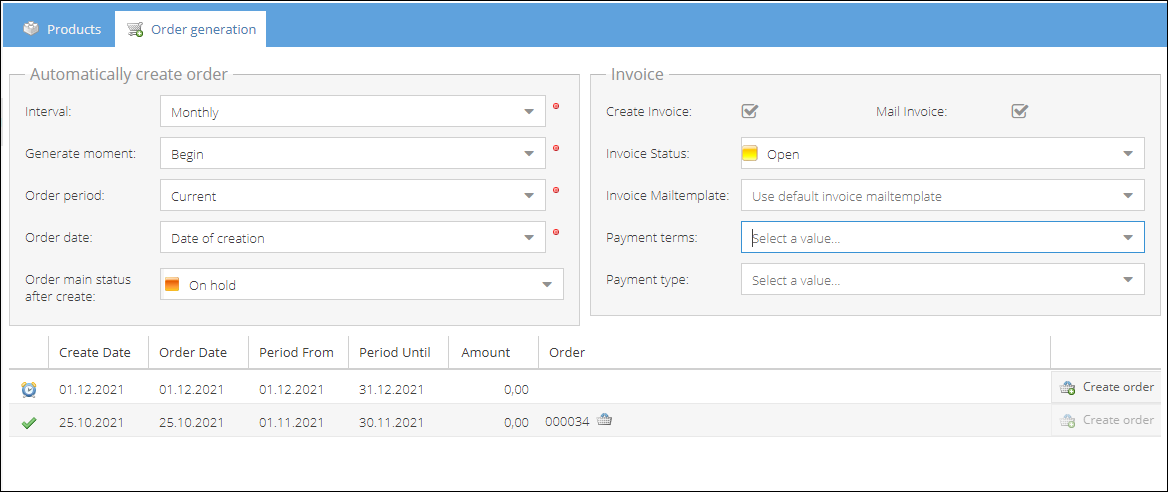
- Select an Interval with which the order will be generated: None (order not generated), Monthly, Quarterly, or Yearly.
- Set a moment the order will be generated within the interval specified above: begin, middle, end. For month intervals, the period is enlarged with the 5th and 25th dates. The orders pane beneath will be updated with the next planned order row depending on the given settings.
- Choose an Order period - the period to create an order for: current, previous, or next.
- Select a Date that will be set for the auto-generated order. It could be the default Date of creation value or Last date of the period.
- (Optional) Select what main status to set for the order after creation.
- (Optional) You can select the payment type among those used on a shop.
- (Optional) If the payment type used is Invoice, you can also configure to create and send an invoice along with creating an order:
- Mark the Create Invoice checkbox.
- Select what status to set for the invoice after creation.
- Decide whether you want to auto-email the invoice right after creation by marking the Mail Invoice checkbox.
- Select a mail template that will be used for the generation of the automatic mail.
- Check the order generation preview pane to make sure the periods were configured correctly. The next planned order row will be displayed in a grid and marked with a
 icon.
icon. - Mark the Active checkbox to enable the order generation.
- Click Save or Save and Close to save the contract.
The fulfillment status of the newly generated order will be "Hold fulfillment", to prevent the order from an automatic shipment before customer confirmation.
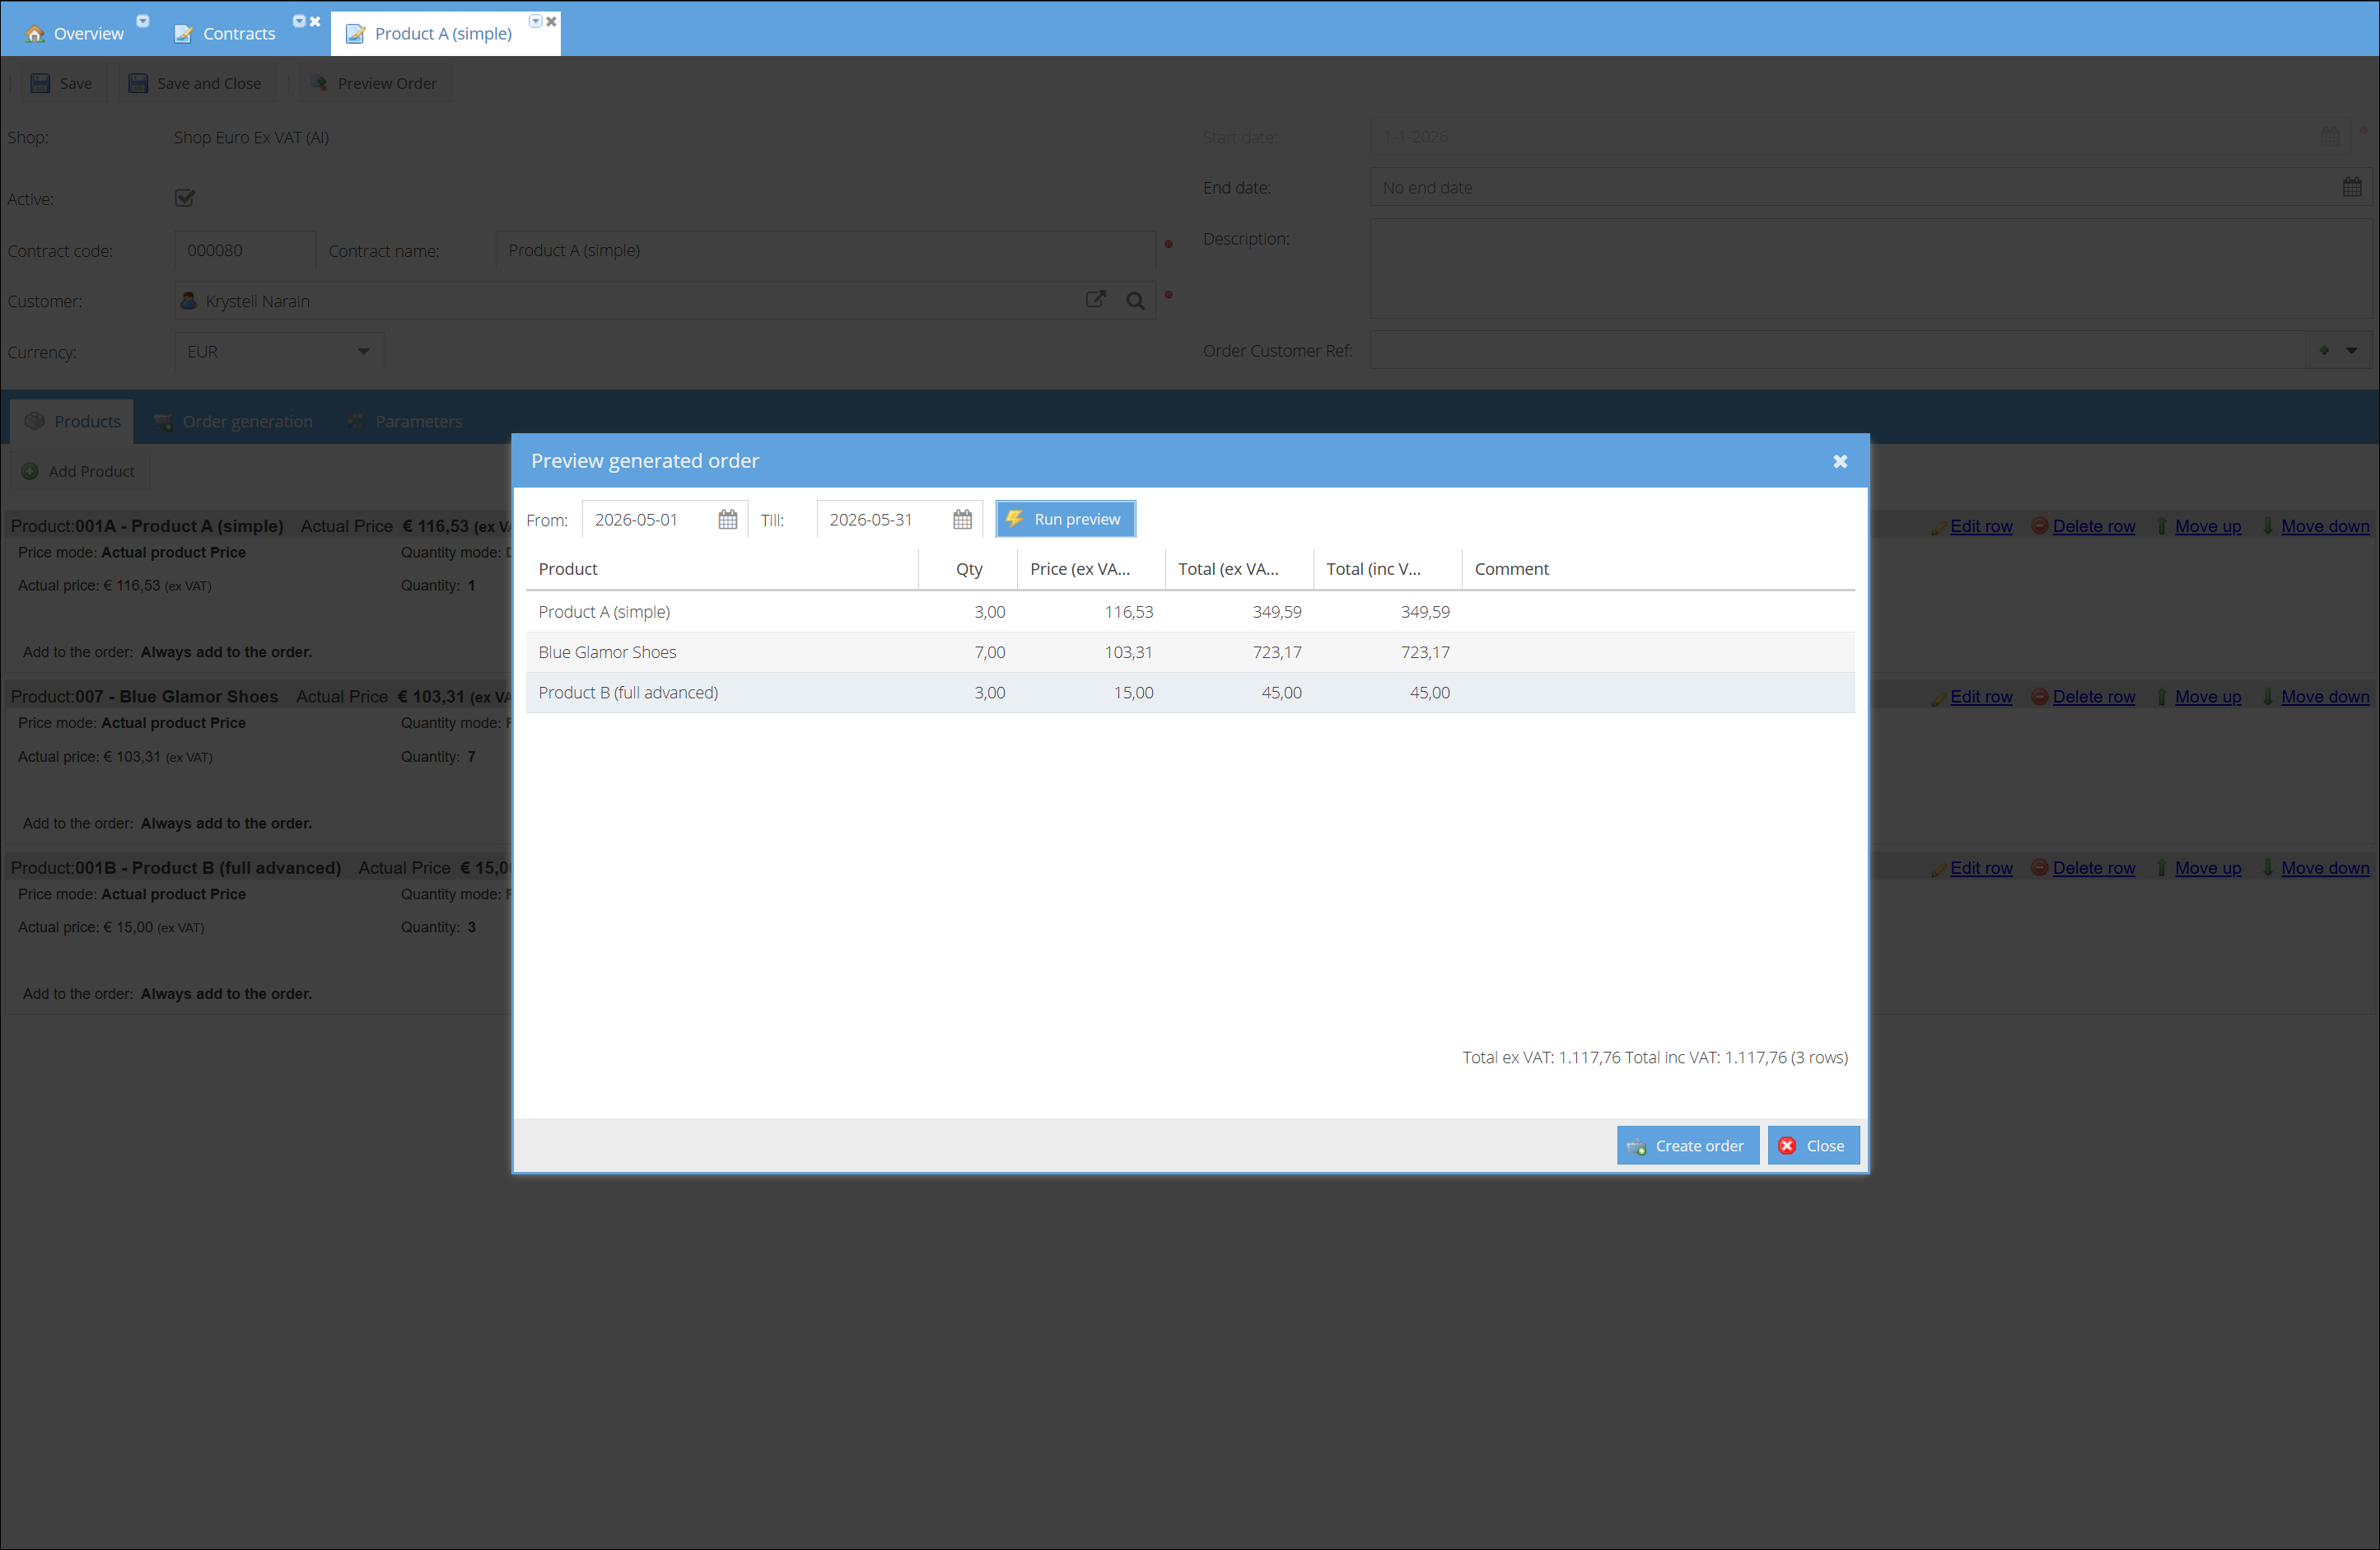
Preview order
You can preview the order rows that would be generated for a given period without actually creating the order.
- Click the Preview Order button in the top toolbar.
- Set the From and Till dates for the period you want to preview. By default, the dates are set to the previous month.
- Click Run preview to generate a preview of the order rows. The grid will display the product name, quantity, price, totals, and comment for each row.
- Review the results. If the preview looks correct, you can click Create order to generate and save the order directly from the preview window.
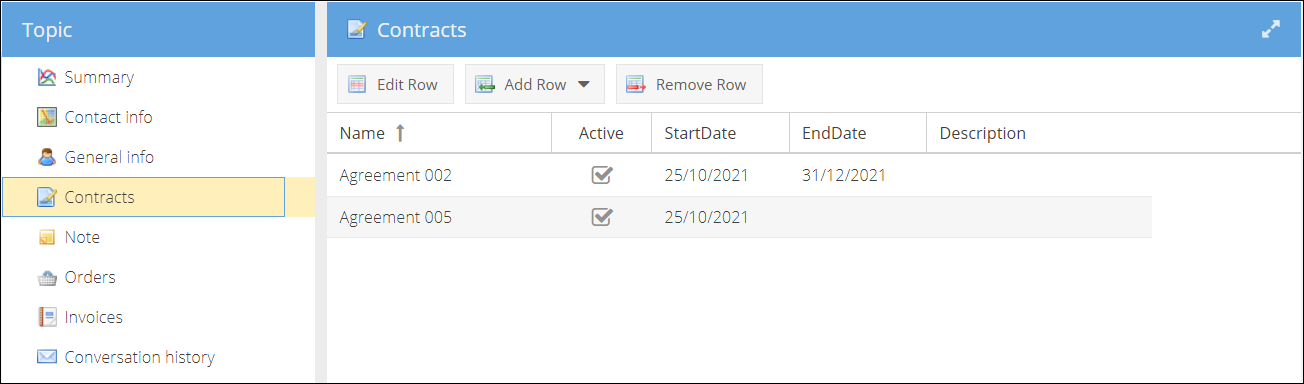
Manage contracts
Once the contracts are created, you can manage them from the Sales > Contracts tab.
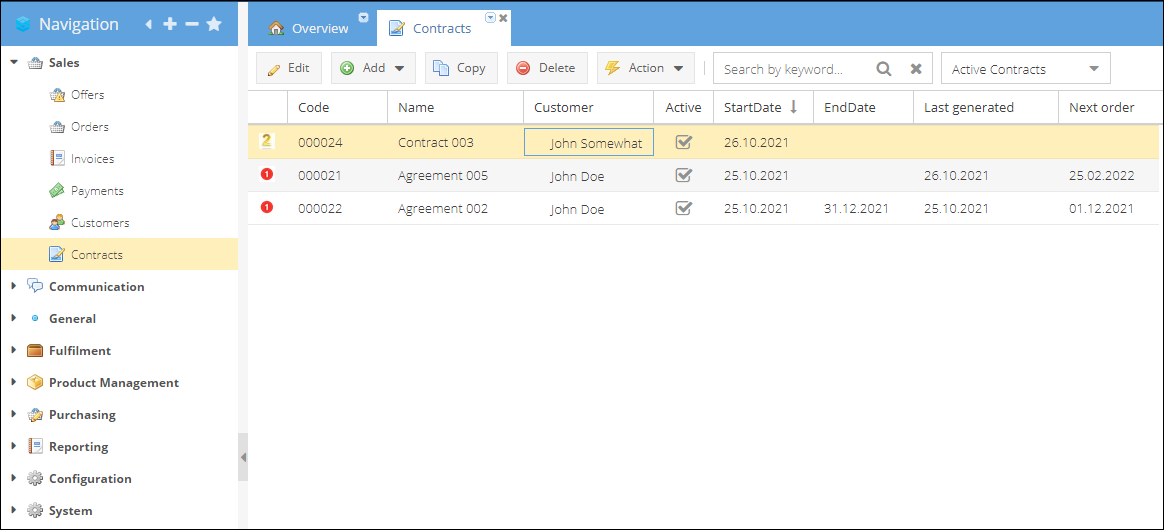
The contracts page shows the active contracts by default, and you can change the filter to 'All Contracts' to include the deactivated to the list. The Last generated column indicates the date of the last order created upon a contract. And the Next order column displays the next planned order date. You can open the contract for editing by double-clicking the contract row.
The whole list of contracts created for the customer is also available from the customer details page Topic menu > Contracts.