MultiSafepay and ShopCtrl Checkout page
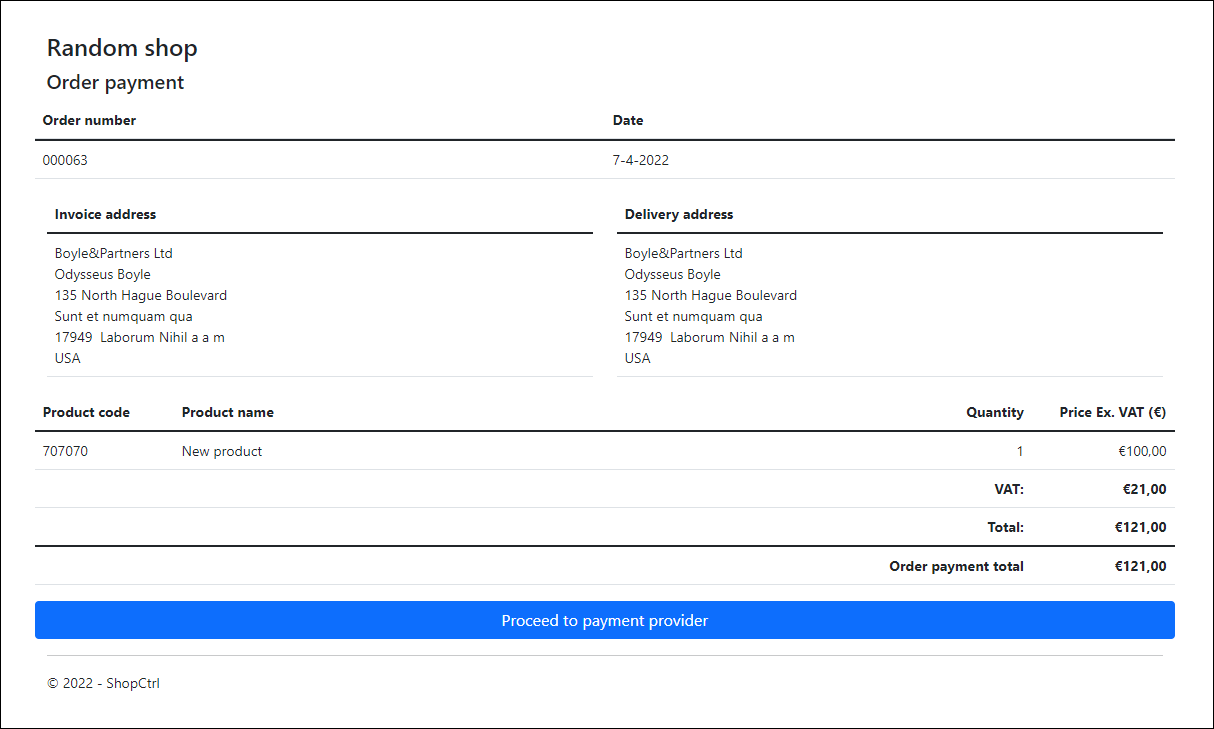
ShopCtrl offers integration with a MultiSafepay payment provider offering your customers a number of payment methods to choose from. As part of this integration, we offer a self-hosted checkout page and a possibility to generate payment links within ShopCtrl using merge fields. You can generate and send your customers a payment link to pay the total of the order, make a down payment on the order, or pay an invoice.
The ShopCtrl Checkout page and payment links generation can also be integrated with different payment providers as well.
Payments are processed in the shop’s default currency. The language of the checkout page is defined based on order and customer culture.
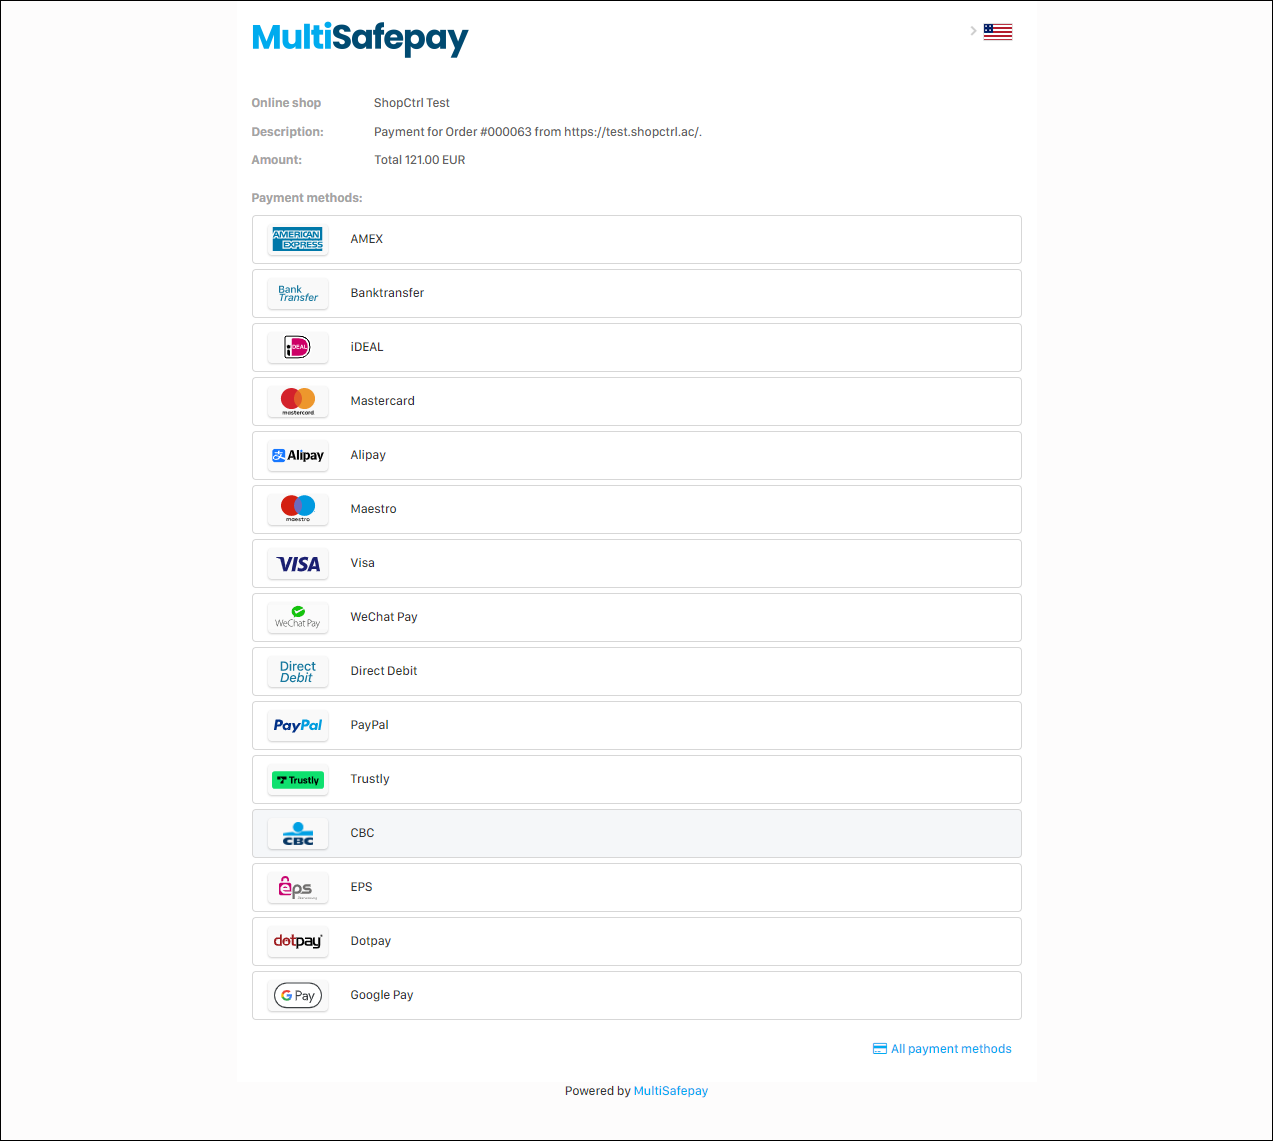
Proceeding to payment opens a new page with a list of all available payment methods. The payment methods that are available, are determined by your MultiSafepay account settings.
The system supports multiple MultiSafepay transactions per order. The payment received will be immediately mapped to the order or invoice it was issued for. A corresponding record will appear in the payments tab and order details payment allocations.
Setup
To set up the integration with MultiSafepay and the possibility to generate payment links, we need to follow the three steps below.
Step 1. Configure test integration with MultiSafepay
To set up an integration with a MultiSafepay payment provider, you first need to create and configure your test MultiSafepay account. In 'Test mode', the test API from MultiSafepay is used. In combination with a test account (required), you are free to test the payment system as you desire: no real money is used in these transactions.
See more on MultiSafepay docs - Create a test account and Site ID, API key, and secure code.
Once the account is created, please contact us to walk through the activation process of MultiSafepay on your environment and set up the Hosting URL for the checkout page.
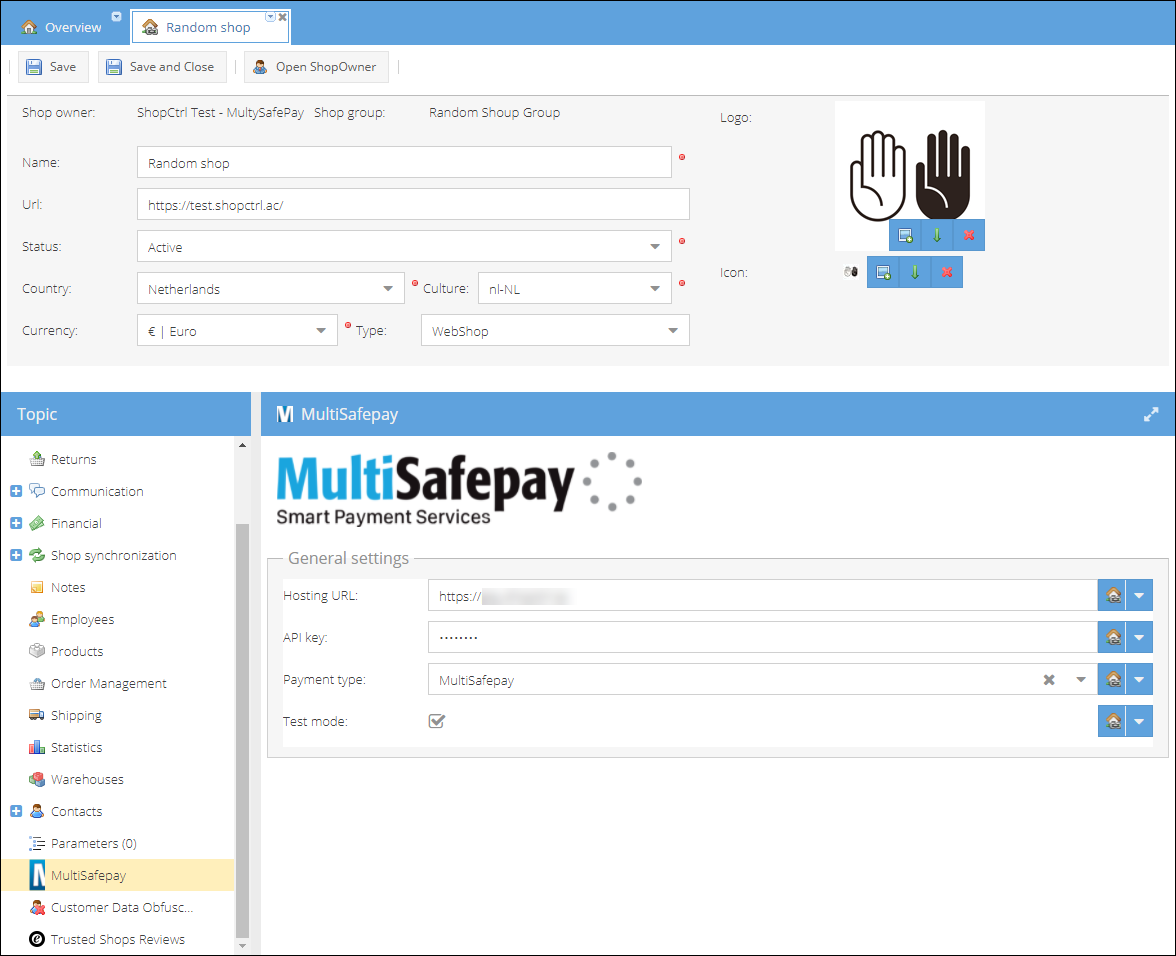
To set up test MultiSafepay integration on a shop:
- Go to the Shop settings > MultiSafepay.
- Enter an URL hosting a checkout page (provided by ShopCtrl): Hosting URL.
- Enter an API key from the previously created integration.
- Select the ShopCtrl payment type to be mapped to the payments performed through the portal: MultiSafepay.
- Check the Test mode checkbox to connect to a MultiSafepay test environment.
- Click Save or Save and Close.
Step 2. Configure Checkout page
The Checkout page is multilingual. The language of the checkout page is defined based on order and customer culture. The shop logo and name will be displayed automatically based on the shop settings for which the payment link was created. Depending on the payment purpose, there are three checkout pages layouts: order, order down payment, or invoice. The other placeholders for all of the pages could be defined from the Resources tab.
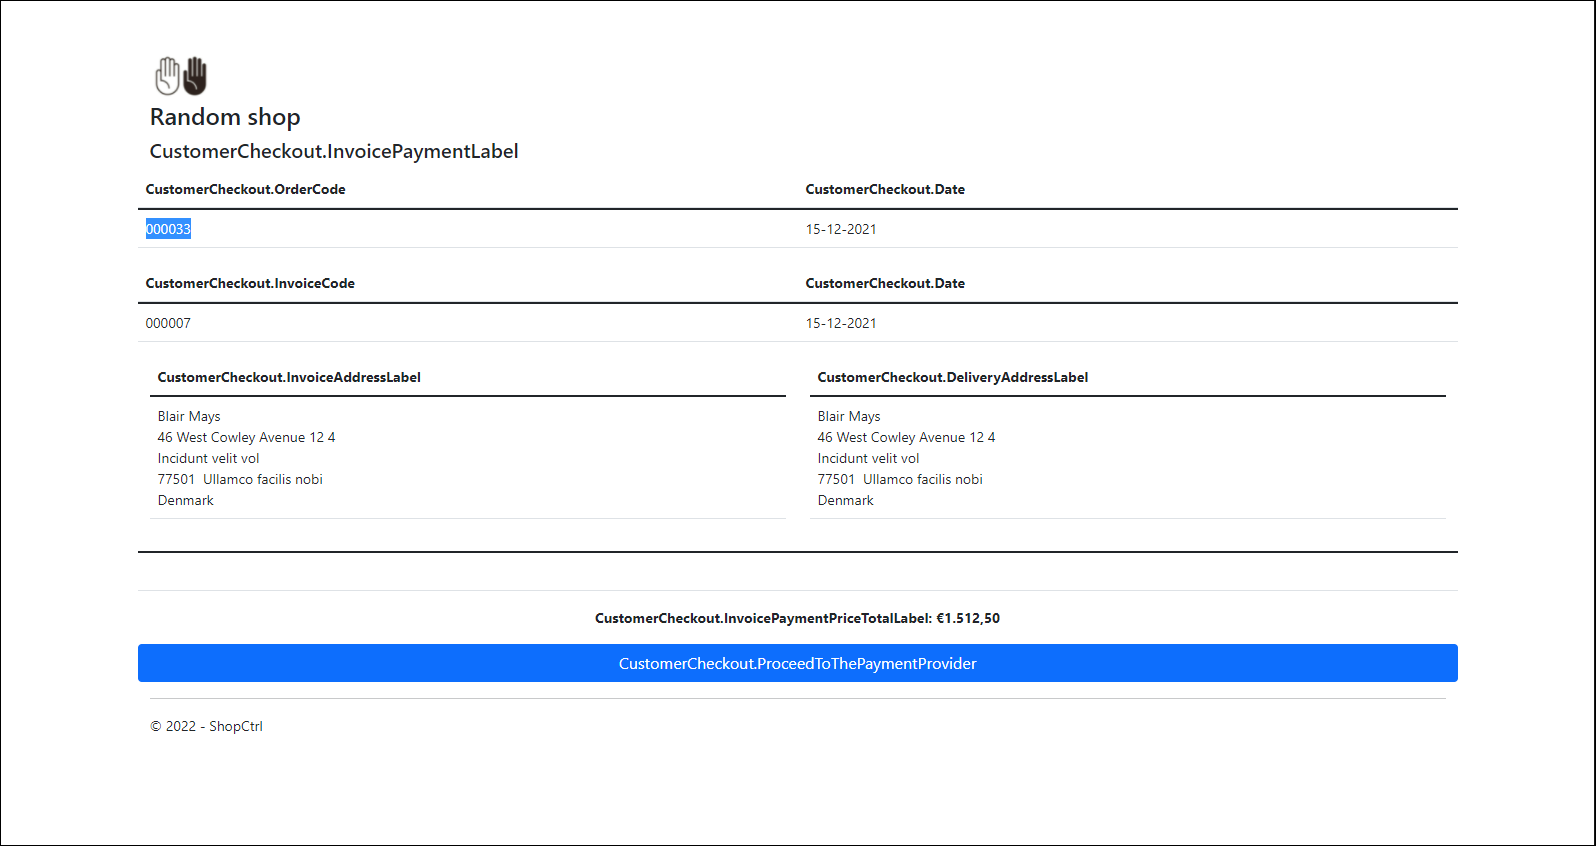
The labels could be translated from the Configuration > Resources tab. ShopCtrl provides default dutch (nl-NL) values for the labels. You can modify the default ones and add any number of languages to any number of languages.
You can get the complete list of the labels from the checkout page on the {Hosting URL}/Checkout/TranslationLabels.
To create a new translation for the Checkout page:
- Go to Configuration > Resources.
- Click Add.
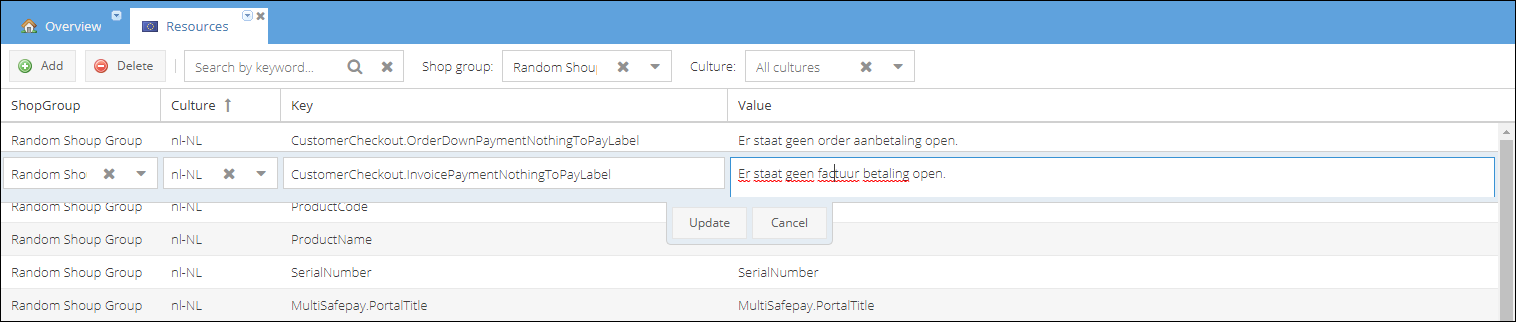
- In the new line select Shop group.
- Select Culture of the translation you are adding.
- Enter the Key which is the placeholder from the checkout page and a value. See below an nl-NL version:
| Key (placeholder) | Value |
|---|---|
CustomerCheckout.VatLabel | BTW |
CustomerCheckout.ThereAreNoInvoicesForThisOrder | Er zijn geen facturen voor deze bestelling. |
CustomerCheckout.ThankYouForPaying | Bedankt voor uw betaling! |
CustomerCheckout.ShippingCostsLabel | Transportkosten |
CustomerCheckout.ProductNameLabel | Product naam |
CustomerCheckout.ProductCodeLabel | Product code |
CustomerCheckout.ProceedToThePaymentProvider | Naar de betaalprovider gaan |
CustomerCheckout.PriceTotalLabel | Totaal |
CustomerCheckout.PriceLabel | Prijs |
CustomerCheckout.PortalTitle | Betalen |
CustomerCheckout.PaymentFeeLabel | Betaalkosten |
CustomerCheckout.OrderPaymentPriceTotalLabel | Order betaling totaal |
CustomerCheckout.OrderPaymentNothingToPayLabel | Er staat geen order betaling open. |
CustomerCheckout.OrderPaymentLabel | Order betaling |
CustomerCheckout.OrderDownPaymentPriceTotalLabel | Order aanbetaling totaal |
CustomerCheckout.OrderDownPaymentNothingToPayLabel | Er staat geen order aanbetaling open. |
CustomerCheckout.OrderDownPaymentLabel | Order aanbetaling |
CustomerCheckout.OrderCode | Bestelnummer |
CustomerCheckout.ItemQuantity | Aantal |
CustomerCheckout.InvoicePaymentPriceTotalLabel | Factuurbetaling totaal |
CustomerCheckout.InvoicePaymentNothingToPayLabel | Er staat geen factuur betaling open. |
CustomerCheckout.InvoicePaymentLabel | Factuur betaling |
CustomerCheckout.InvoiceCode | Factuurnummer |
CustomerCheckout.InvoiceAddressLabel | Factuuradres |
CustomerCheckout.IncVAT | Inc. BTW |
CustomerCheckout.ExVAT | Ex. BTW |
CustomerCheckout.DiscountLabel | Korting |
CustomerCheckout.DeliveryAddressLabel | Afleveradress |
CustomerCheckout.Date | Datum |
CustomerCheckout.AnErrorHasOccurred | Er is een fout opgetreden. |
CustomerCheckout.AllInvoicesArePaidForTheOrder | Alle facturen voor deze bestelling zijn betaald. |
- Click Update to save the record.
- Repeat to all of the placeholders for the desired language.
Make sure to provide translation values for all of the placeholders of the specific culture you are editing.
Step 3. Create email templates
To create payment email templates, there are several merge fields to populate emails with payment links. ShopCtrl offers three types of payment links and matching merge fields:
- Order - order total due -
$$Order.CustomerCheckoutOrderCheckoutUrl$$ - Order Down Payment - order down payment -
$$Order.CustomerCheckoutOrderDownPaymentCheckoutUrl$$ - Invoice - total due on the invoice -
$$Invoice.CustomerCheckoutInvoiceCheckoutUrl$$
Step 4. Configure integration with MultiSafepay on your production environment
After the initial setup is done and the integration is tested on the acceptance environment, we can now move to set up the integration on the production environment. See more on MultiSafepay docs - Onboard my account. In the same way, you will need to retrieve the API key this time for your live dashboard. See more on MultiSafepay docs - Site ID, API key, and secure code.
To set up production MultiSafepay integration on a shop:
- Go to the Shop settings > MultiSafepay.
- Enter an URL hosting a checkout page (provided by ShopCtrl): Hosting URL.
- Enter an API key from the previously created integration.
- Select the ShopCtrl payment type to be mapped to the payments performed through the portal: MultiSafepay.
- Click Save or Save and Close.
Now your shop can accept payments using the MultiSafepay gateway.
If you are planning to use this payment method on multiple shops, you need to configure the MultiSafepay module on all of the shops on which MultiSafepay is to be active. Each website configured at MultiSafepay should be mapped to a corresponding shop in ShopCtrl with an API key. See more on MultiSafepay docs - Sites.
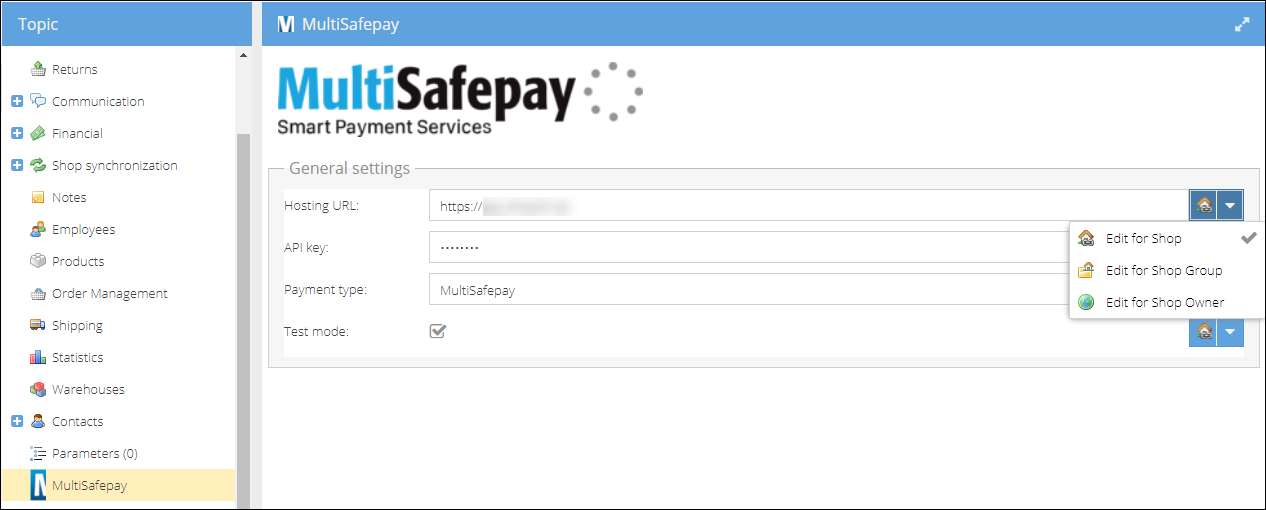
To copy the settings to all of the shops in the system:
- Click an arrow at the end of each setting and select the area on which it should be applied.
- Repeat for all of the settings.
- Save the shop settings to apply changes to the selected area.