Creating Shipment
- 20 Jun 2022
- 1 Minute to read
- Print
- DarkLight
- PDF
Creating Shipment
- Updated on 20 Jun 2022
- 1 Minute to read
- Print
- DarkLight
- PDF
Article summary
Did you find this summary helpful?
Thank you for your feedback
The process of fulfilling an order starts with allocating stock for an order. The order can be allocated from one warehouse or split among several warehouses or dropship suppliers. You can create pick and pack lists, and generate labels for the packages. After the shipment is handed over to a carrier, the final step will be to mark it as shipped. At this moment, based on an integration with a sales channel or set triggers, the customer will be updated with a tracking number.
How to manually ship an order from a private warehouse:
- Go to Sales > Orders.
- Locate and open an order you would like to ship.
- If the stock was not yet allocated for the order, please do it manually. Click Fulfillment > Allocate stock:
1. Select Automatic. ShopCtrl will determine what warehouse to use.
2. Or click a warehouse name to allocate stock from a specific warehouse.

- From the top menu, choose Fulfillment > Create Shipment.
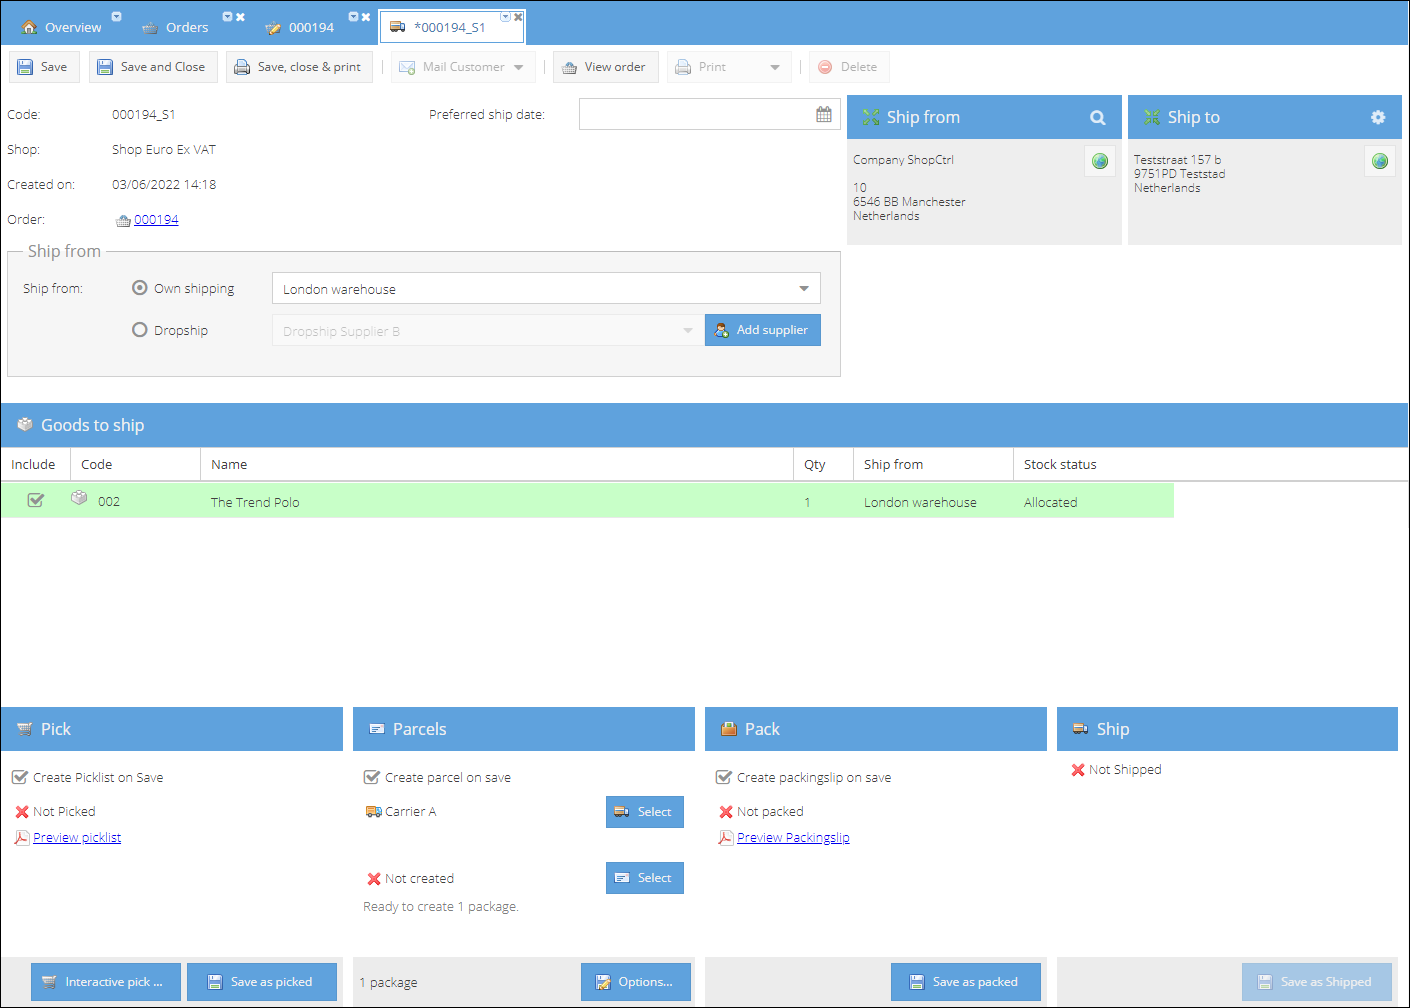
- Decide whether to auto-generate Picklist and Packingslip after saving a shipment for the first time.
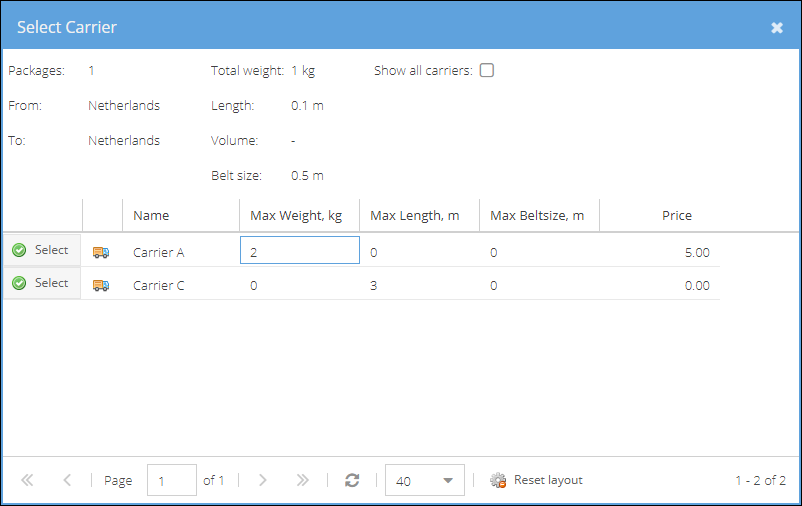
- (Optional) Change the Carrier to ship the parcel:
1. Click the Select button on the Parcels pane.
2. From a list of carriers that match the parcel dimensions choose the new Carrier.
- Choose whether to create a parcel and thus generate a shipping label the moment the shipment is saved.
- Save, Save and Close or Save, close & print shipment.


After the shipment is saved, you can proceed with picking, packing and passing package(s) to a carrier shipping service. By this time, it is important to mark the shipment as Shipped.