Amazon 3P
- 17 May 2024
- 7 Minutes to read
- Print
- DarkLight
- PDF
Amazon 3P
- Updated on 17 May 2024
- 7 Minutes to read
- Print
- DarkLight
- PDF
Article summary
Did you find this summary helpful?
Thank you for your feedback!
Required Permissions
An employee must be assigned to the shop with a Shop Owner Admin role to perform actions referred to in this article.
Amazon integration connector lets you import orders and products from your Amazon seller account using API integration directly to ShopCtrl.
Amazon Synchronization Module Features
With the Amazon module you can:
- Import new orders
- Update tracking numbers for the shipped orders
- Export cancelled orders
- Create returns
- Update Amazon inventory
- Export changed product prices
- Change product publication status
Setting up integration with Amazon
Amazon Profile Configuration
- Login to your Seller Central Amazon account.
- From the top right navigation menu, select Partner Network > Develop Apps.
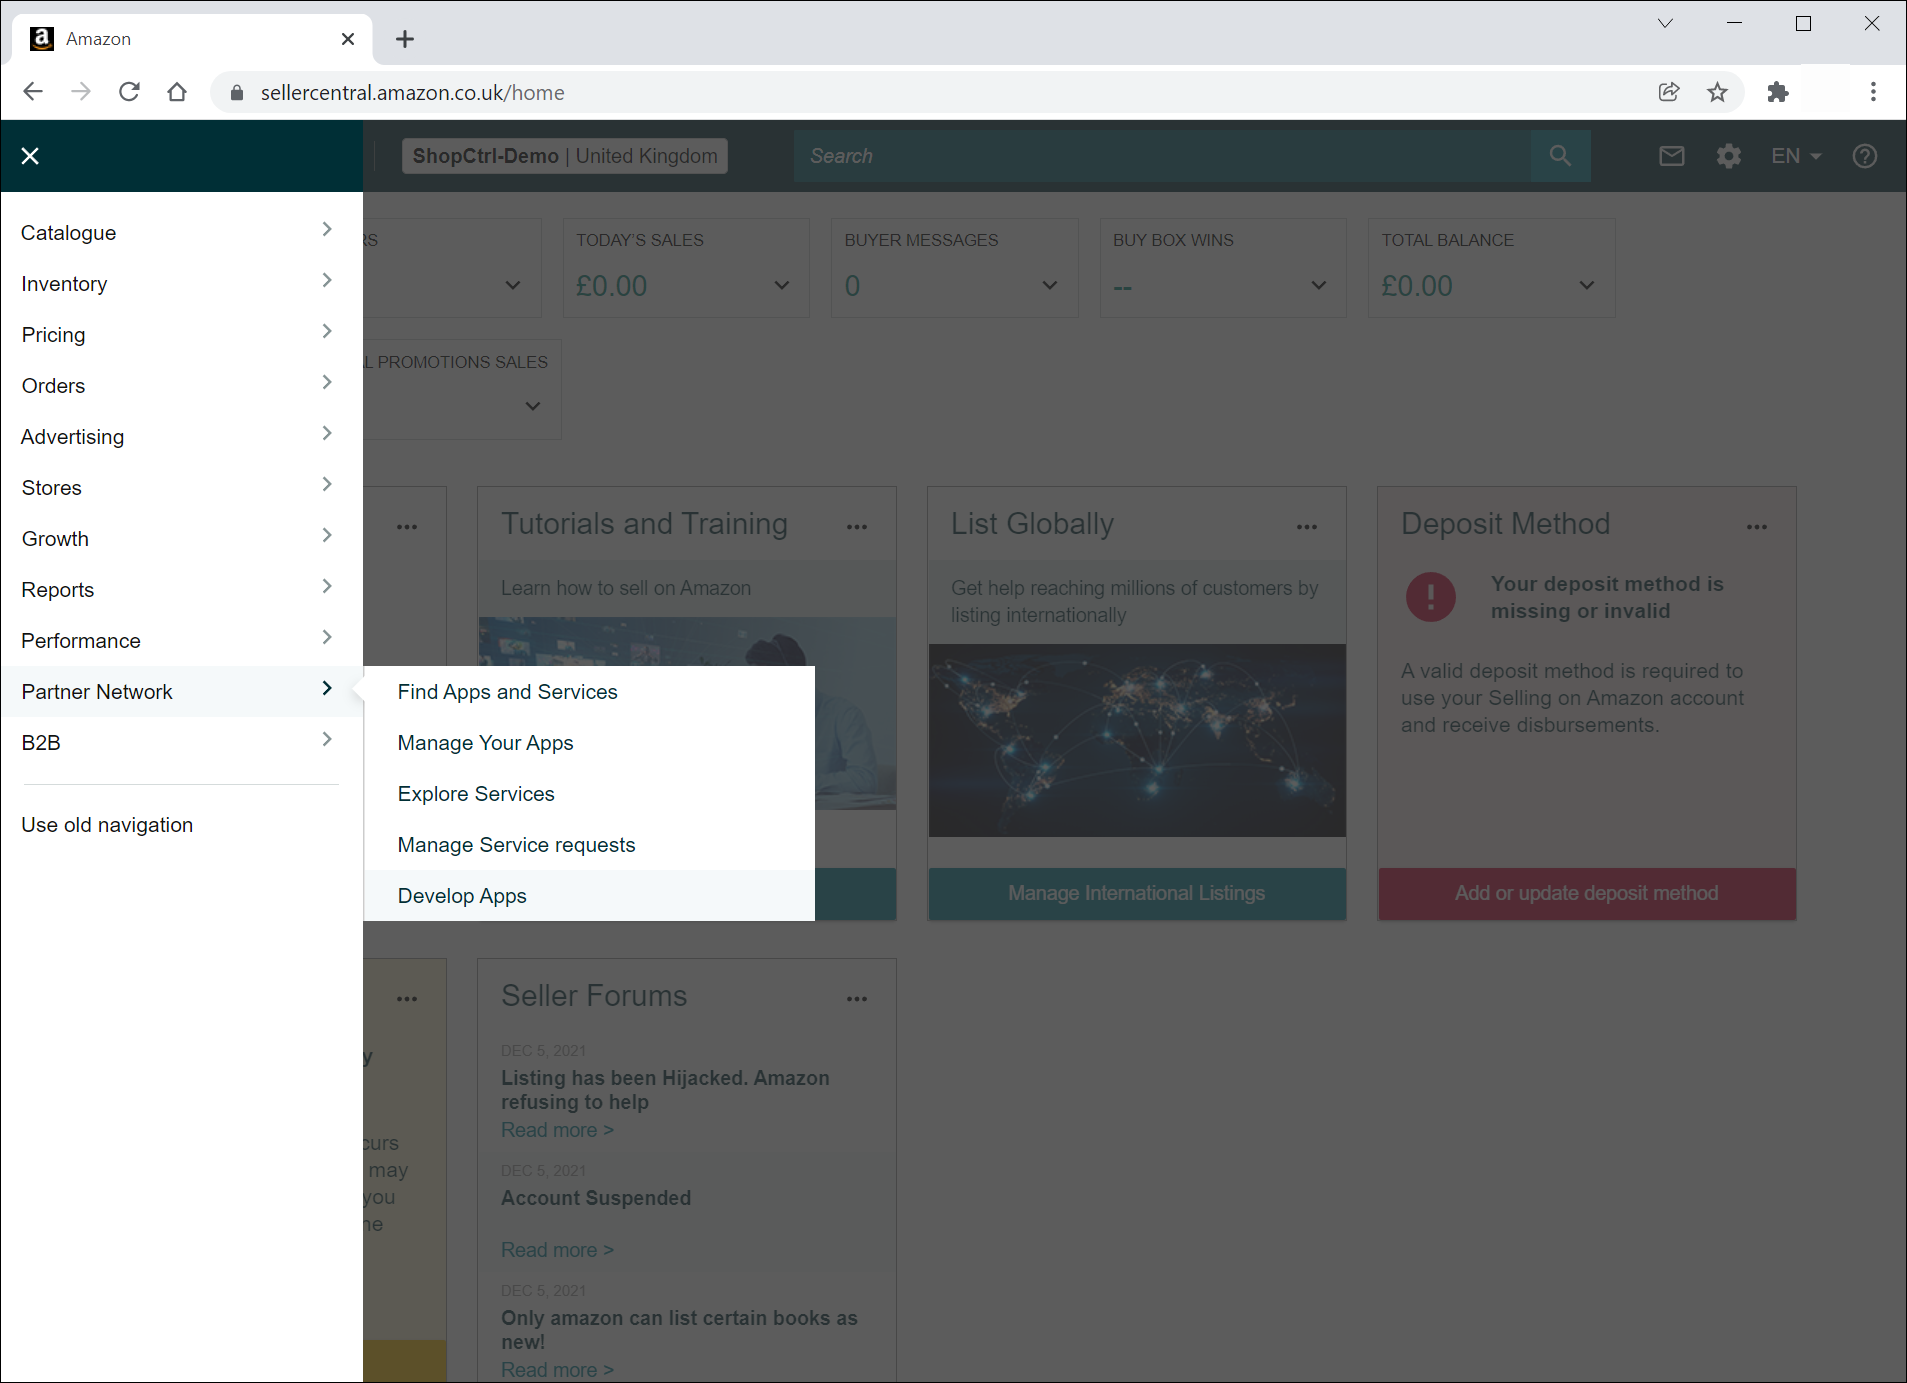
- Click Your Developer Profile.
- On a new page fill in your company Contact Information:
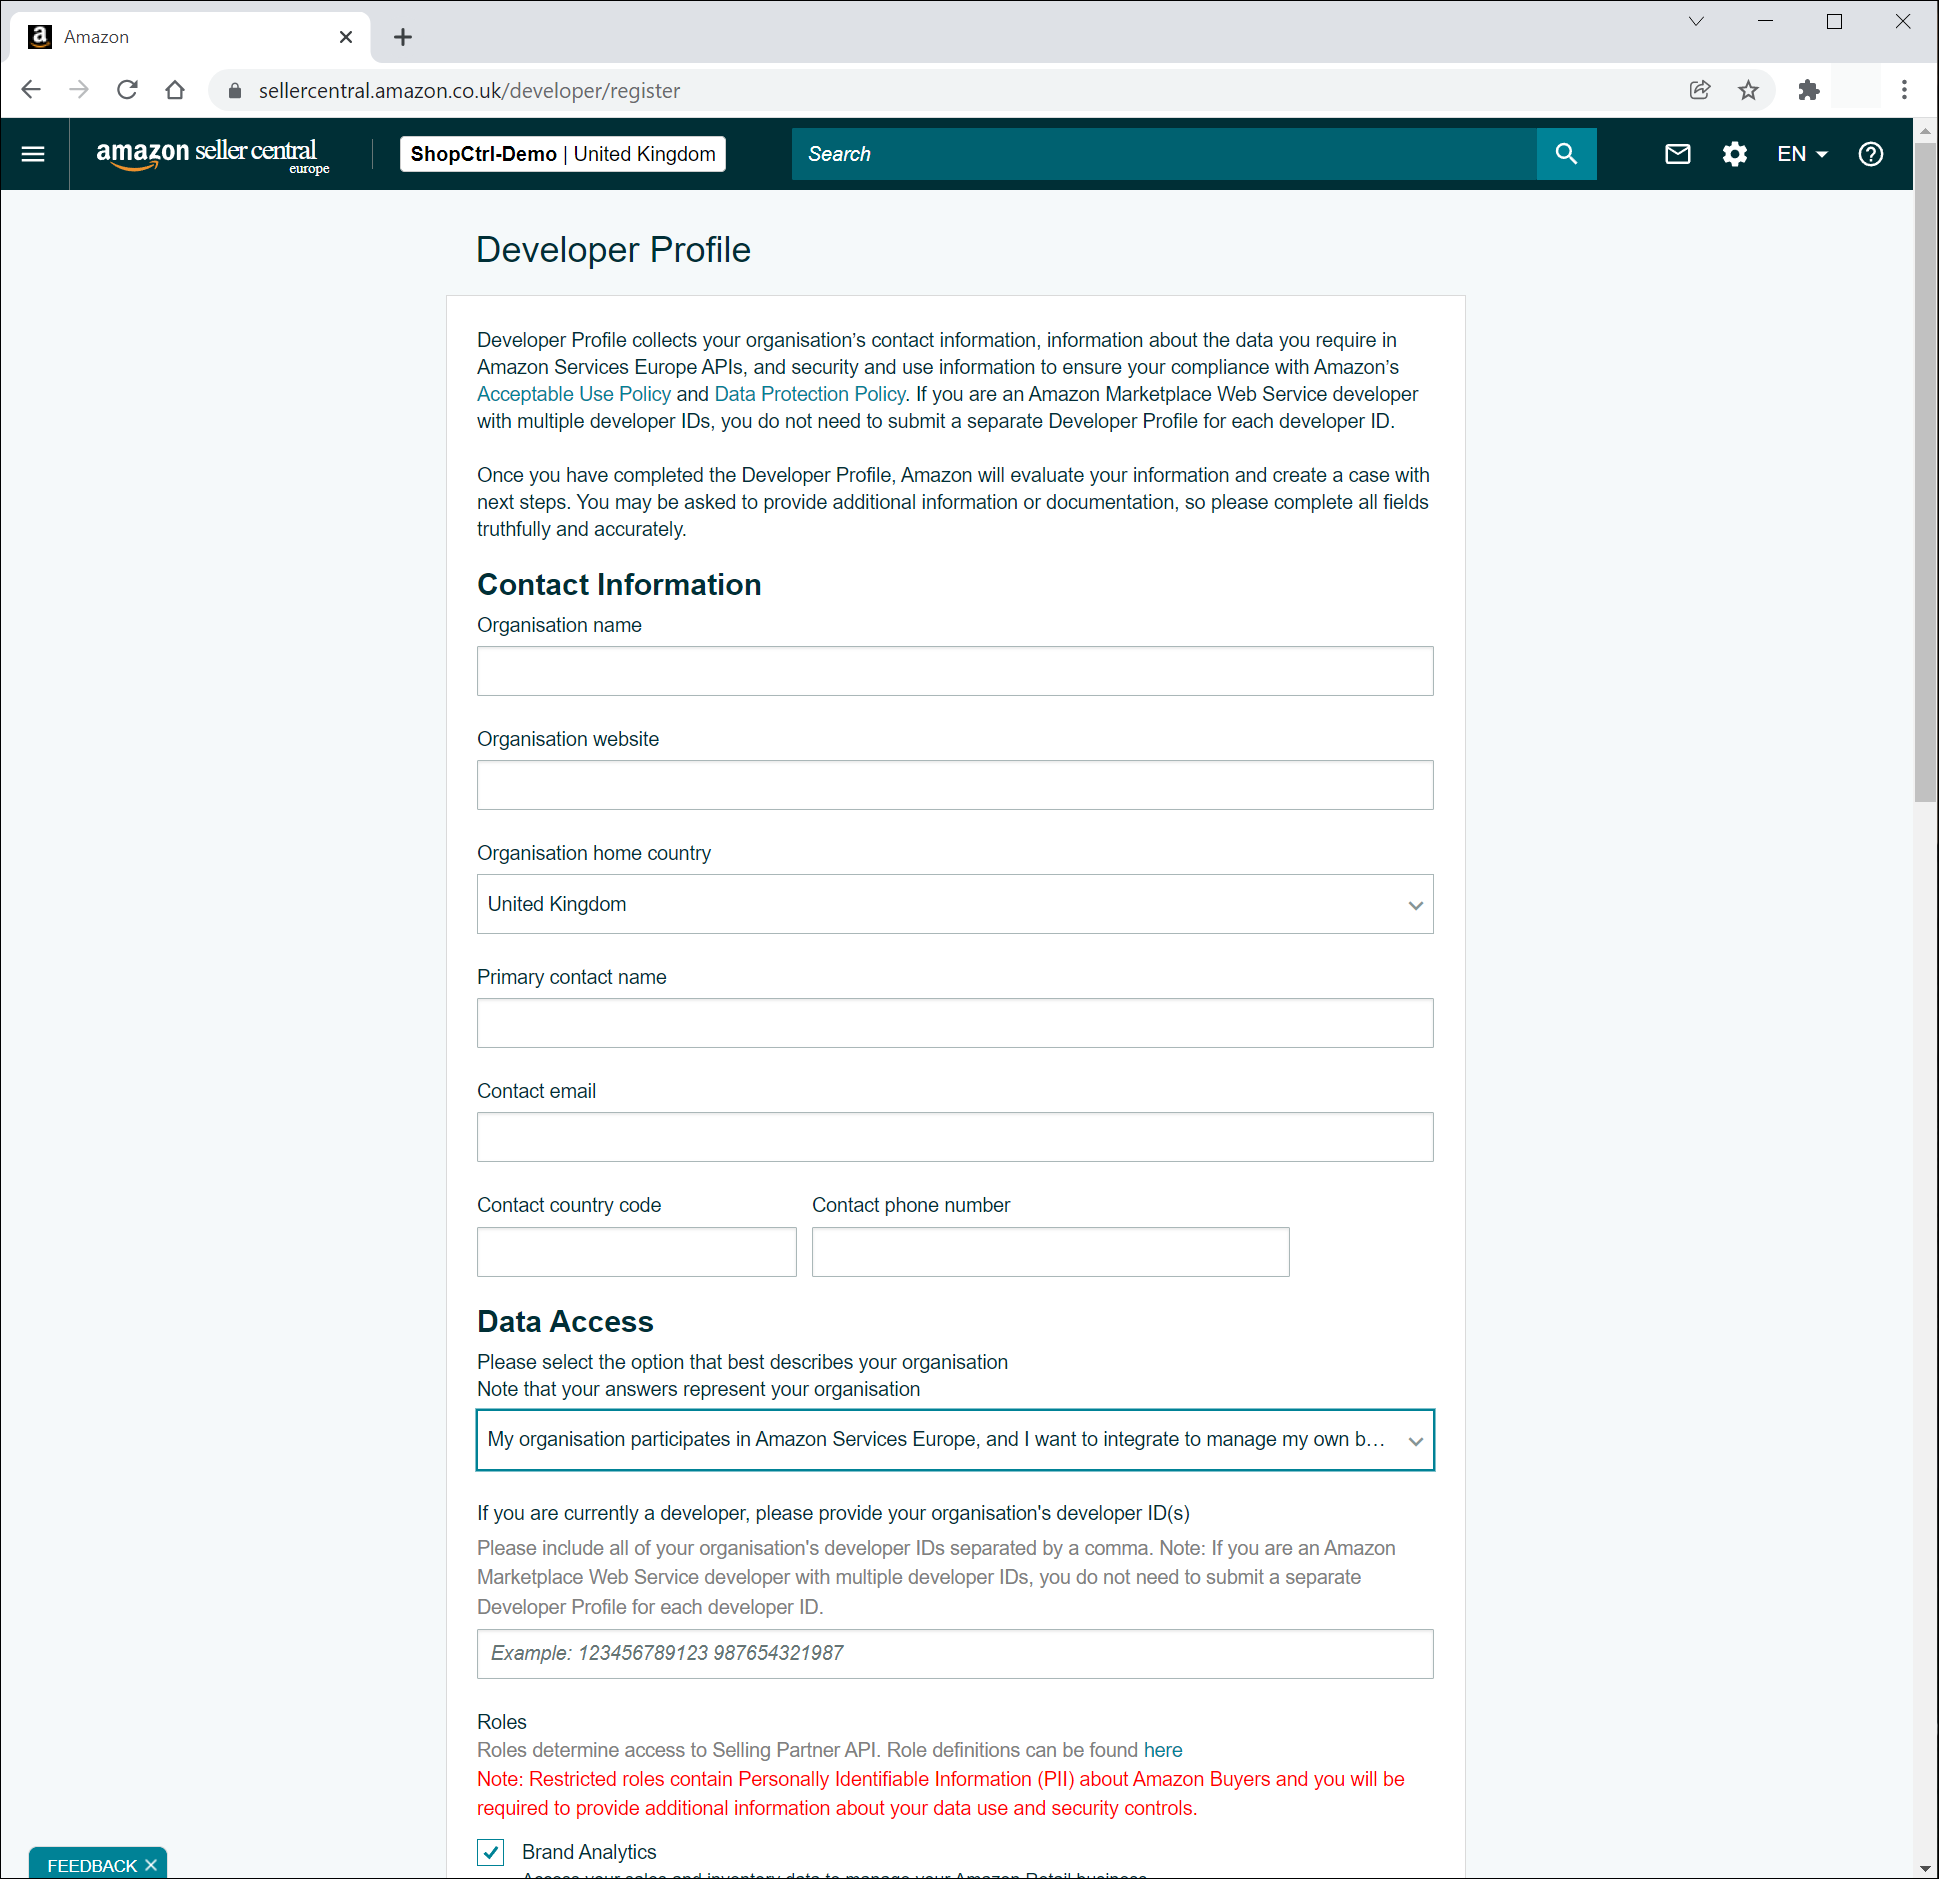
- In the Data Access select this option to describe your organization:
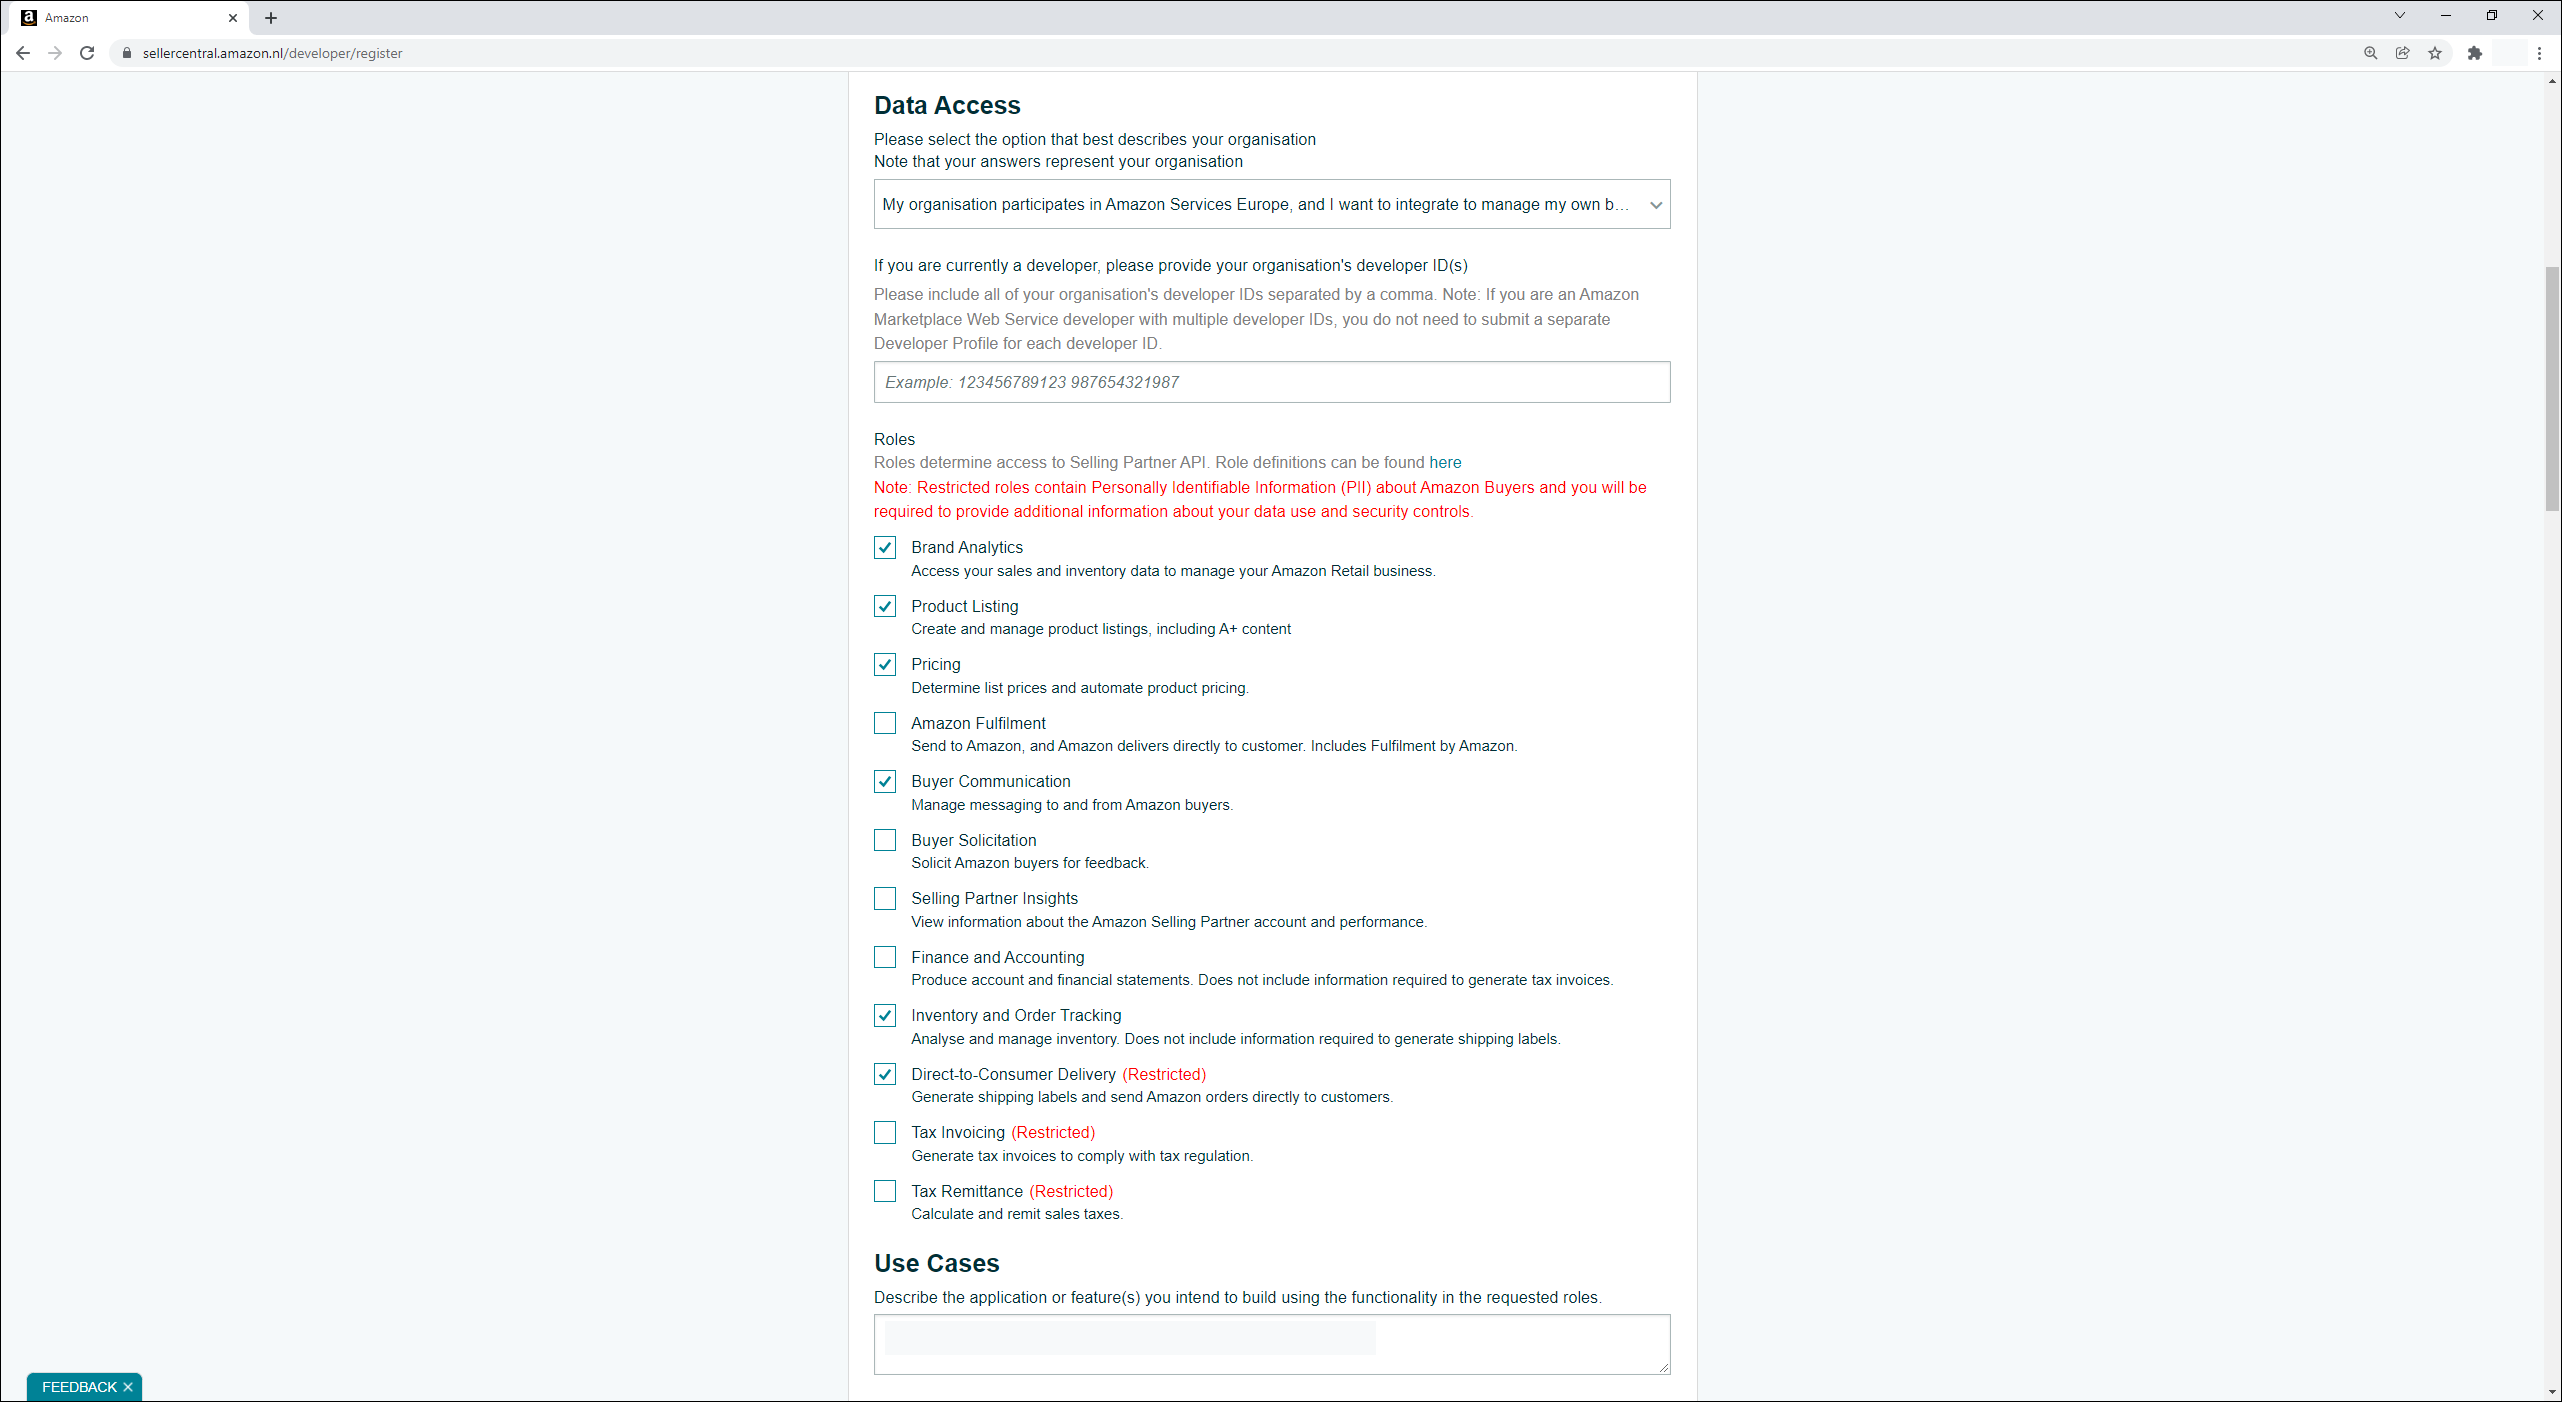
"My organisation participates in Amazon Services Europe, and I want to integrate to manage my own business only." - Select the areas of the Amazon store to which you would like to grant API access.
- Brand Analytics
- Product Listing
- Pricing
- Buyer Communication
- Inventory and Order Tracking
- Direct to Consumer Delivery
- Describe the Use Case for which you would like to retrieve data from Amazon.
- Specify the Security controls used in your organization.
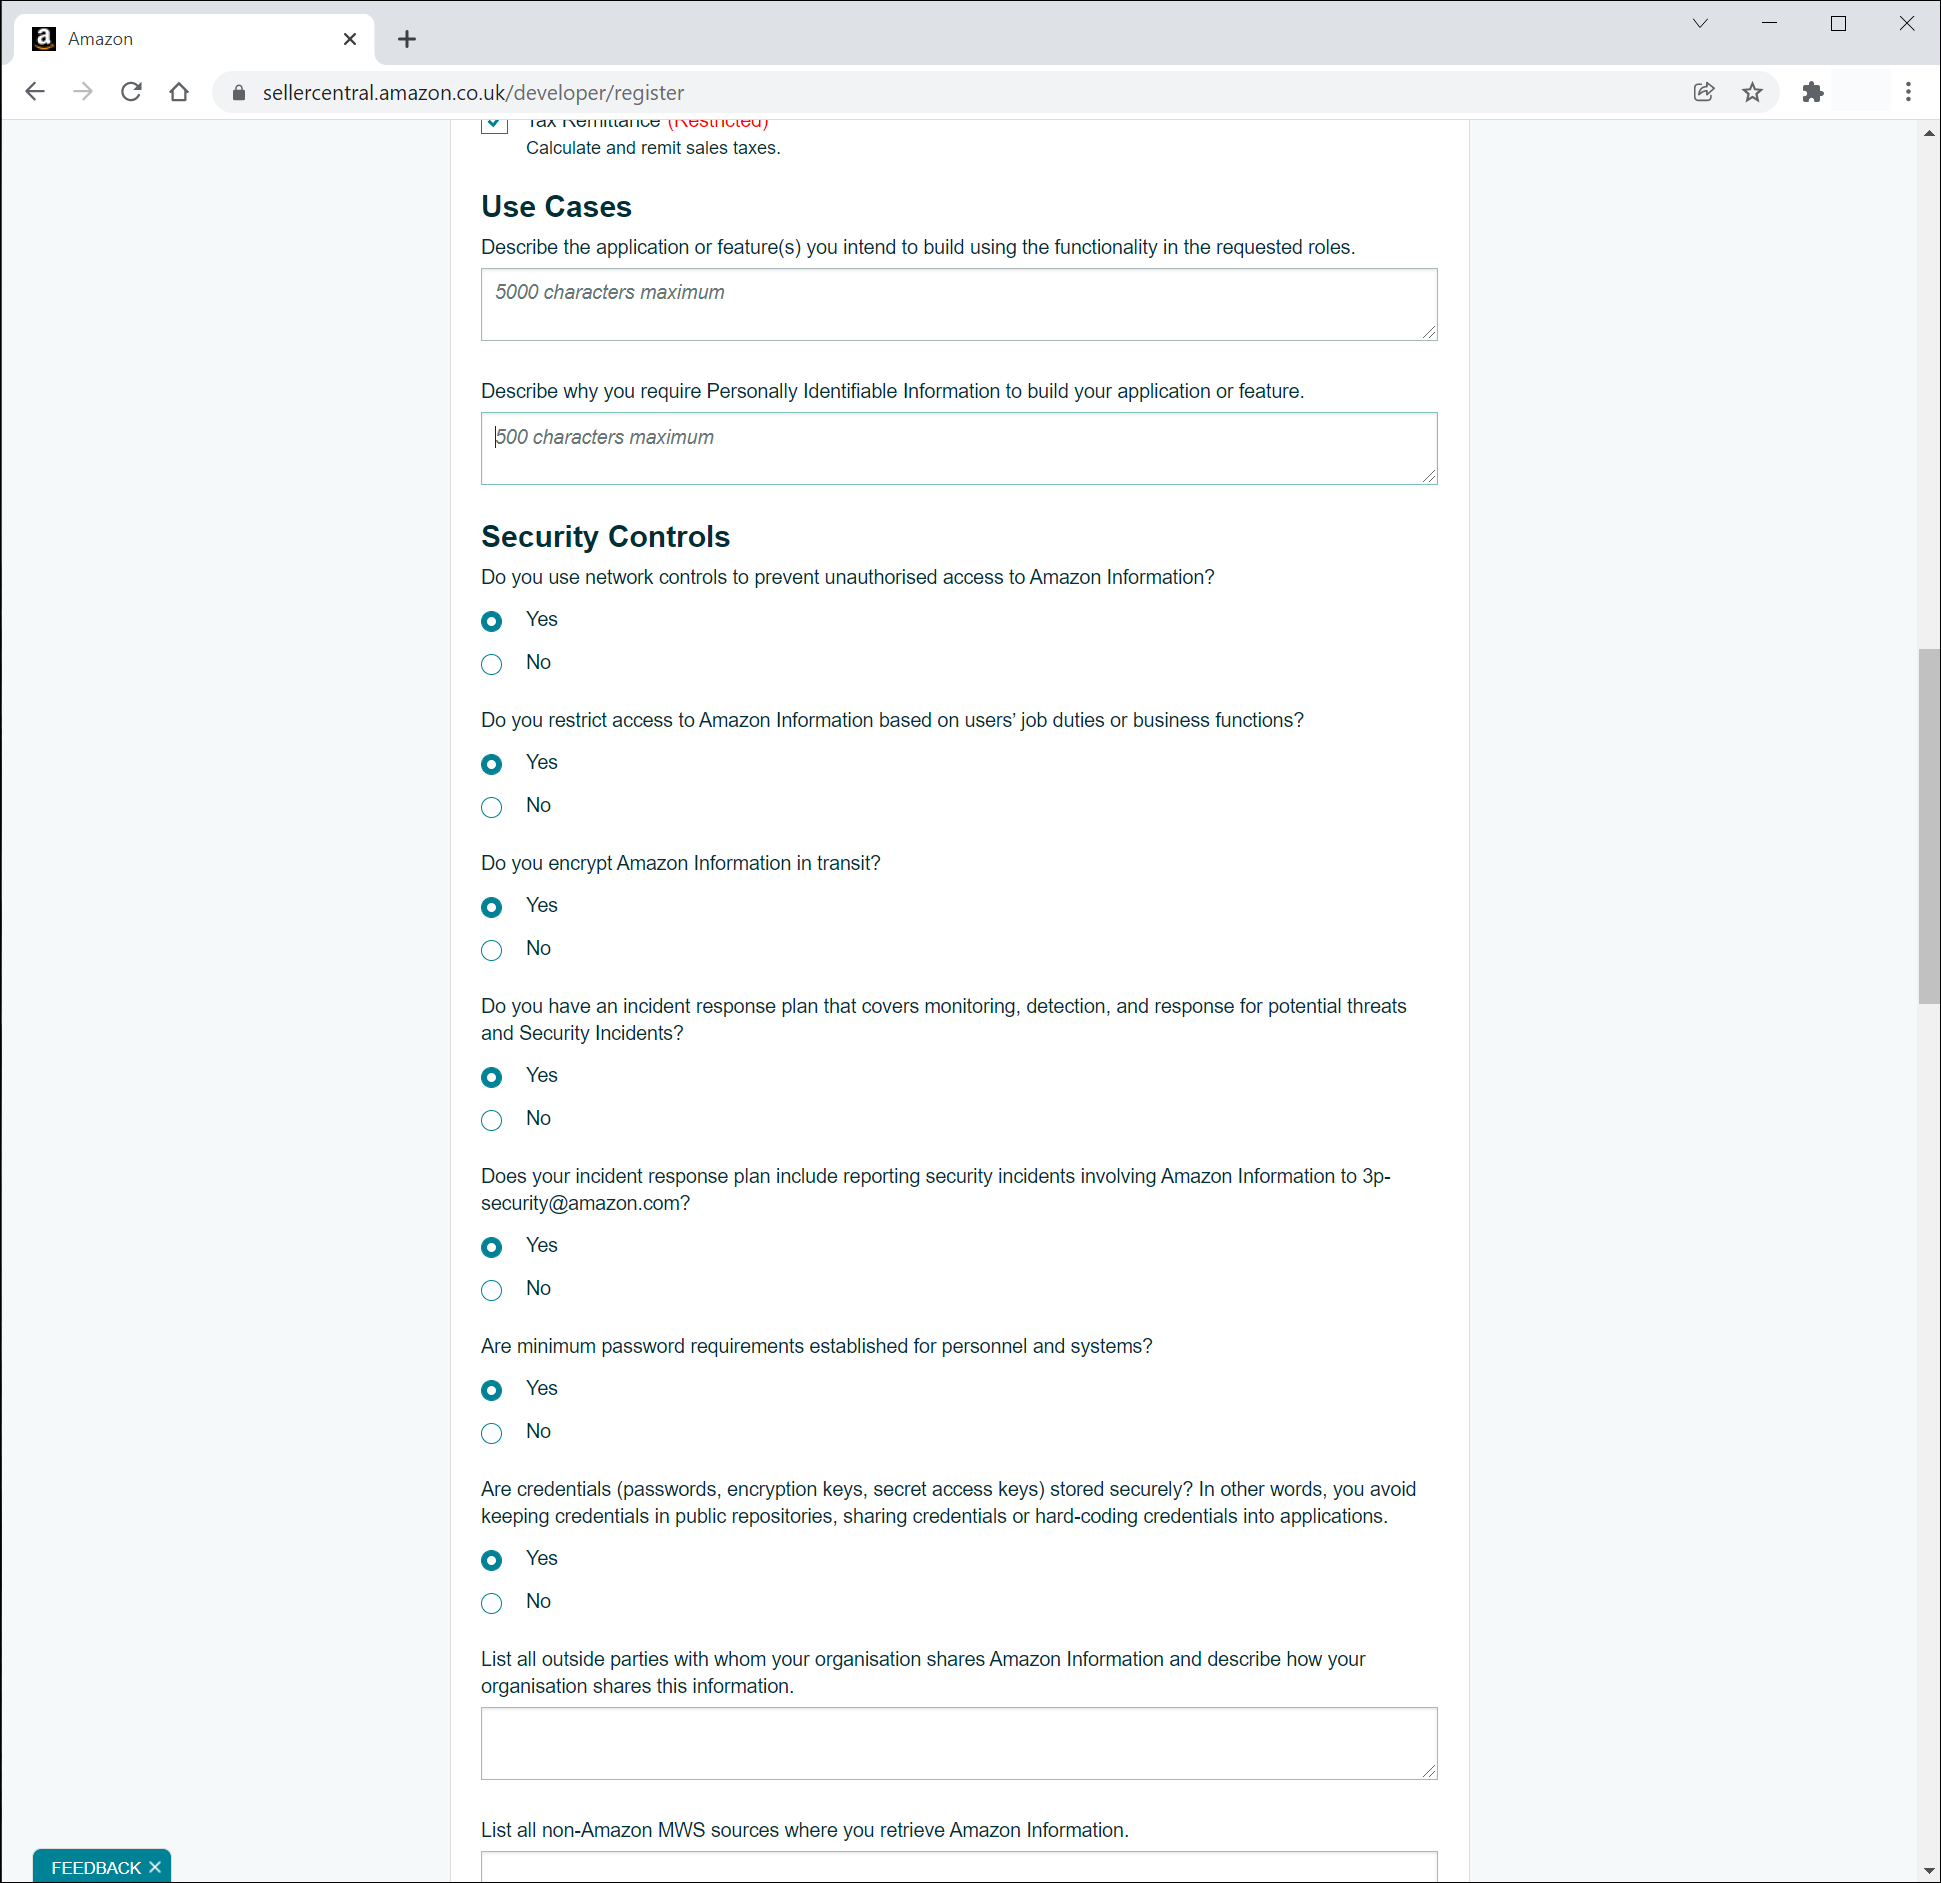
- Read and confirm the Amazon Agreement and Policies.
- Click Register to apply for API access.


After creating a profile, Amazon will take some time to review and approve it.
Create an application
Once Amazon approves your developer account, we could proceed with creating the application to generate credentials to your store and give ShopCtrl access to your open API
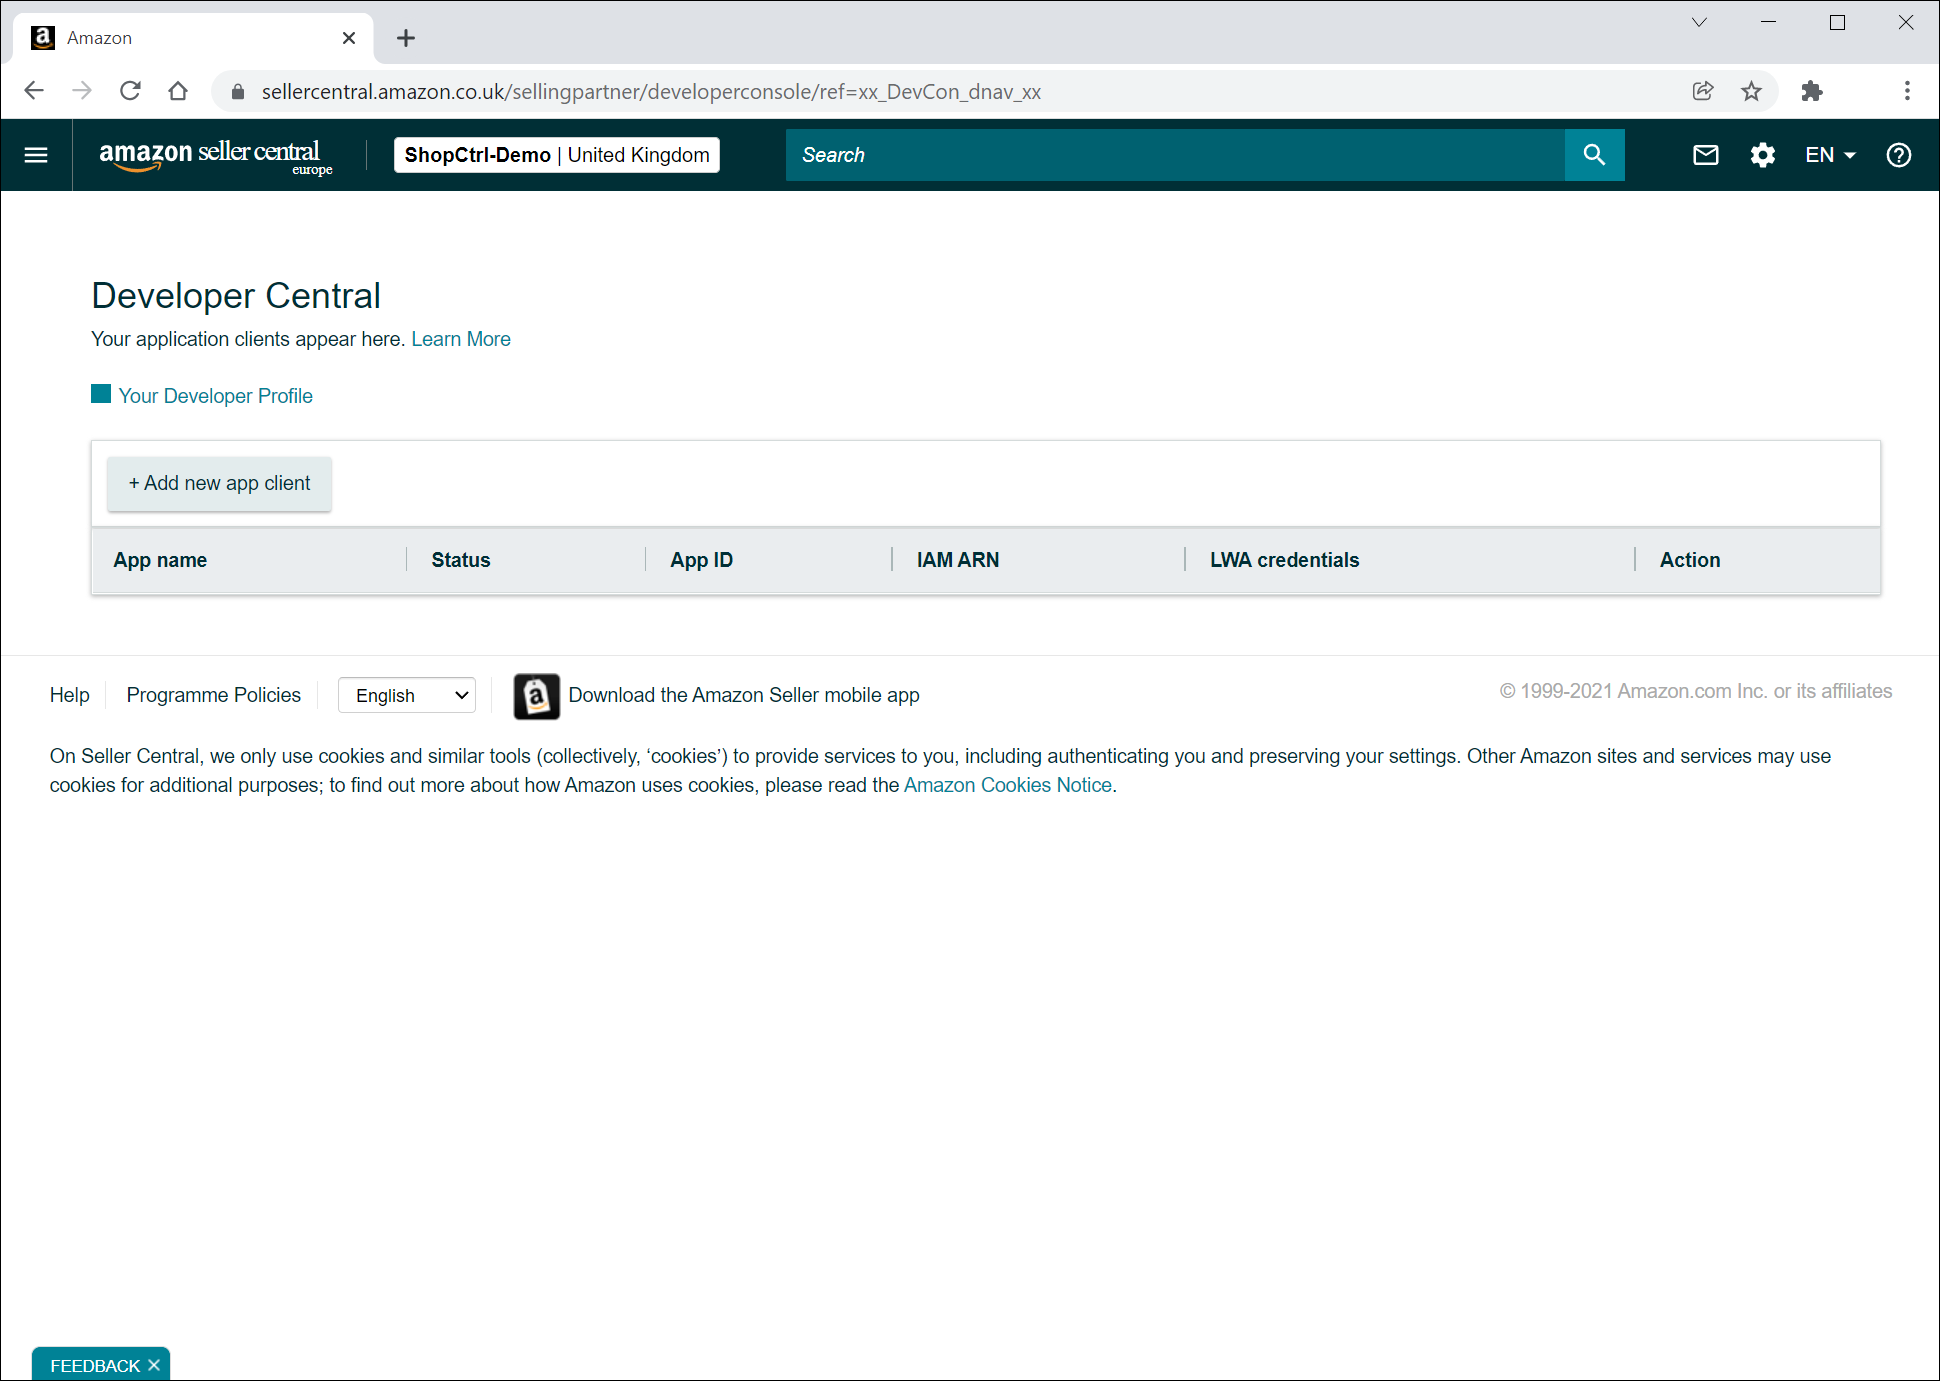
- Open the Developer console page.
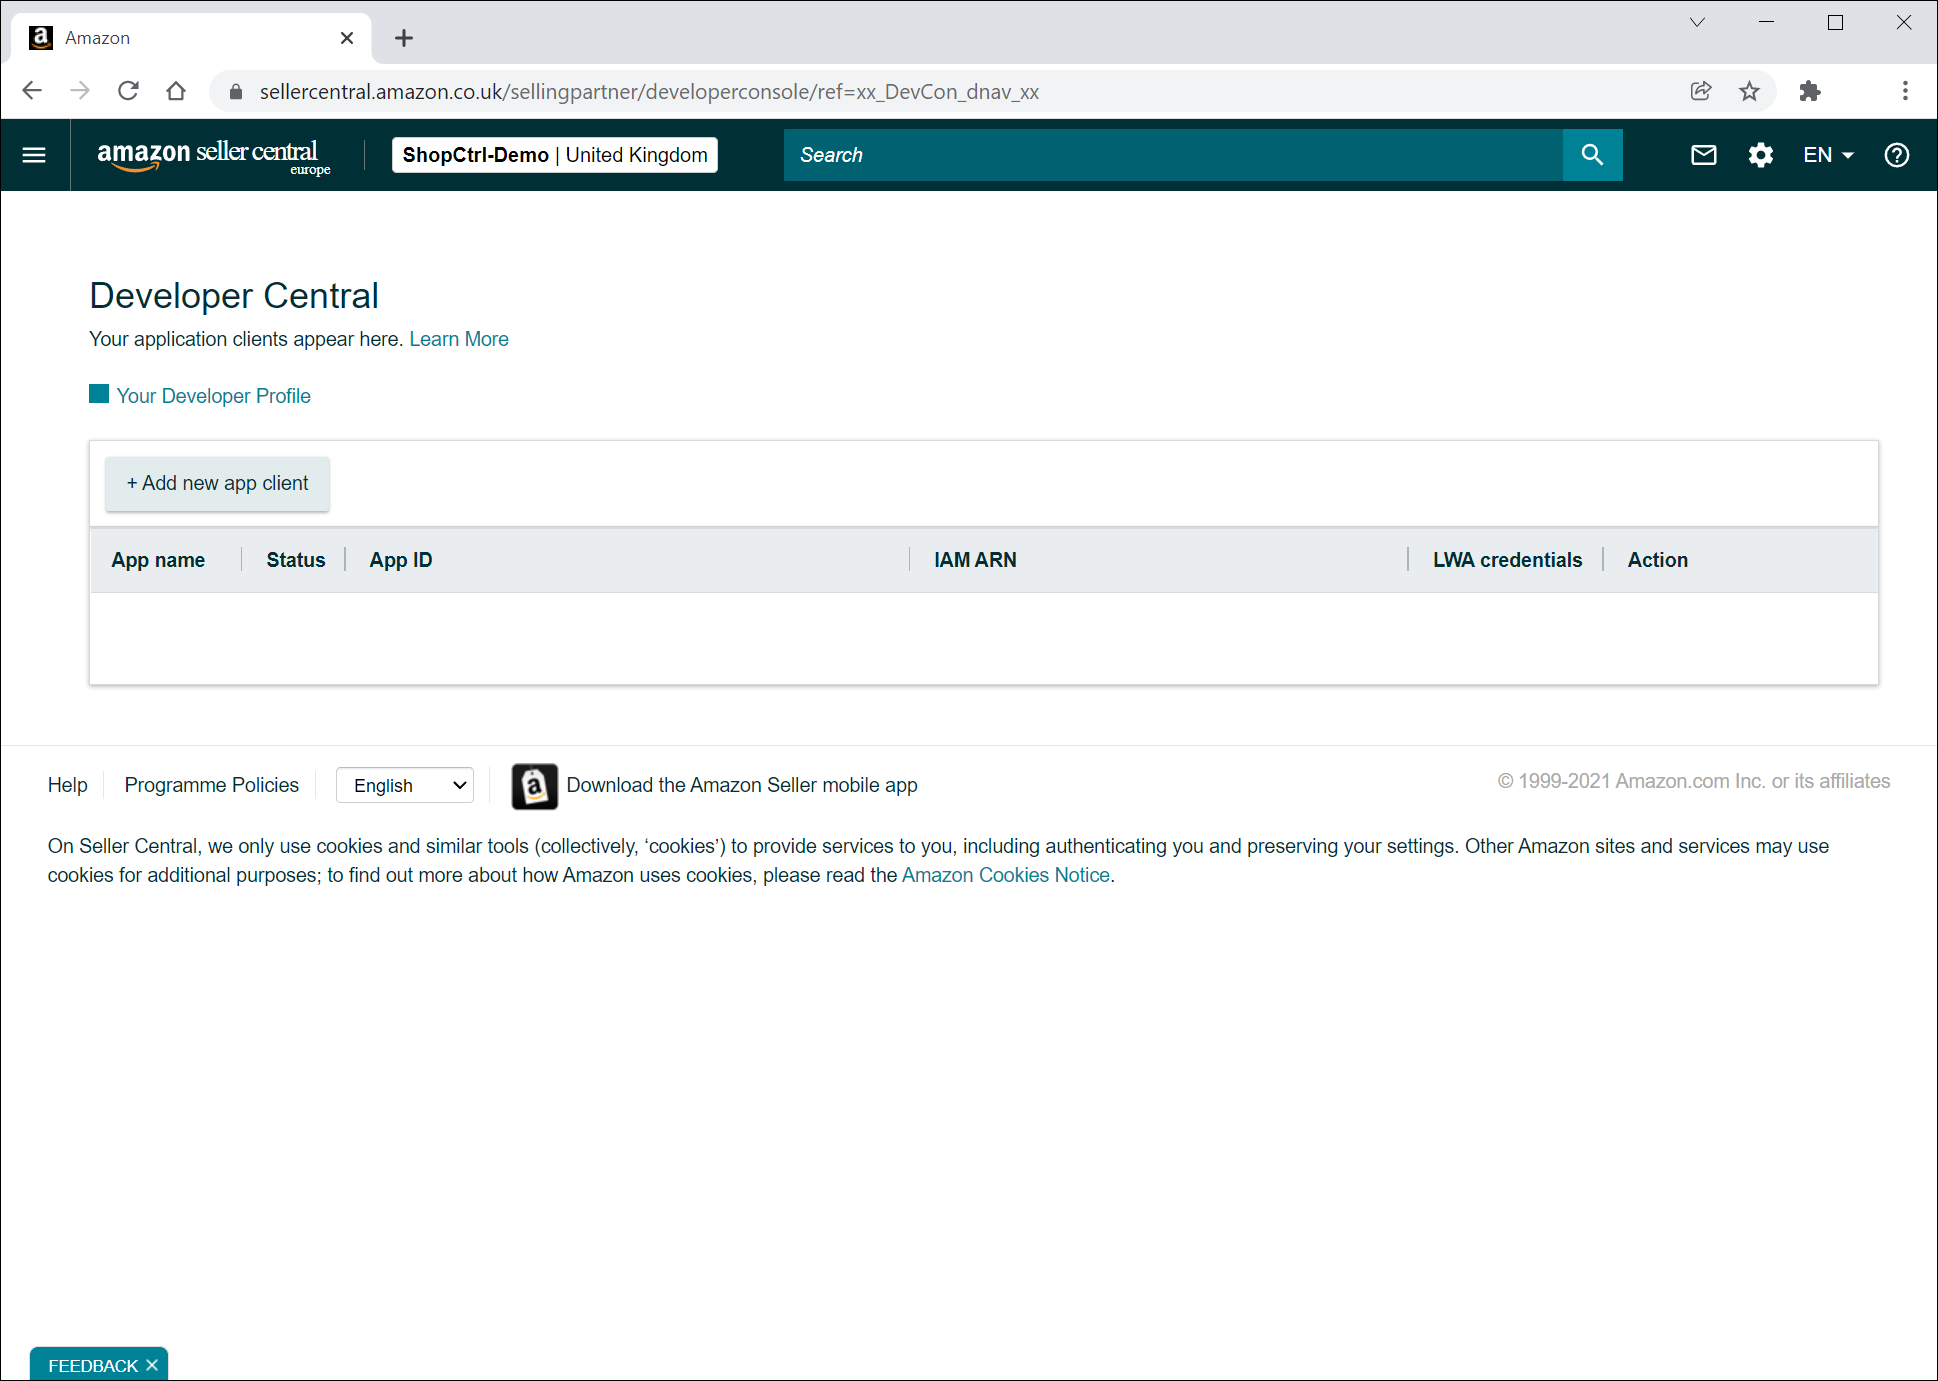
- Click Add new app client.
- The new application details will be opened on a new page. Fill in the App name.
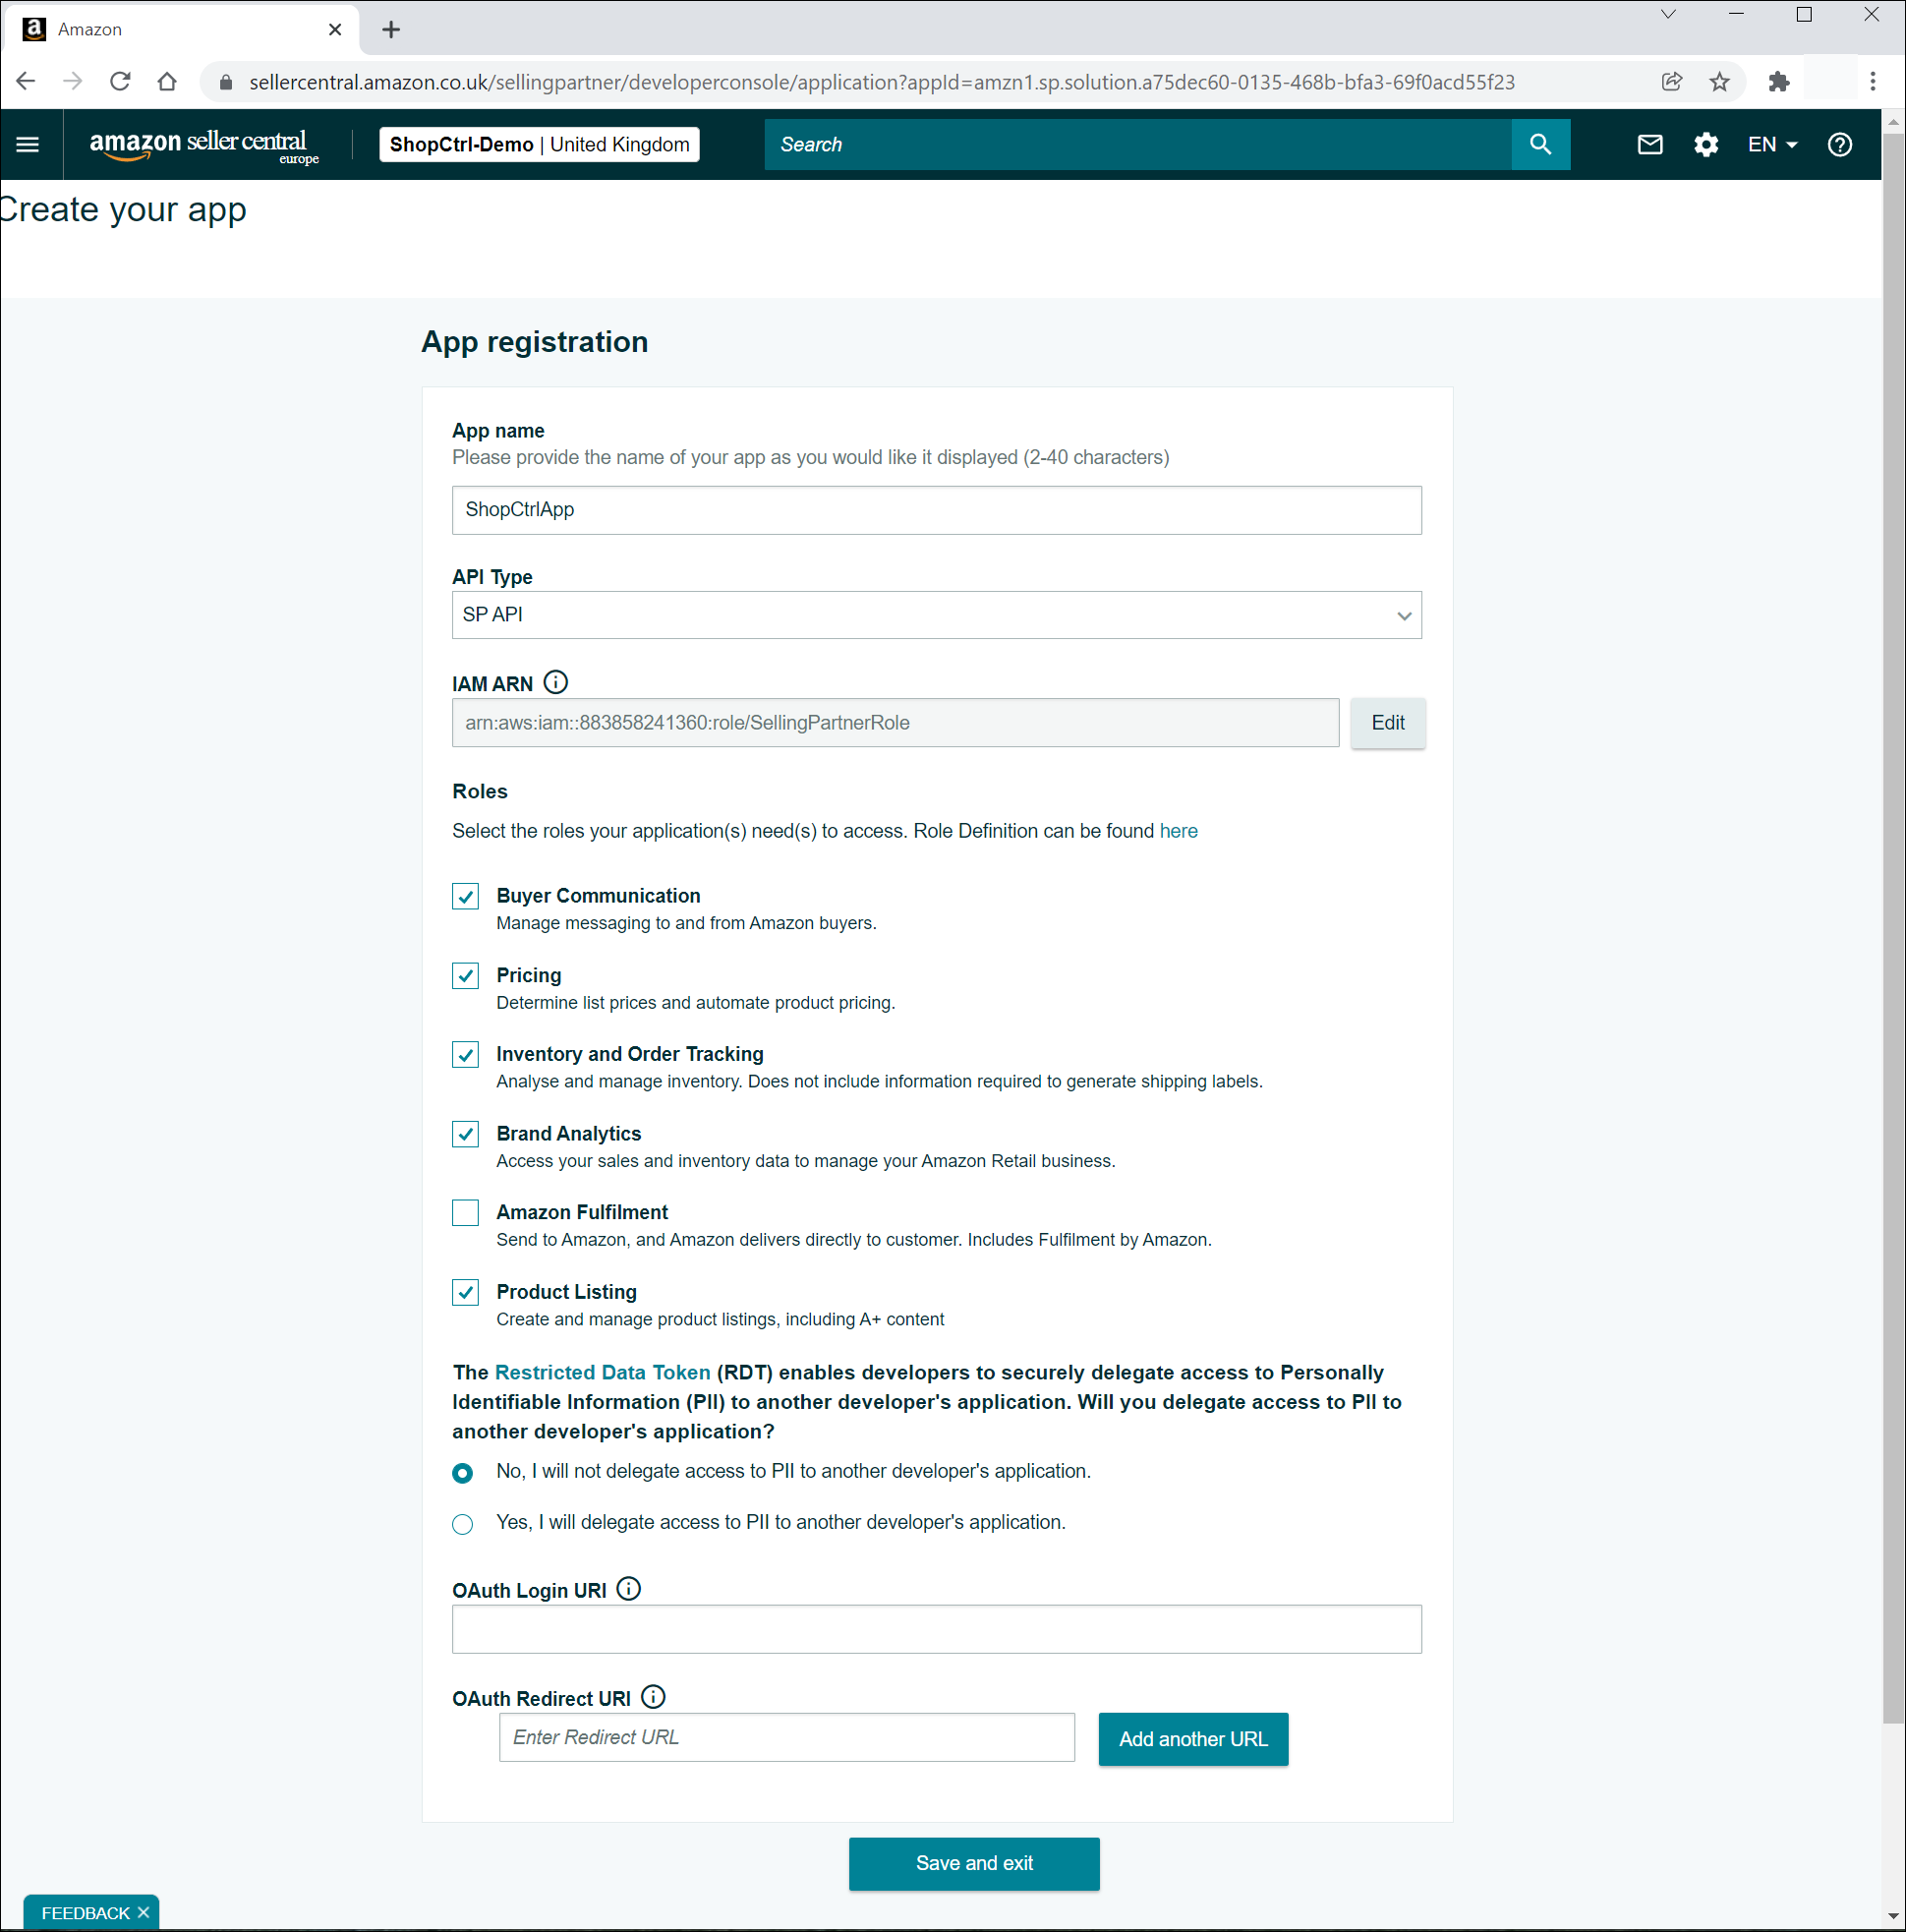
- Select an API Type - SP API.
- Fill in the IAM ARN provided by ShopCtrl:
arn:aws:iam::883858241360:role/SellingPartnerRole. - Select the Roles you would like to grant API access to.
- Select whether you would like to delegate access to PII to another developer's application: No, I will not delegate access to PII to another developer's application.
- Leave the OAuth fields empty.
- Click Save.


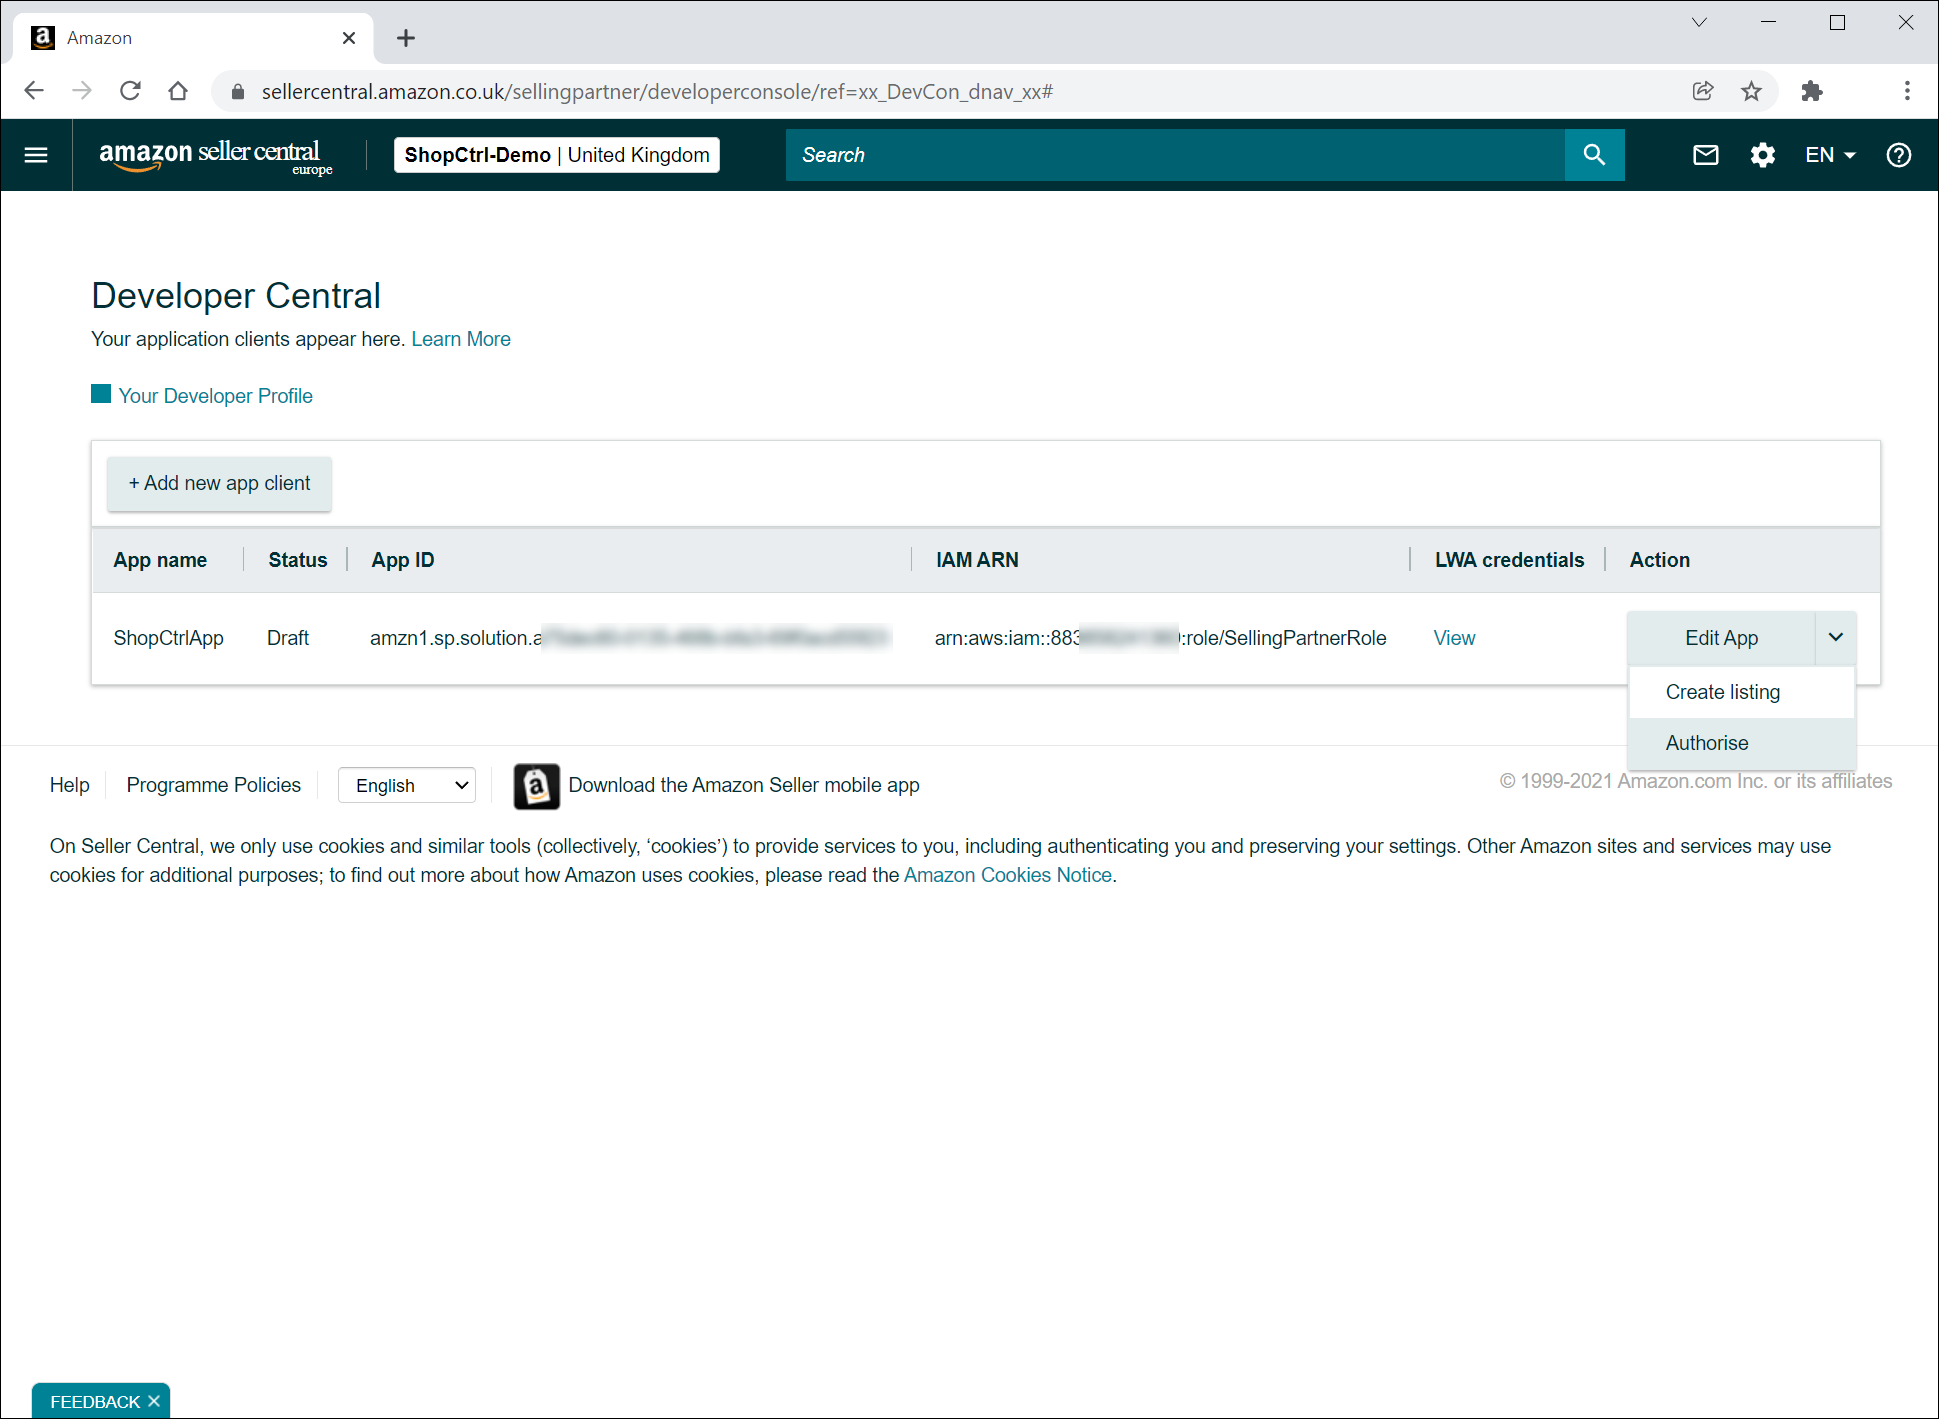
The new app will be displayed on your Developer Central account:

Getting credentials for your Amazon synchronization with ShopCtrl
To establish the API connection with your Amazon account, we need to provide the following information:
- Seller ID
- LWA Client ID
- LWA Client Secret
- Refresh token
Seller ID
- Login to your Seller Partner account.
- Click on the gear icon in the top action panel. And select Account Info.
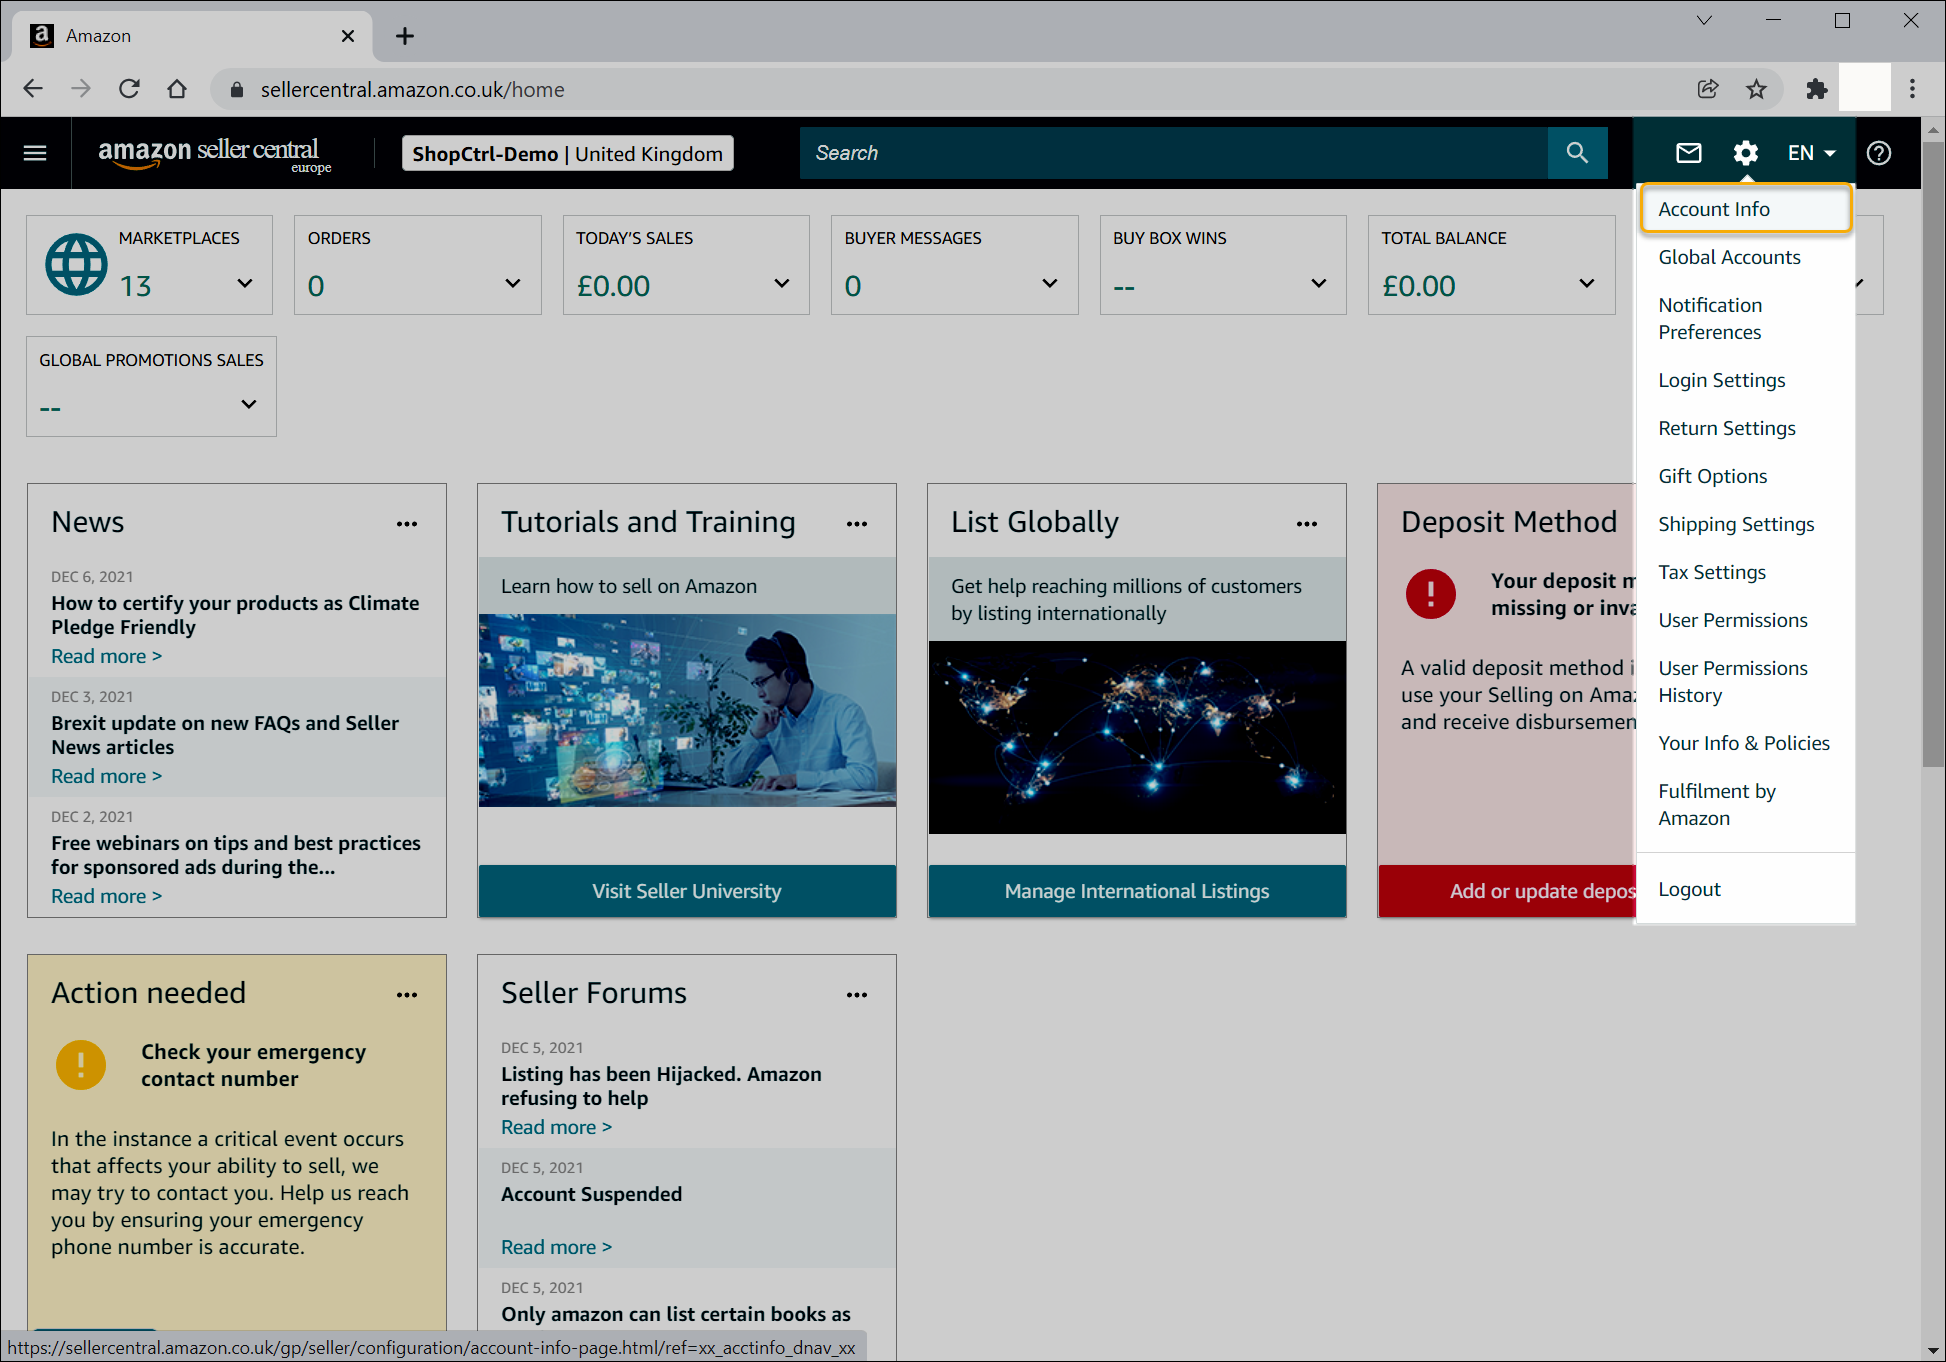
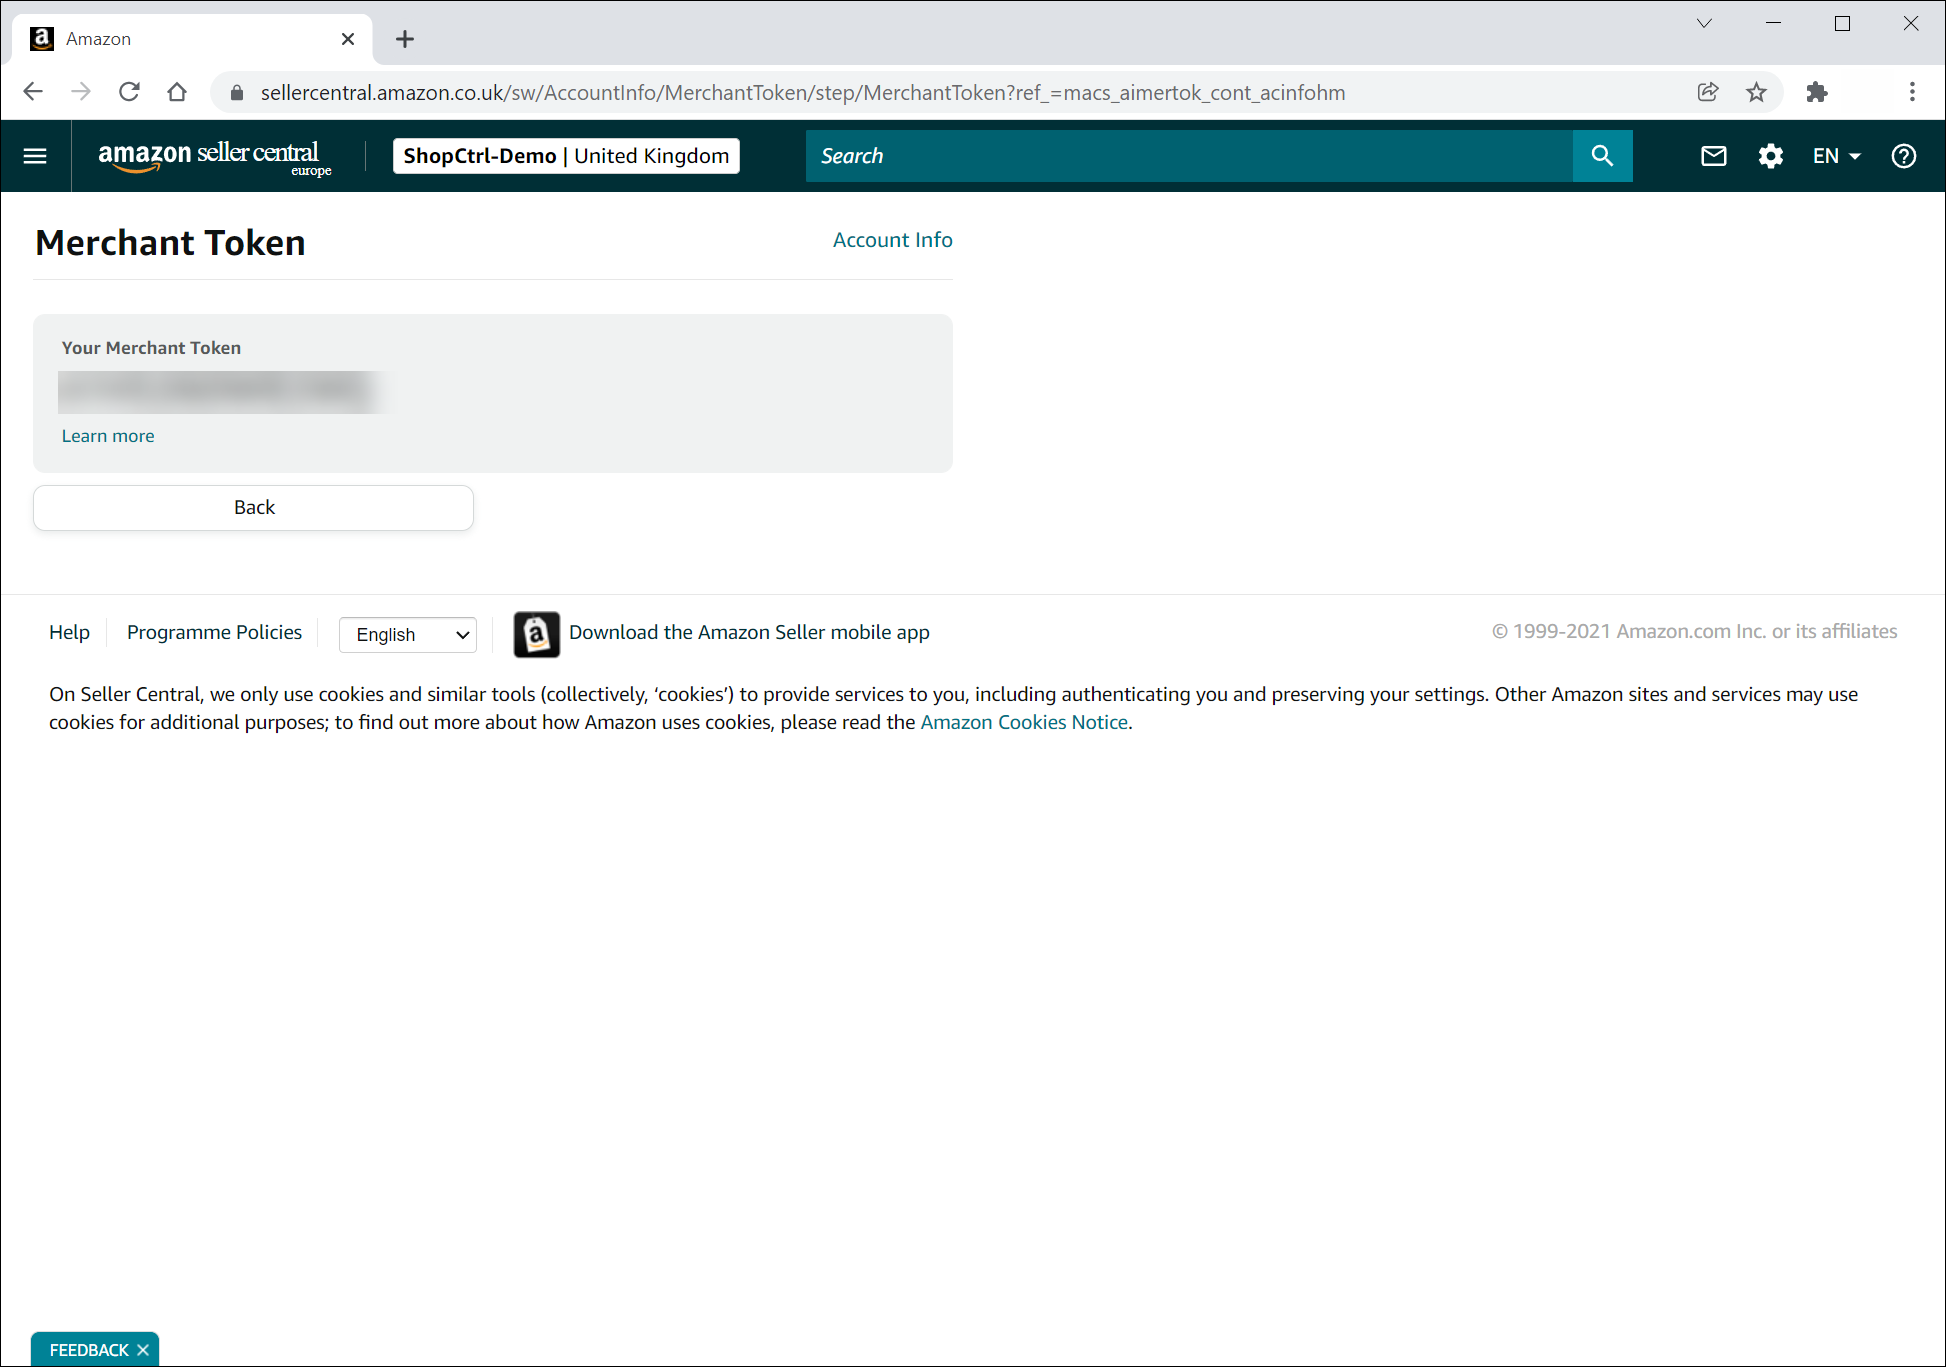
- You will be redirected to the Seller Account Information page. within Business Information pane, click on Your Merchant Token link.
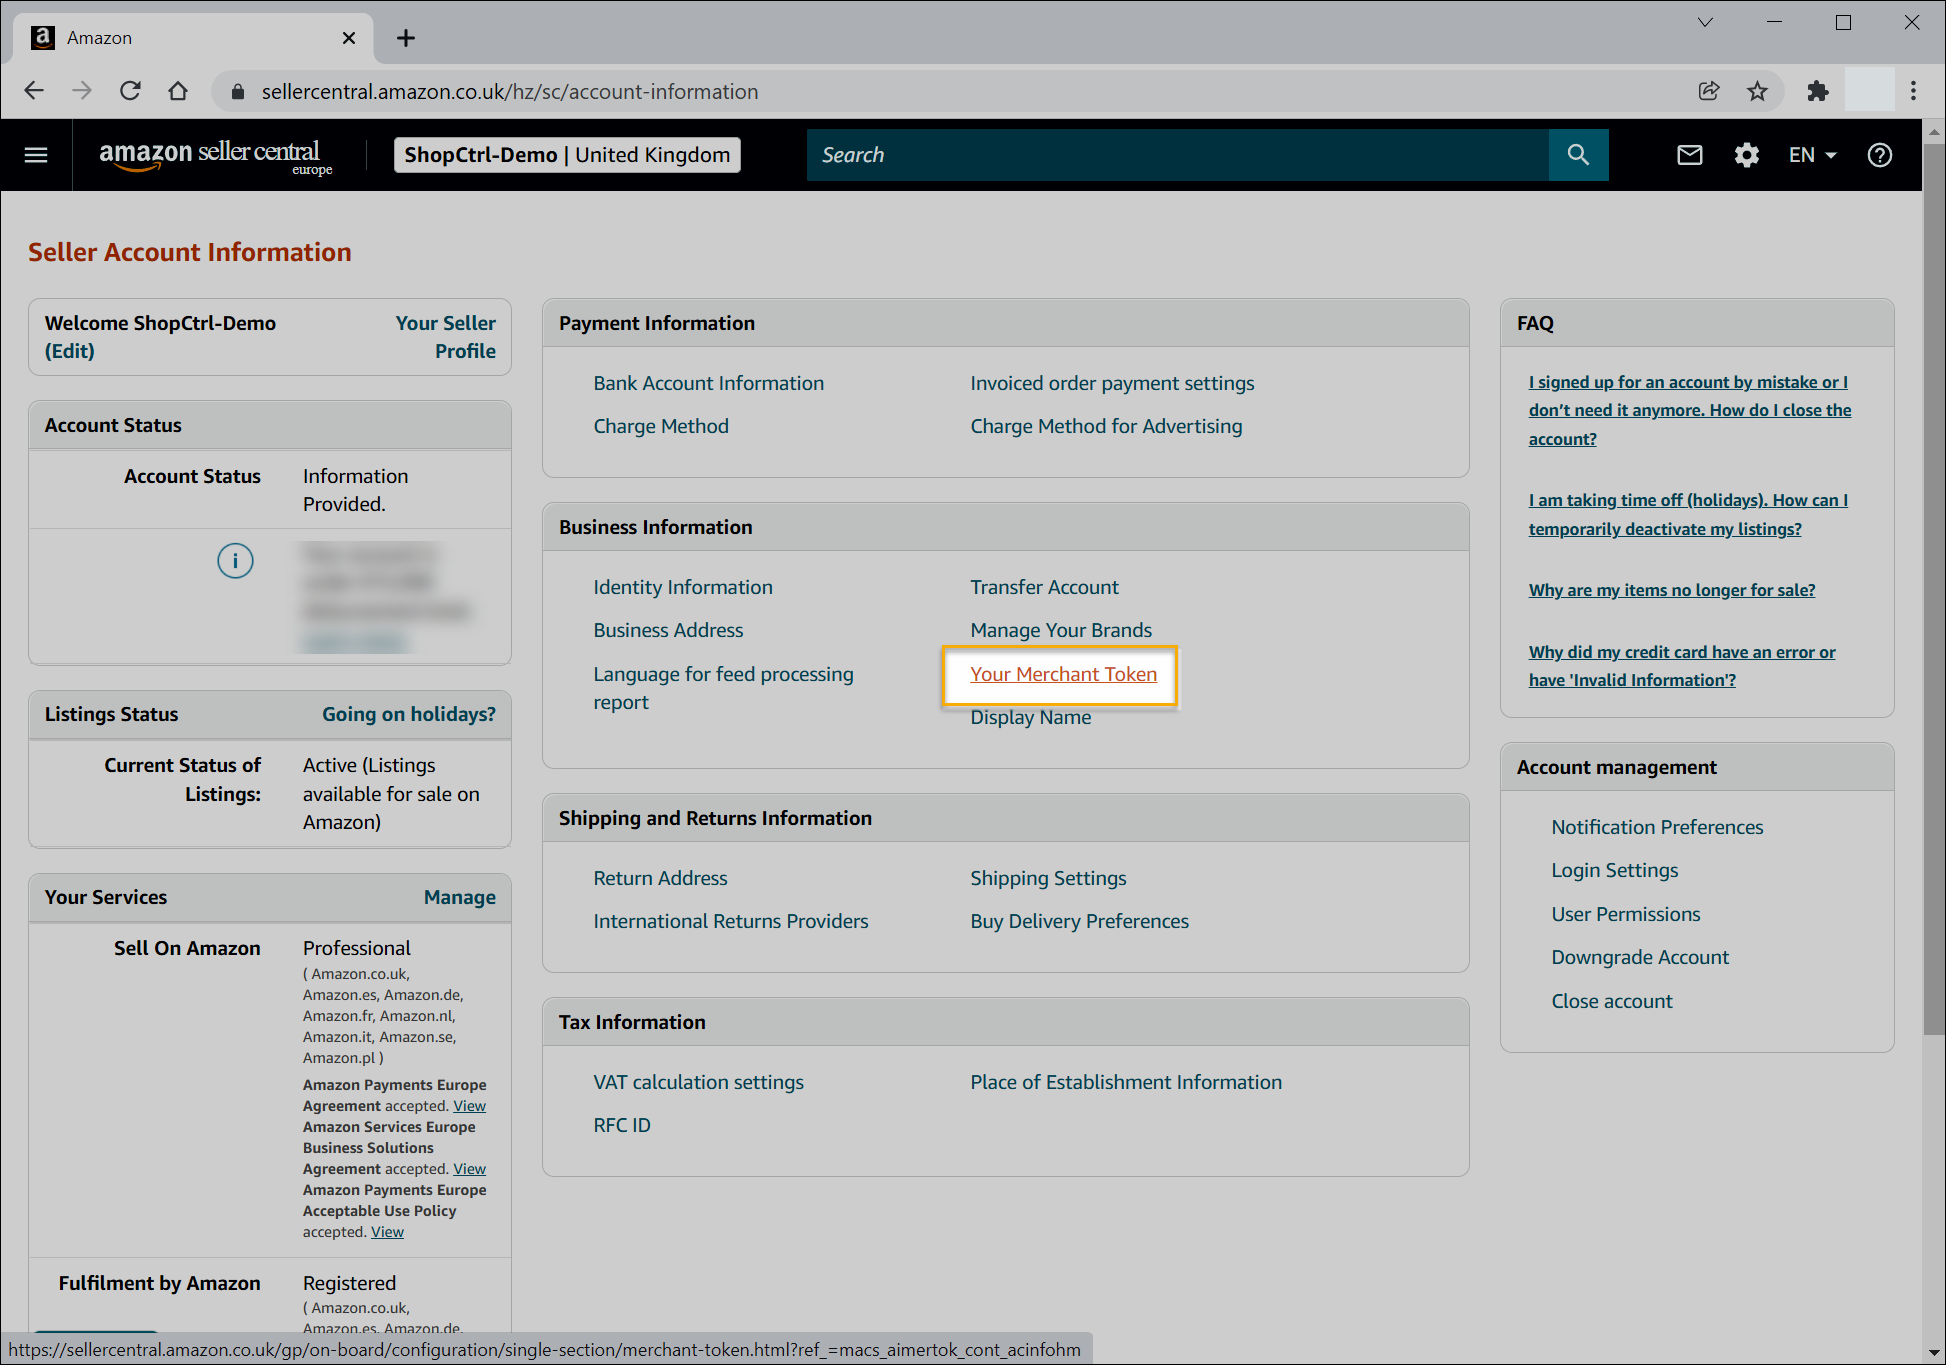
- You will be redirected to the Merchant Token page. Which is your Seller ID.


LWA Credentials
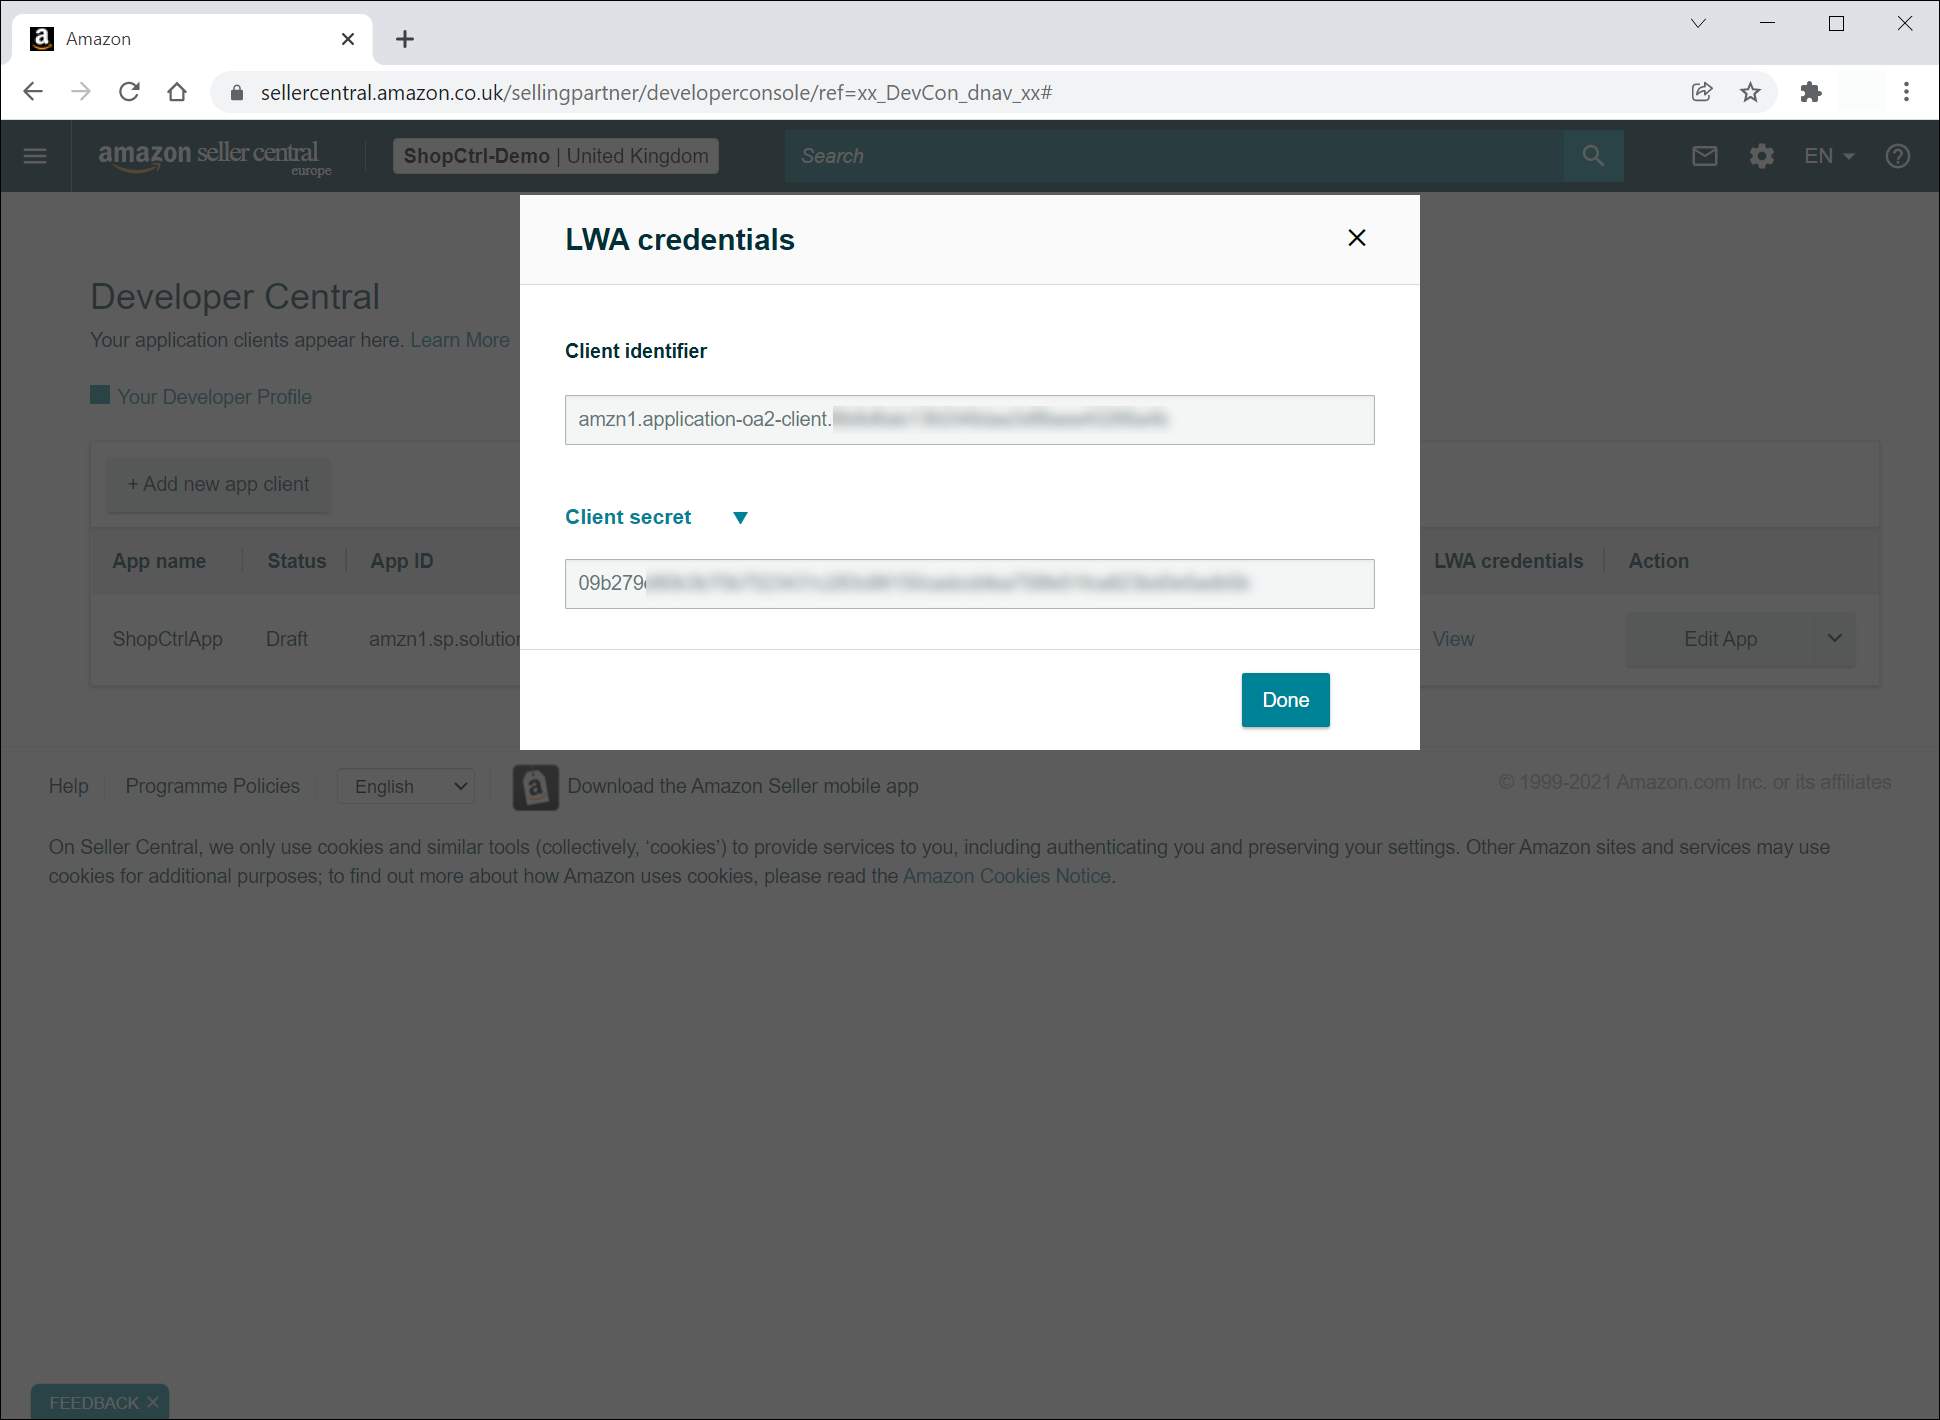
To retrieve the LWA Client ID and LWA Client Secret:
- Go to your Developer console page.
- Click View in the LWA credentials column. Both Client identifier and Client secret will be displayed.

Refresh Token
- Open the Developer console page.
- In the Action column navigate and click on the arrow. In the drop-down menu select Authorise.
- You will be redirected to the Authorise application page.
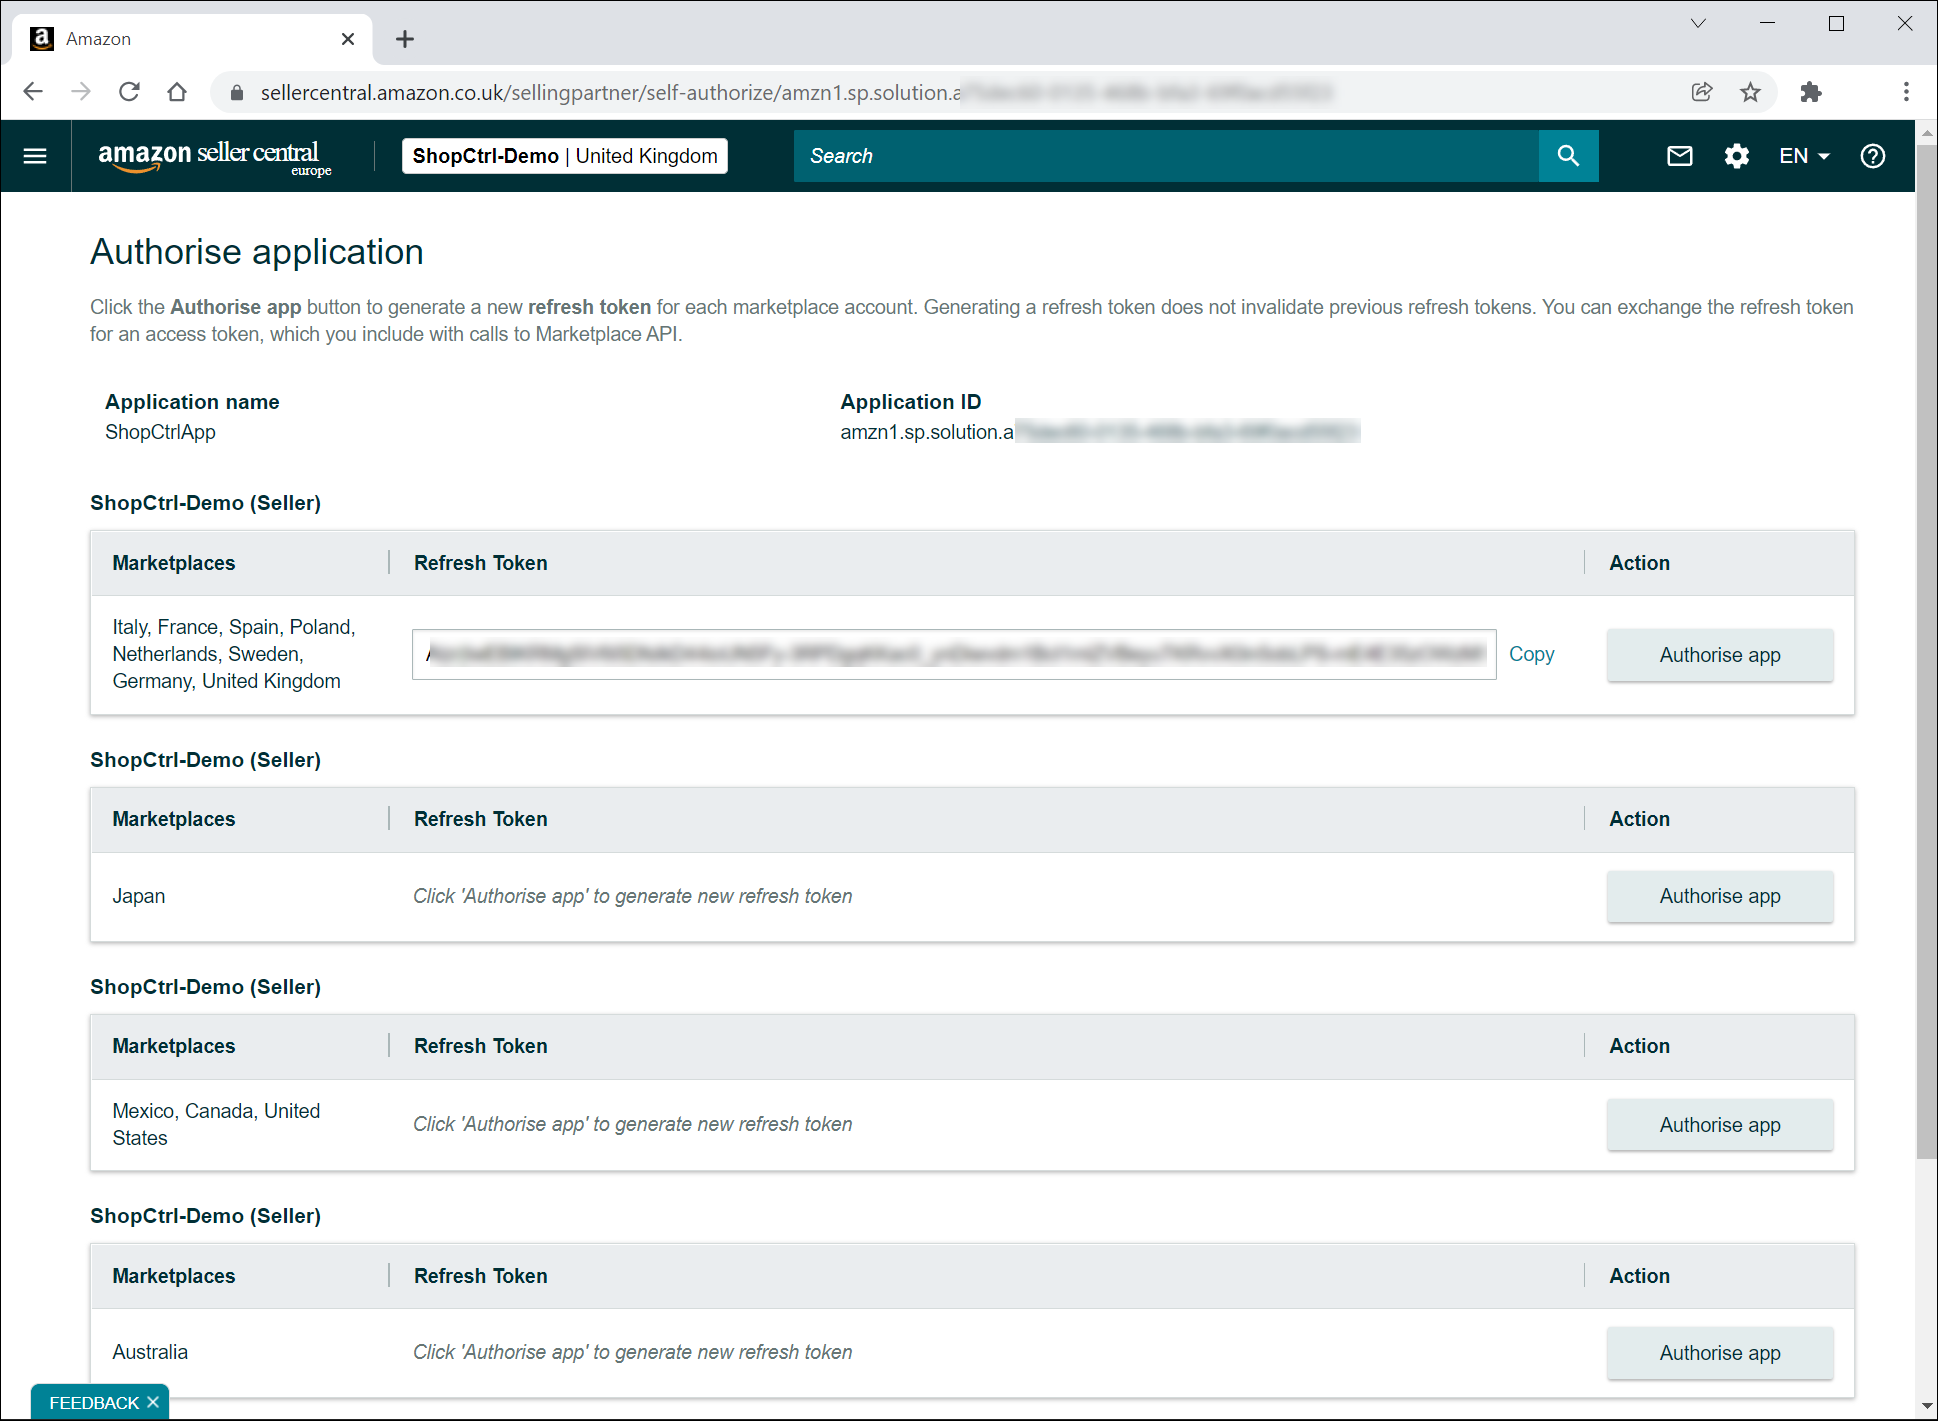
- Select Marketplace(s) that you would like to authorise your app at.
- Click Authorise app button.
- This will generate the Refresh Token.


Setting up shop synchronization in ShopCtrl
Once you have enabled integration in your Amazon account, you can set up synchronization in ShopCtrl. It will consist of two steps.
1. Configuring shop in ShopCtrl
Before start
Before enabling synchronization with Amazon, please set up the corresponding shop currency, VAT tariffs, and payment types for your ShopCtrl shop.
To continue setting up the shop in ShopCtrl, we need to determine how the customer contact information is stored. Amazon sends customer names as well as customer addresses as single fields to ShopCtrl. We need to change the designated shop settings to process this data correctly.

To change the way customer contact information will be stored in ShopCtrl:
- Log in to your ShopCtrl account as a user with the Shop Owner Admin role.
- Open the shop settings page for which the Amazon connection was established.
- Within the topic menu, expand the Contacts nod and click Contact Info.
- Change the Address detail setting to One field for street name, house number and extension.
- Change the Name detailsetting to One single field for contact person name.
- Click Save or Save and Close to apply changes to the shop.
2. Setting up Amazon shop synchronization in ShopCtrl
- Log in to your ShopCtrl account as a user with the Shop Owner Admin role.
- In the navigation menu, select Configuration > Shops to open the list of shops created.
- Select a shop for which you would like to set up Amazon synchronization and click Edit to open shop settings.
- Within the topic menu, select Shop synchronization > Amazon Shop Synchronization.
- Select a Region and a Marketplace which orders you would like to import through this shop.

Please note
You can set up synchronization with only one region, but it is possible to select several marketplaces per region. This means that orders from all marketplaces will be imported in one shop in ShopCtrl.
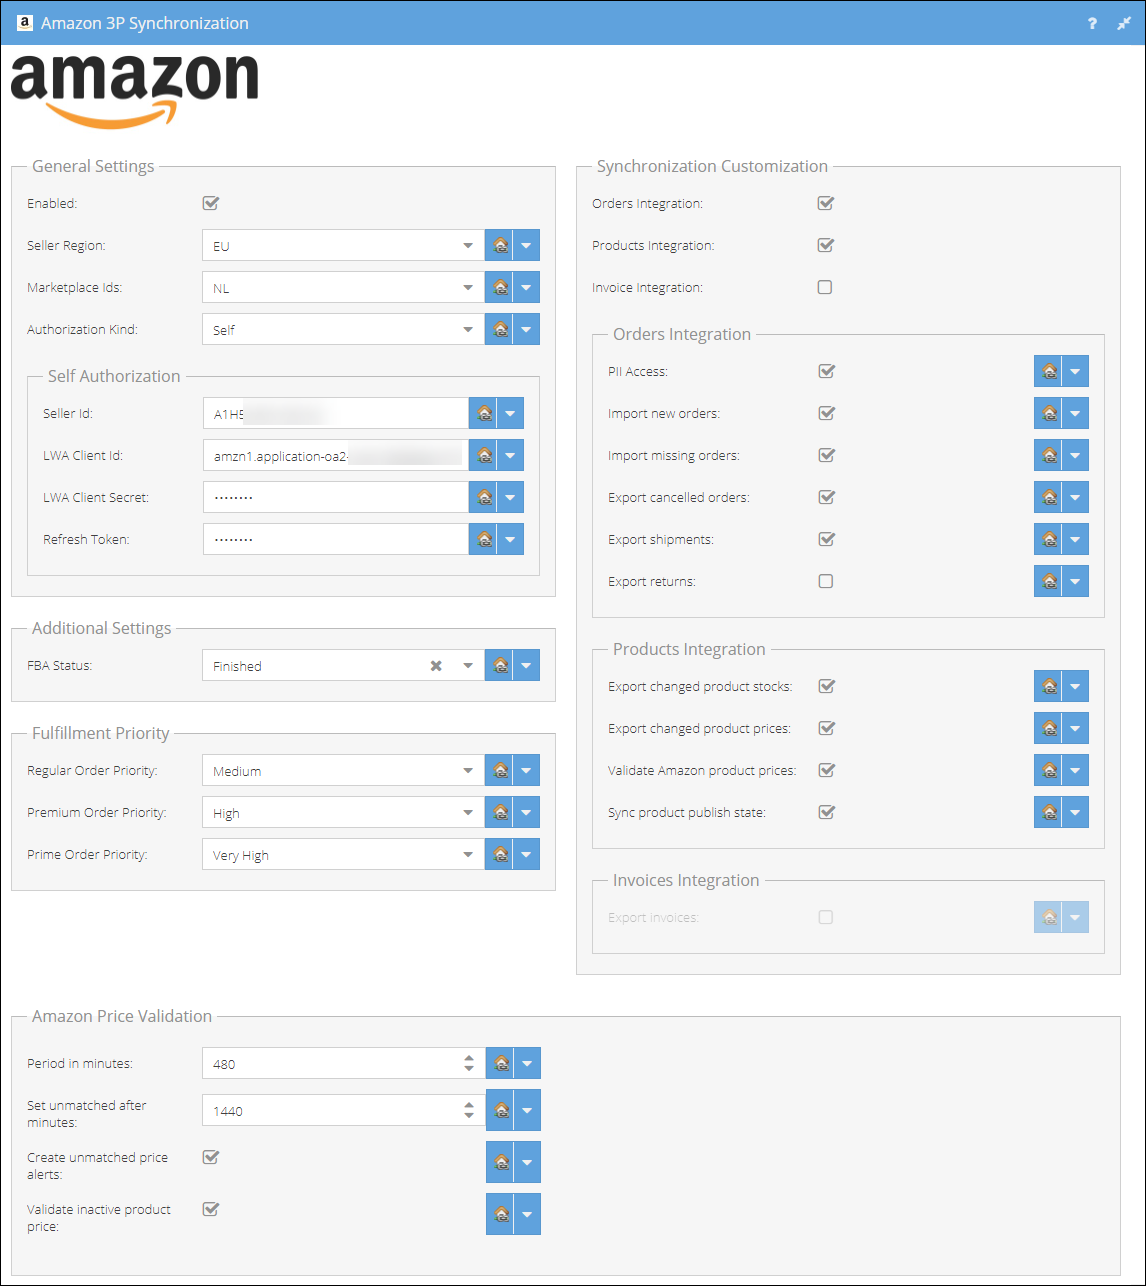
- Select Self Authorization Kind.
- Provide the Seller ID (Your Amazon Merchant Token).
- Provide the LWA Client Id and LWA Client Secret generated for the ShopCtrl private app in Amazon.
- Provide the Refresh Token.
- In the Synchronization Customization pane, check the features you would like to use. At the moment, the following features are available:
- Orders Integration - a general setting that enables order import
- PII Access - imports your customer's personal identifiable information for order processing
- Import new orders - imports new orders
- Import missing orders - check this feature to exclude all possible synchronization mistakes and import orders that went missing for any reason
- Export cancelled orders - updates orders cancelled in ShopCtrl to Amazon
- Export shipments - exports tracking codes to Amazon
- Export returns - exports returns created in ShopCtrl to Amazon
- Products Integration
- Export changed product stocks - enables inventory export to Amazon
- Export changed product prices - updates corresponding listing prices
- Validate Amazon product prices - once in a set period of time requests report from Amazon and validates if there are any price discrepancies
- Sync product publish state - closes or opens listings based on product publication status in ShopCtrl
- Orders Integration - a general setting that enables order import
- On the Amazon Price Validation pane you can configure the report request period and set up alerts for price discrepancies:
- Period in minutes: Specify the interval (in minutes) for requesting the price inventory report from Amazon. The recommended setting is 8 hours.
- Set unmatched after minutes: Define the time period (in minutes) after which a price is considered unmatched on Amazon Seller Central. The usual setting is 24 hours. In this scenario, ShopCtrl is considered the source of truth.
- Create unmatched price alerts: Decide whether to generate alerts after the specified period for unmatched prices. These alerts will include detailed information about the product and the price difference with Amazon Seller Central.
- Validate inactive product price: Choose whether to compare prices for inactive products on Amazon. If not selected, these products will be excluded from the report, reducing the number of products to compare.
- In the Additional Settings pane, select the main order status that will be set while importing for the orders fulfilled by Amazon. To guarantee that the orders won't be fulfilled twice.
- (Optional) In the Fulfillment Priority tab you can change the default fulfilment priority which is set for regular, premium and prime orders after import.
- (Optional) The order statuses mapping is performed automatically, but you could override it by setting up statuses mapping manually:
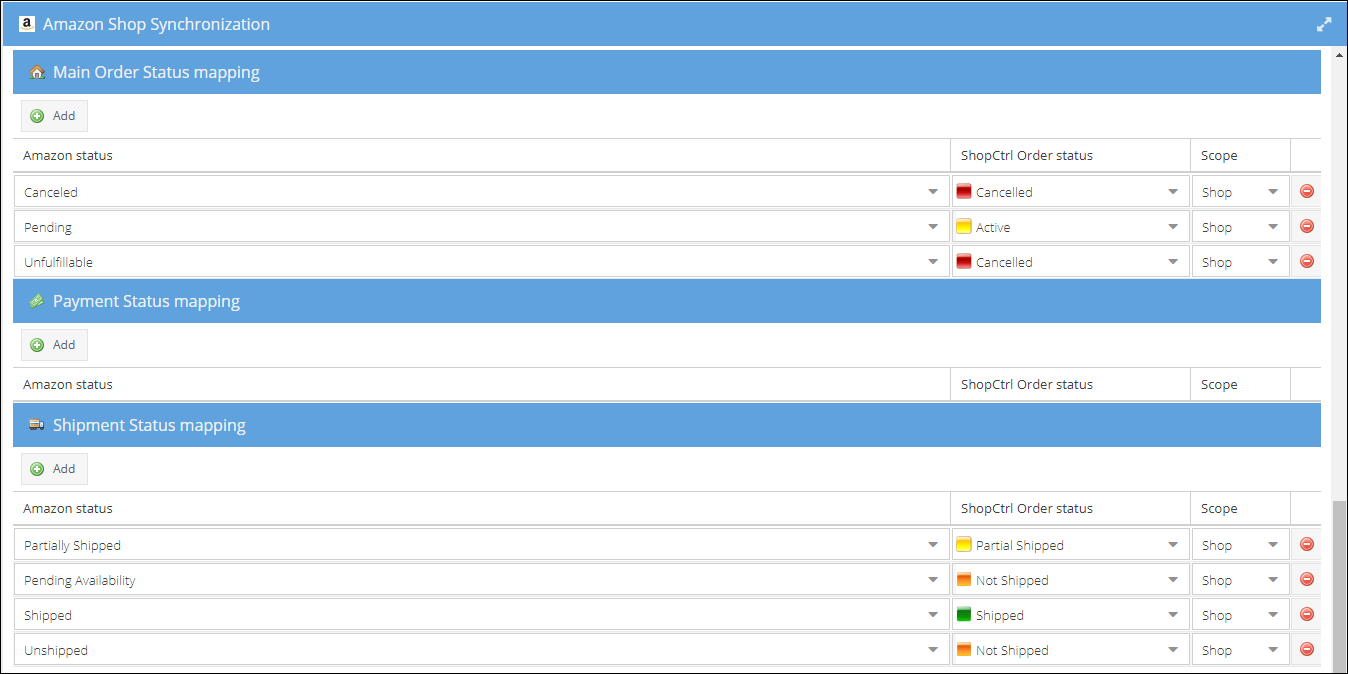

Here is the Amazon order statuses flow for your reference:

- Map each of the Shipment Categories configured in your Amazon seller account to the ShopCtrl Carrier Account and Amazon Carrier Name and Delivery Service. You could choose a name from the carriers and delivery services list or enter it manually.
Please note
Amazon verifies submitted tracking codes along with the carrier name and shipment method used to deliver the order.
In order to get the carrier processed correctly, ShopCtrl carrier accounts need to be mapped to corresponding carrier names and delivery services recognizable by Amazon.
The incorrect mapping might affect the Amazon VTR calculation. See more Valid Tracking Rate

- Once all of the steps are finished, you can Enable synchronization by marking the checkbox at the top of the settings page. Your orders will be synced in the background.
- Click Save or Save and Close to apply changes to the shop.